Headset Switcher ™
A m p l i f i e r
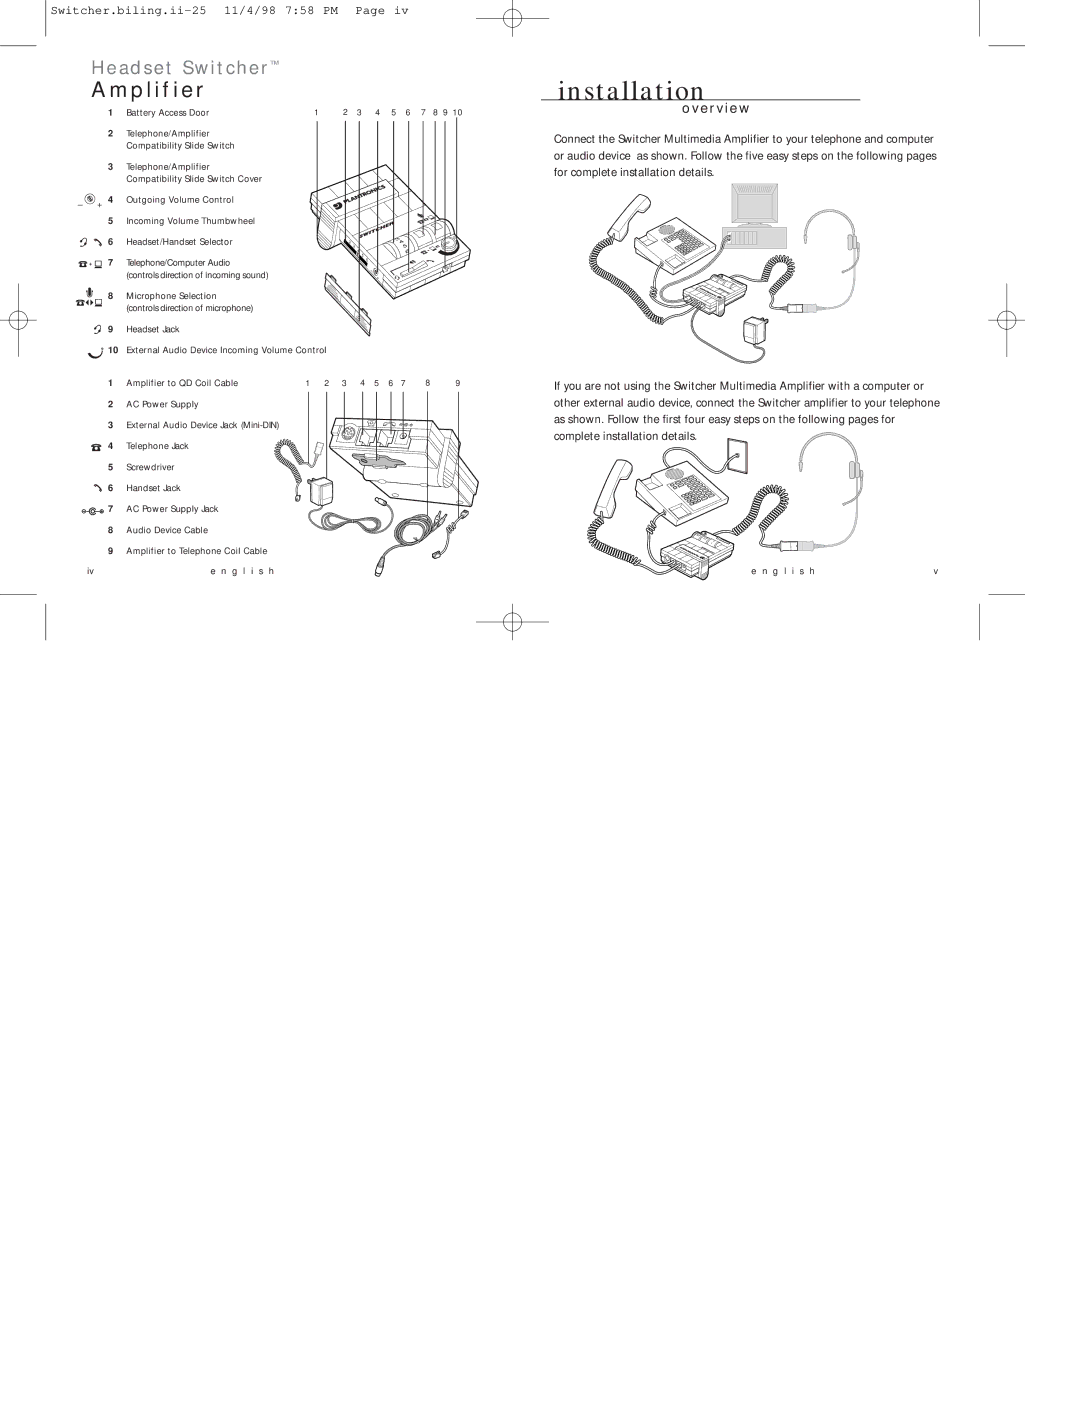
1 Battery Access Door | 1 |
| 2 | 3 |
| 4 |
| 5 | 6 | 7 8 9 10 |
2Telephone/Amplifier Compatibility Slide Switch
3Telephone/Amplifier Compatibility Slide Switch Cover
_ ![]() + 4 Outgoing Volume Control
+ 4 Outgoing Volume Control
5 Incoming Volume Thumbwheel
6 | Headset/Handset Selector |
| 1 | 3 |
|
|
| 2 |
|
| |||
| 3 | 45 |
|
| ||
|
|
| 4 | 6 |
|
|
7 | Telephone/Computer Audio |
| 5 |
|
|
|
| 6 |
|
| |||
| (controls direction of incoming sound) |
|
| – |
|
|
|
|
| + |
|
| |
8 | Microphone Selection |
|
|
|
|
|
| (controls direction of microphone) |
|
|
|
|
|
9 | Headset Jack |
|
|
|
|
|
10 External Audio Device Incoming Volume Control |
|
|
|
| ||
1 | Amplifier to QD Coil Cable | 1 2 | 3 4 | 5 6 7 | 8 | 9 |
2AC Power Supply
3External Audio Device Jack
4Telephone Jack![]()
![]()
![]()
5Screwdriver![]()
![]()
6Handset Jack![]()
7AC Power Supply Jack
8Audio Device Cable
9Amplifier to Telephone Coil Cable
iv | e n g l i s h |
installation
o v e r v i e w
Connect the Switcher Multimedia Amplifier to your telephone and computer or audio device as shown. Follow the five easy steps on the following pages for complete installation details.
1 ![]()
2
If you are not using the Switcher Multimedia Amplifier with a computer or other external audio device, connect the Switcher amplifier to your telephone as shown. Follow the first four easy steps on the following pages for complete installation details.![]()
1 ![]()
2
e n g l i s h | v |