CHAPTER 5 (CONTINUED
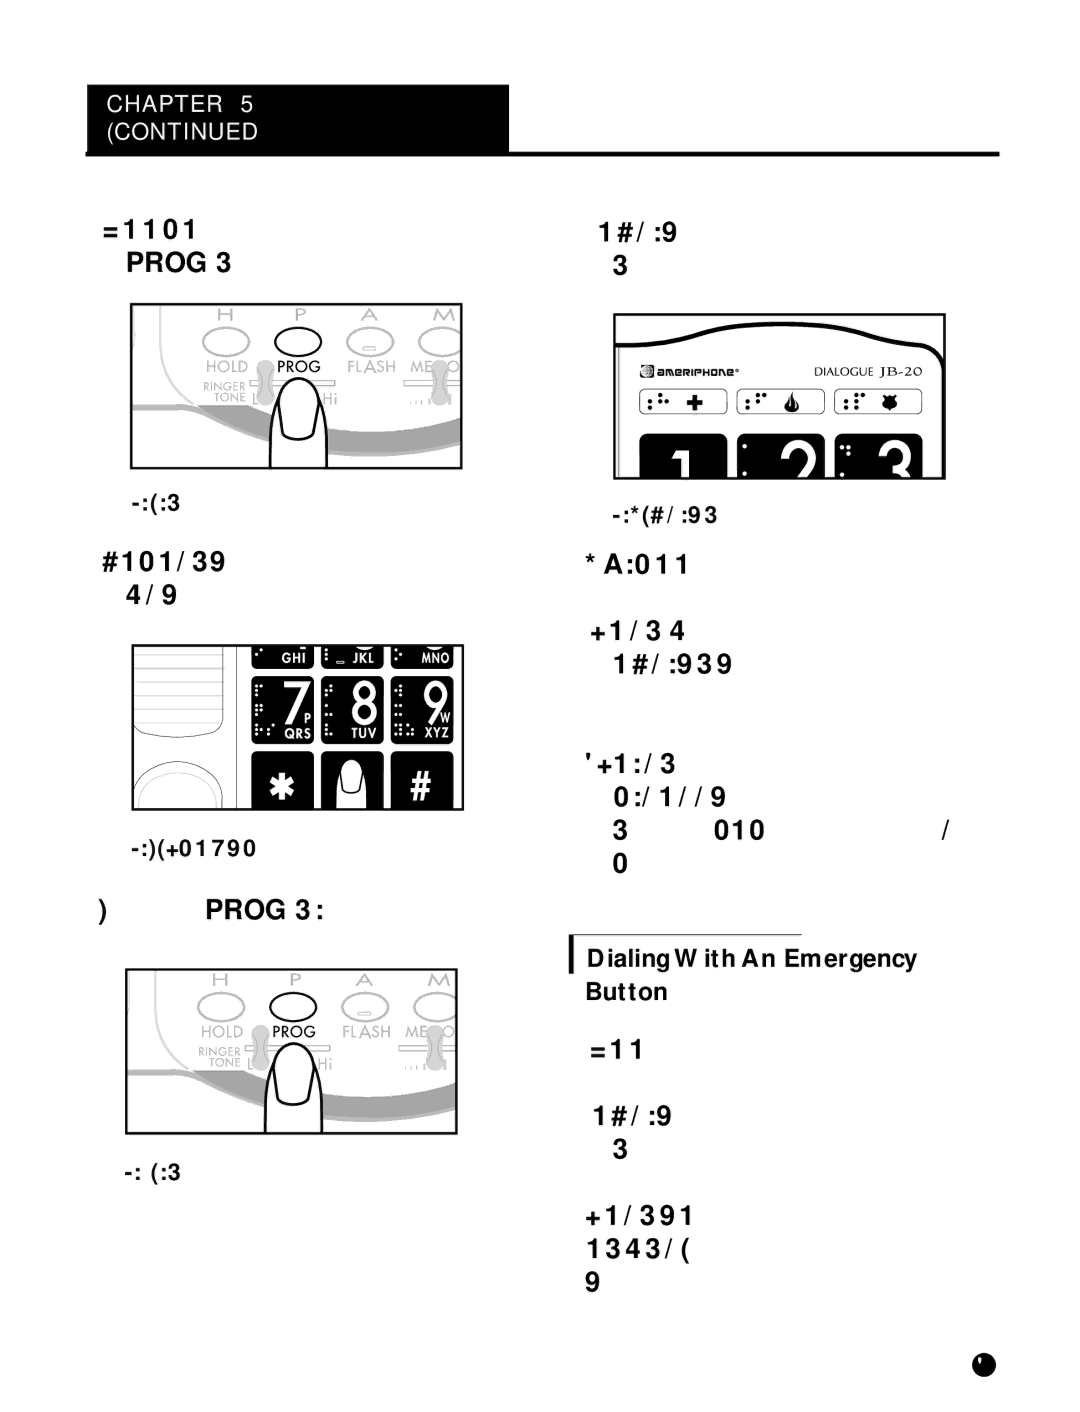
1. Lift the handset and press the |
|
|
|
|
|
| 4. Press one of the Emergency | |||||||
PROG |
| button. |
|
|
|
|
|
| buttons. | |||||
|
|
|
|
|
|
|
|
|
|
|
|
|
|
|
|
|
|
|
|
|
|
|
|
|
|
|
|
|
|
|
|
|
|
|
|
|
|
|
|
|
|
|
|
|
|
|
|
|
|
|
|
|
|
|
|
|
|
|
|
|
|
|
|
|
|
|
|
|
|
|
|
|
|
|
|
|
|
|
|
|
|
|
|
|
|
|
|
|
|
|
|
|
|
|
|
|
|
|
|
|
|
|
|
|
|
|
|
|
|
|
|
|
|
|
|
|
|
|
|
|
|
|
|
|
|
|
|
|
|
|
|
|
|
|
Fig. 12 - Prog button
2.Enter the phone number as you would normally dial it.
Fig. 13 - Telephone keypad
3. Press | PROG | button again. | ||||||||||
|
|
|
|
|
|
|
|
|
|
|
|
|
|
|
|
|
|
|
|
|
|
|
|
|
|
|
|
|
|
|
|
|
|
|
|
|
|
|
|
|
|
|
|
|
|
|
|
|
|
|
|
|
|
|
|
|
|
|
|
|
|
|
|
|
|
|
|
|
|
|
|
|
|
|
|
|
|
|
|
|
|
|
|
|
|
|
|
|
|
|
Fig. 14 - Prog button
Fig. 15 - Emergency button
5.Hang up the handset.
6.The number is now stored into the Emergency button you selected.
7.To change a stored number or
to program another memory
button, r epeat this process from step 1.
Dialing With An Emergency Button
1.Lift the handset.
2.Press one of the Emergency buttons.
The number you have stored
for that button will be automati- cally dialed.
7
