2 Set Up
2.1 Connecting USB Adapter to PC
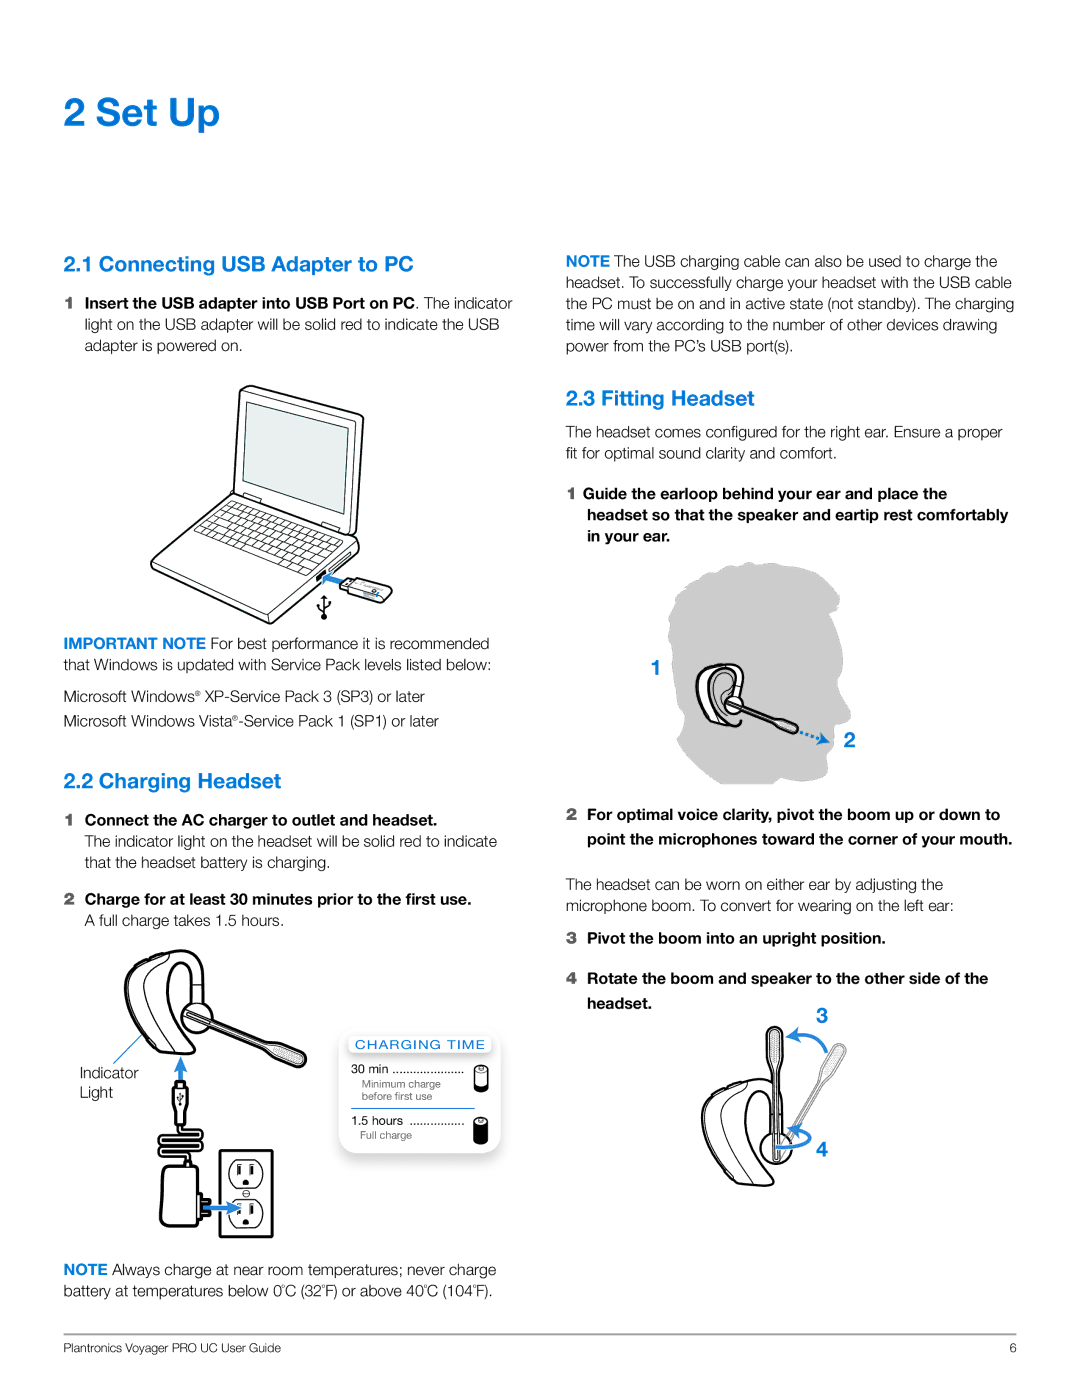
1Insert the USB adapter into USB Port on PC. The indicator light on the USB adapter will be solid red to indicate the USB adapter is powered on.
Important NOTE For best performance it is recommended that Windows is updated with Service Pack levels listed below:
Microsoft Windows®
2.2 Charging Headset
1Connect the AC charger to outlet and headset.
The indicator light on the headset will be solid red to indicate that the headset battery is charging.
2Charge for at least 30 minutes prior to the first use. A full charge takes 1.5 hours.
| Charging time |
Indicator | 30 min |
Light | Minimum charge |
before first use | |
| 1.5 hours |
| Full charge |
note Always charge at near room temperatures; never charge battery at temperatures below 0ºC (32ºF) or above 40ºC (104ºF).
Note The USB charging cable can also be used to charge the headset. To successfully charge your headset with the USB cable the PC must be on and in active state (not standby). The charging time will vary according to the number of other devices drawing power from the PC’s USB port(s).
2.3 Fitting Headset
The headset comes configured for the right ear. Ensure a proper fit for optimal sound clarity and comfort.
1Guide the earloop behind your ear and place the headset so that the speaker and eartip rest comfortably in your ear.
1
![]()
![]() 2
2
2For optimal voice clarity, pivot the boom up or down to point the microphones toward the corner of your mouth.
The headset can be worn on either ear by adjusting the microphone boom. To convert for wearing on the left ear:
3Pivot the boom into an upright position.
4Rotate the boom and speaker to the other side of the
headset.3
![]() 4
4
Plantronics Voyager PRO UC User Guide | 6 |
