Installing the Mid/Woofers in Non-Factory Locations
If you have decided to install your Polk/MOMO Series mid/woofers in locations other than those provided by the automobile manufacturer, make certain that the location you choose is clear of all obstructions, both in front of and behind the panel, before you proceed. Pay par- ticular attention to window mechanisms and any body panels critical to the structural integrity of the vehicle. The mounting depths and cutout diameters of your Polk/MOMO Series mid/woofers are listed with all the other important specifications at the end of
this manual.
1.Cut a hole in the panel (5 inch or 127 mm hole for the MM455 and
150.9 mm hole for the MM465).
2.Using the speaker grille as a template for marking the locations of the four screw
holes.
3.Drill the holes with a 1/8” bit.
4.Attach the screw clips to the car panel at the hole locations.
5.Cut the supplied driver wire (the heavier gauge of the two sets of wire) in half.
6.Remove the yellow crossover cover by squeezing the cover at the tabs. Attach
speaker wires to the crossover “woofer” terminals. Attach the wire with the white
stripe to the positive (+) terminal screw, and the
terminal screw.
7.Route the driver wire from the crossover location to the mid/woofer location.
8.Strip 1/8” – 1/4”
9.Unscrew the binding post thumbnuts on the mid/woofers to fully expose the hole
in the terminal shaft and slip the other end of the wire into the holes in the input
terminals. Tighten the thumb nuts
may strip the threads). Be sure to attach the wire with the white stripe to the posi-
tive (red) terminal, and the
10.Place the grille over the driver and line up the screw holes with the screw clips on
the car panel.
11.Secure the speaker/grille assembly to the car panel with the supplied Allen
head screws.
Polk/MOMO System Tweeters
One important advantage of component systems is their ability, when properly installed, to improve the soundstage created by the music in your car. The soundstage is the musical “pic- ture” made up of the instruments and vocalists. The difference in the soundstage will be dra- matic depending on where you mount your tweeters. We recommend a simple experiment that will help you decide the best spot for your tweeters in your car. Here are the steps:
1.Complete the installation of your entire system except for the MM400 tweeters.
2.Connect the wires provided with your tweeters to the tweeter terminals on your
Polk/MOMO crossovers. (See detailed instructions below)
3.Without running the wires through doors or under upholstered panels, connect
your Polk/MOMO tweeters to these wires. (See detailed instructions below)
4.Have a friend sit in the passenger’s seat while you sit in the driver’s seat, each
holding a tweeter in hand.
5.With music playing, position the tweeters in different locations around the pas-
senger compartment, listening for the differences caused from these placements.
We recommend using vocals for this test. You will be able to determine in a short
time the best location for your tweeters. The soundstage or image should “float”
above the dash and not be localized to the physical location of the drivers or
tweeters. Both passenger and driver should be able to hear both channels and a
stereo image.
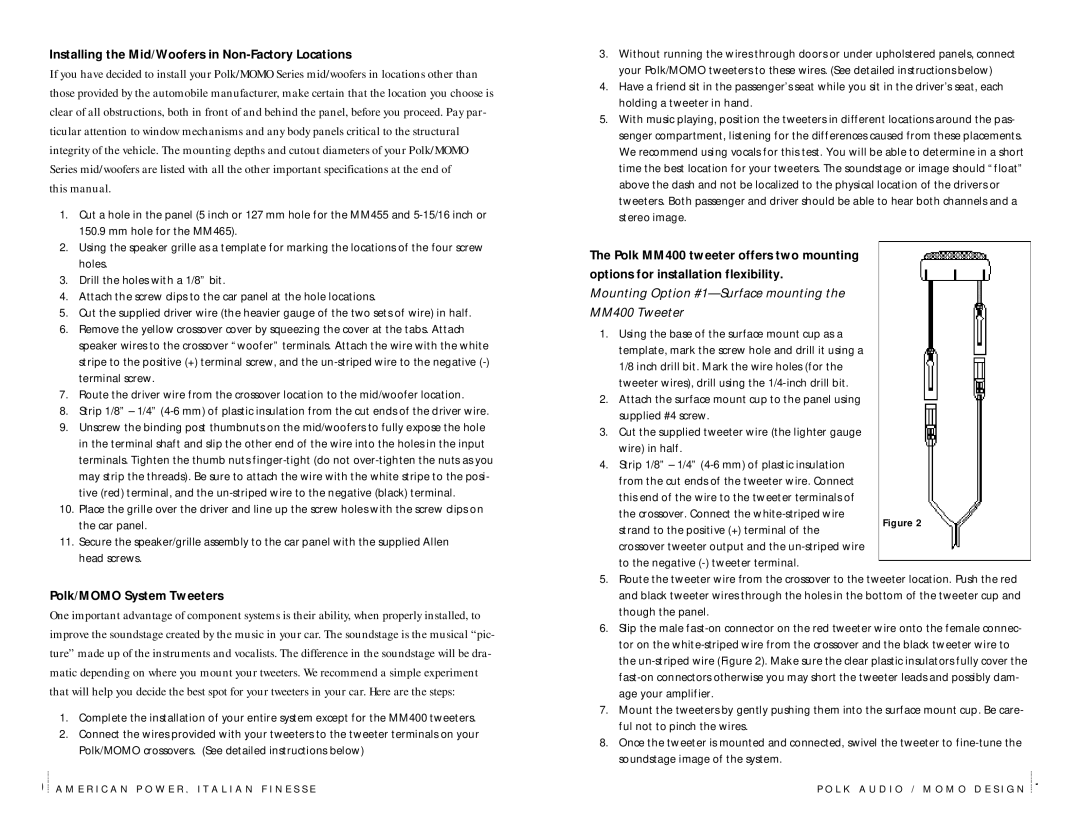
The Polk MM400 tweeter offers two mounting
options for installation flexibility.
Mounting Option #1—Surface mounting the
MM400 Tweeter
1.Using the base of the surface mount cup as a
template, mark the screw hole and drill it using a
1/8 inch drill bit. Mark the wire holes (for the
tweeter wires), drill using the
2.Attach the surface mount cup to the panel using
supplied #4 screw.
3.Cut the supplied tweeter wire (the lighter gauge
wire) in half.
4.Strip 1/8” – 1/4”
from the cut ends of the tweeter wire. Connect
this end of the wire to the tweeter terminals of
the crossover. Connect the
strand to the positive (+) terminal of the
crossover tweeter output and the
to the negative
5.Route the tweeter wire from the crossover to the tweeter location. Push the red
and black tweeter wires through the holes in the bottom of the tweeter cup and
though the panel.
6.Slip the male
tor on the
the
age your amplifier.
7.Mount the tweeters by gently pushing them into the surface mount cup. Be care-
ful not to pinch the wires.
8.Once the tweeter is mounted and connected, swivel the tweeter to
soundstage image of the system.
0 A M E R I C A N P O W E R , I T A L I A N F I N E S S E | P O L K A U D I O / M O M O D E S I G N 1 |