Manuals
/
Polycom
/
TV and Video
/
Universal Remote
Polycom
The Remote Control Turning The Polycom Ex System On & Off, Preset Button, Dot Button
Models:
The Remote Control
1
6
13
13
Download
13 pages
51.33 Kb
3
4
5
6
7
8
9
10
Page 6
Image 6
Page 5
Page 7
Page 6
Image 6
Page 5
Page 7
Contents
PolyCom EX User Manual
USER MANUAL
FOR THE PolyCom EX System
Aug. 18, 2004 v
CHAPTER 2 - TROUBLESHOOTING
Table of Contents
The Remote ControlThe Remote Control Buttons Explained
Using The Remote Control
USING THE REMOTE CONTROL
CHAPTER 1 - GENERAL SYSTEM INFORMATION
The Remote Control
Page 4 of
The Remote Control Buttons Explained
18 Dot Button
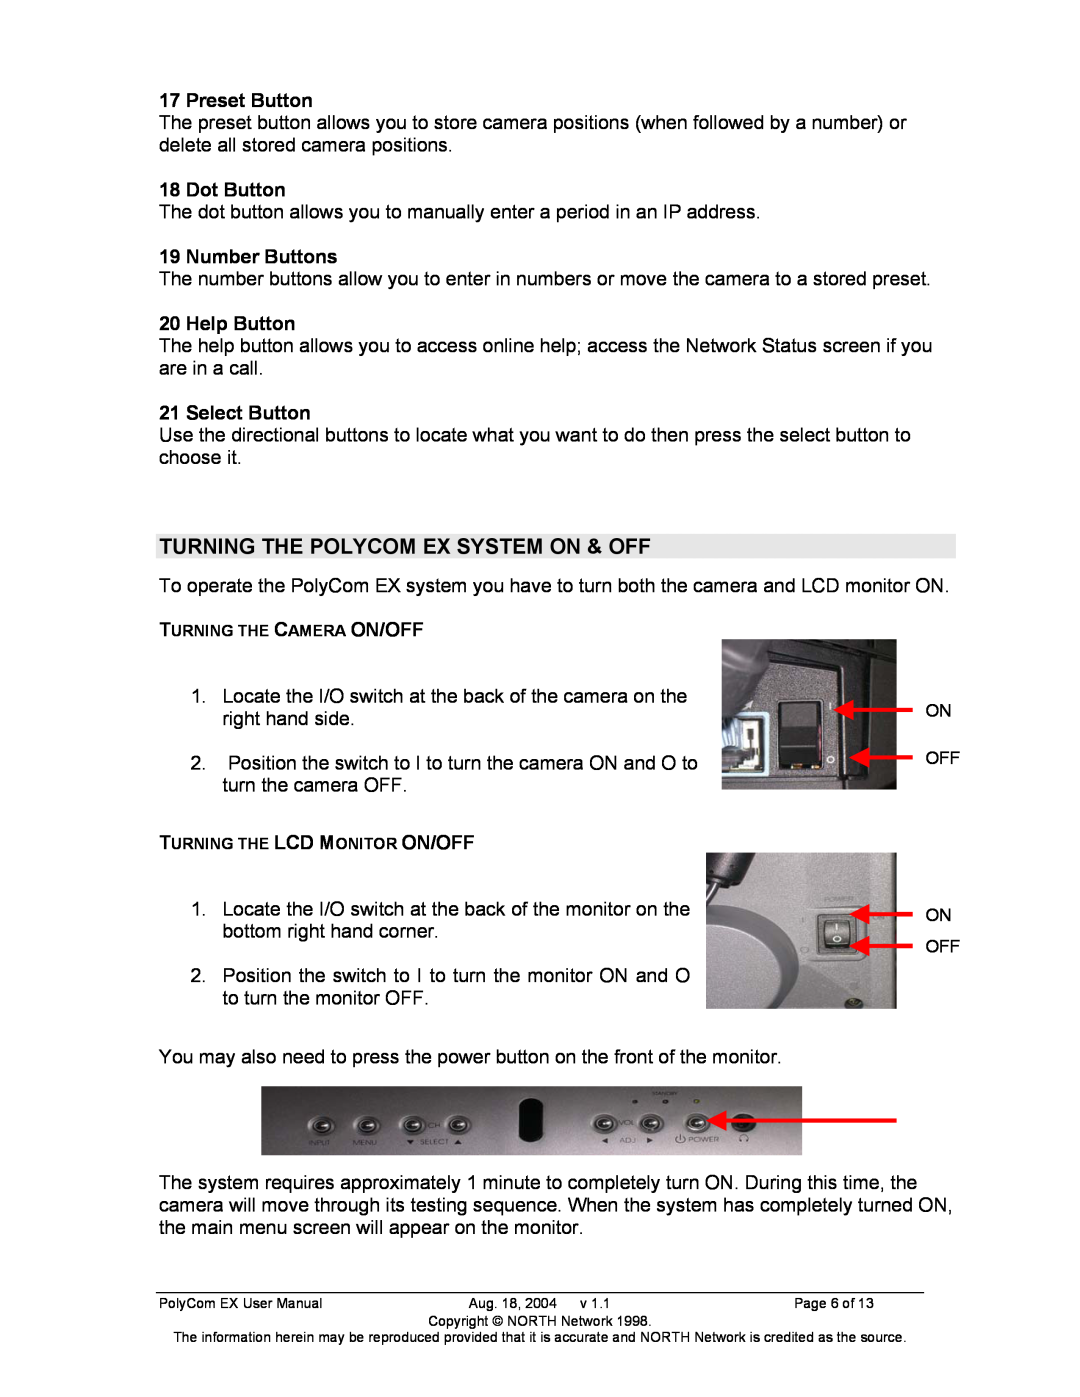
TURNING THE POLYCOM EX SYSTEM ON & OFF
17 Preset Button
19 Number Buttons
PLACING A VIDEO CALL
Placing a Call from the Address Book
VOLUME CONTROL
Speed Dialing a Frequently Called Site
Ending a Video Call
Far End Camera
CAMERA CONTROLS
Near End Camera
Pan and Tilt
Page 10 of
Snapshots
Camera Presets - Deleting
What You Will See If You Have
PICTURE-IN-PICTURE PIP
Turning the PIP ON/OFF During a Video Call
Swapping the PIP and Main Screen Views
CHAPTER 2 - TROUBLESHOOTING
PROBLEM
POTENTIAL SOLUTION
Top
Page
Image
Contents