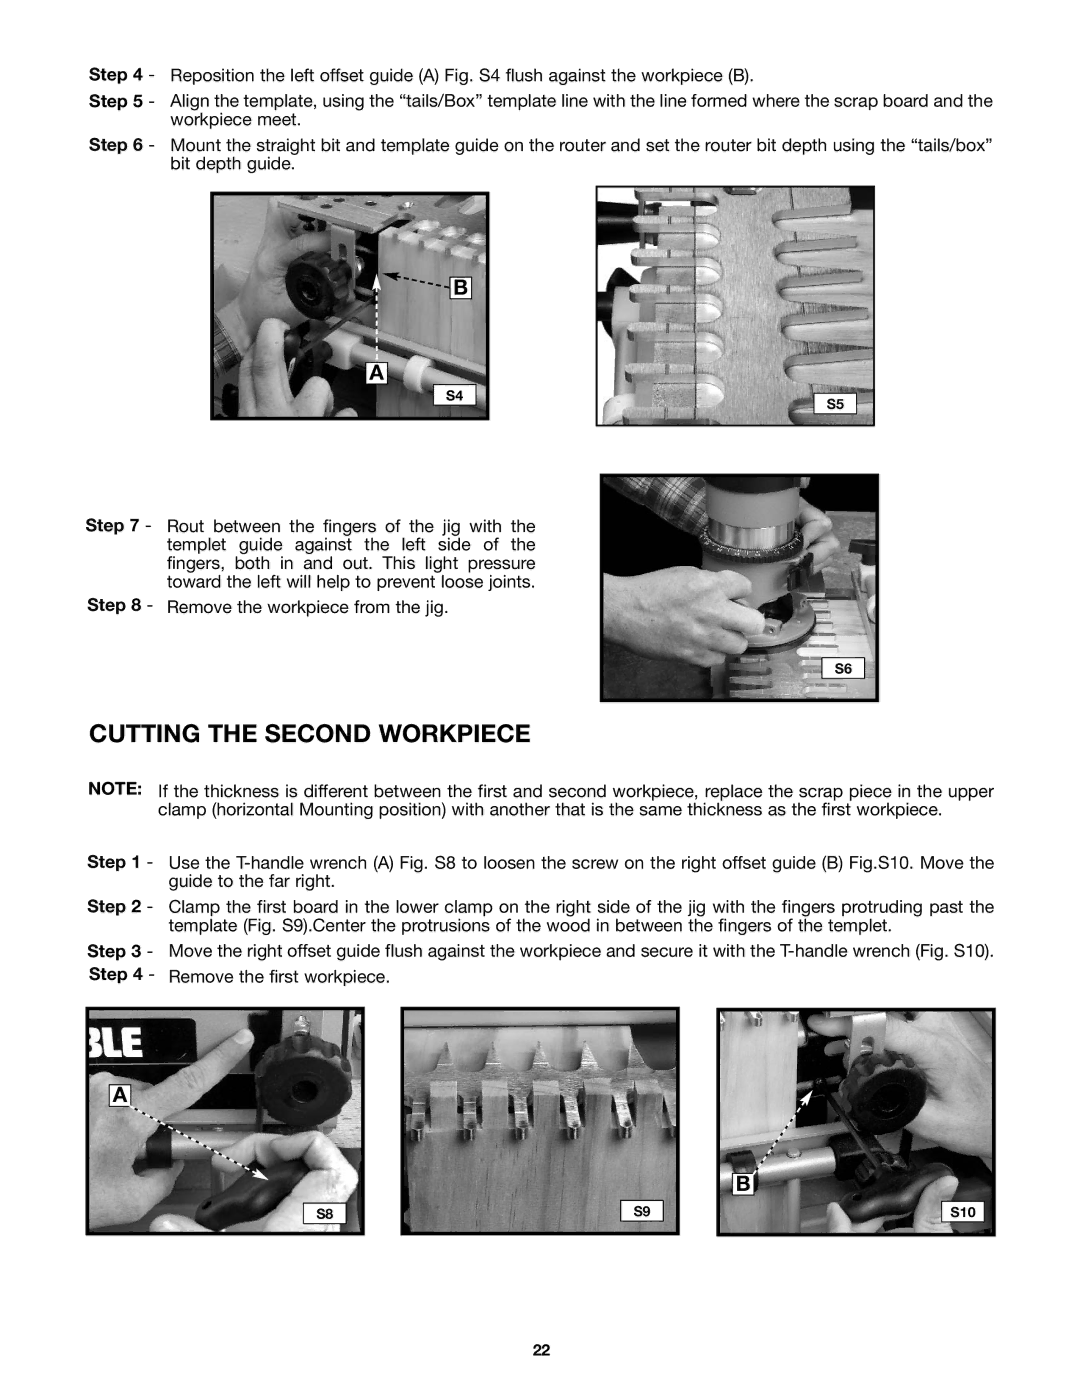
Step 4 - Reposition the left offset guide (A) Fig. S4 flush against the workpiece (B).
Step 5 - Align the template, using the “tails/Box” template line with the line formed where the scrap board and the workpiece meet.
Step 6 - Mount the straight bit and template guide on the router and set the router bit depth using the “tails/box” bit depth guide.
![]() B
B
A
S4
S5
Step 7 - Rout between the fingers of the jig with the templet guide against the left side of the fingers, both in and out. This light pressure toward the left will help to prevent loose joints.
Step 8 - Remove the workpiece from the jig.
S6
CUTTING THE SECOND WORKPIECE
NOTE: If the thickness is different between the first and second workpiece, replace the scrap piece in the upper clamp (horizontal Mounting position) with another that is the same thickness as the first workpiece.
Step 1 - Use the
Step 2 - Clamp the first board in the lower clamp on the right side of the jig with the fingers protruding past the template (Fig. S9).Center the protrusions of the wood in between the fingers of the templet.
Step 3 - Move the right offset guide flush against the workpiece and secure it with the
A
S8
S9
B
S10
22
