ASSEMBLY
Read this manual. Do not attempt to operate
equipment until you have read this Manual for Safety, Operation, and Maintenance Instructions.
NOTE: Left and right describes the location of a part with the operator facing the outlet panel.
UNPACKING
1.Locate the parts carton and set aside for later use.
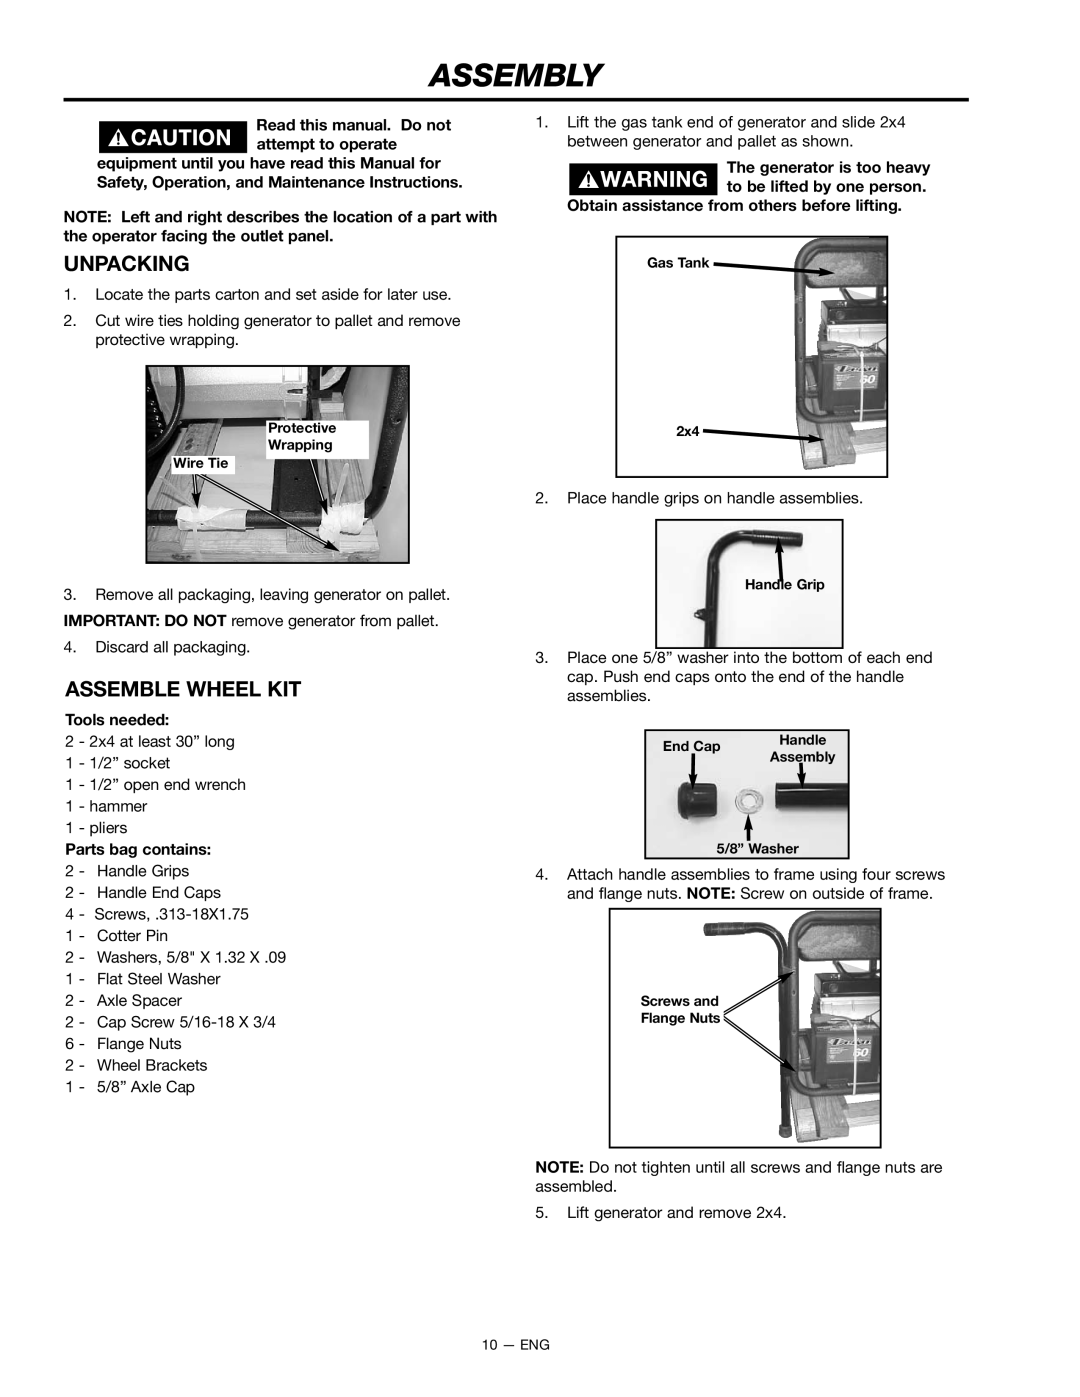
2.Cut wire ties holding generator to pallet and remove protective wrapping.
Protective
Wrapping
Wire Tie
3.Remove all packaging, leaving generator on pallet.
IMPORTANT: DO NOT remove generator from pallet.
4.Discard all packaging.
ASSEMBLE WHEEL KIT
Tools needed:
2 - 2x4 at least 30” long
1 - 1/2” socket
1 - 1/2” open end wrench
1 - hammer
1 - pliers
Parts bag contains:
2 - Handle Grips
2 - Handle End Caps
4 -
1 - Cotter Pin
2 - Washers, 5/8" X 1.32 X .09
1 - Flat Steel Washer
2 - Axle Spacer
2 - Cap Screw
6 - Flange Nuts
2 - Wheel Brackets
1 - 5/8” Axle Cap
1.Lift the gas tank end of generator and slide 2x4 between generator and pallet as shown.
The generator is too heavy to be lifted by one person.
Obtain assistance from others before lifting.
Gas Tank![]()
2x4![]()
2.Place handle grips on handle assemblies.
Handle Grip
3.Place one 5/8” washer into the bottom of each end cap. Push end caps onto the end of the handle assemblies.
End Cap | Handle | |
Assembly | ||
|
5/8” Washer
4.Attach handle assemblies to frame using four screws and flange nuts. NOTE: Screw on outside of frame.
Screws and
Flange Nuts
NOTE: Do not tighten until all screws and flange nuts are assembled.
5.Lift generator and remove 2x4.
10 — ENG