INSTALLAT ION GUIDES
IMPORTANT
Please do not connect the power cord or turn on the main unit until you have fully read the installation guides and followed the instructions!!!
TECHNICAL ENHANCEMENTS
Applicable technical enhancements in PST7700 series include RTC battery replacement, COM port power supply settings, VGA port power supply settings, DRAM upgrades,
INSTALLING UPS BATTERY (OPTION)
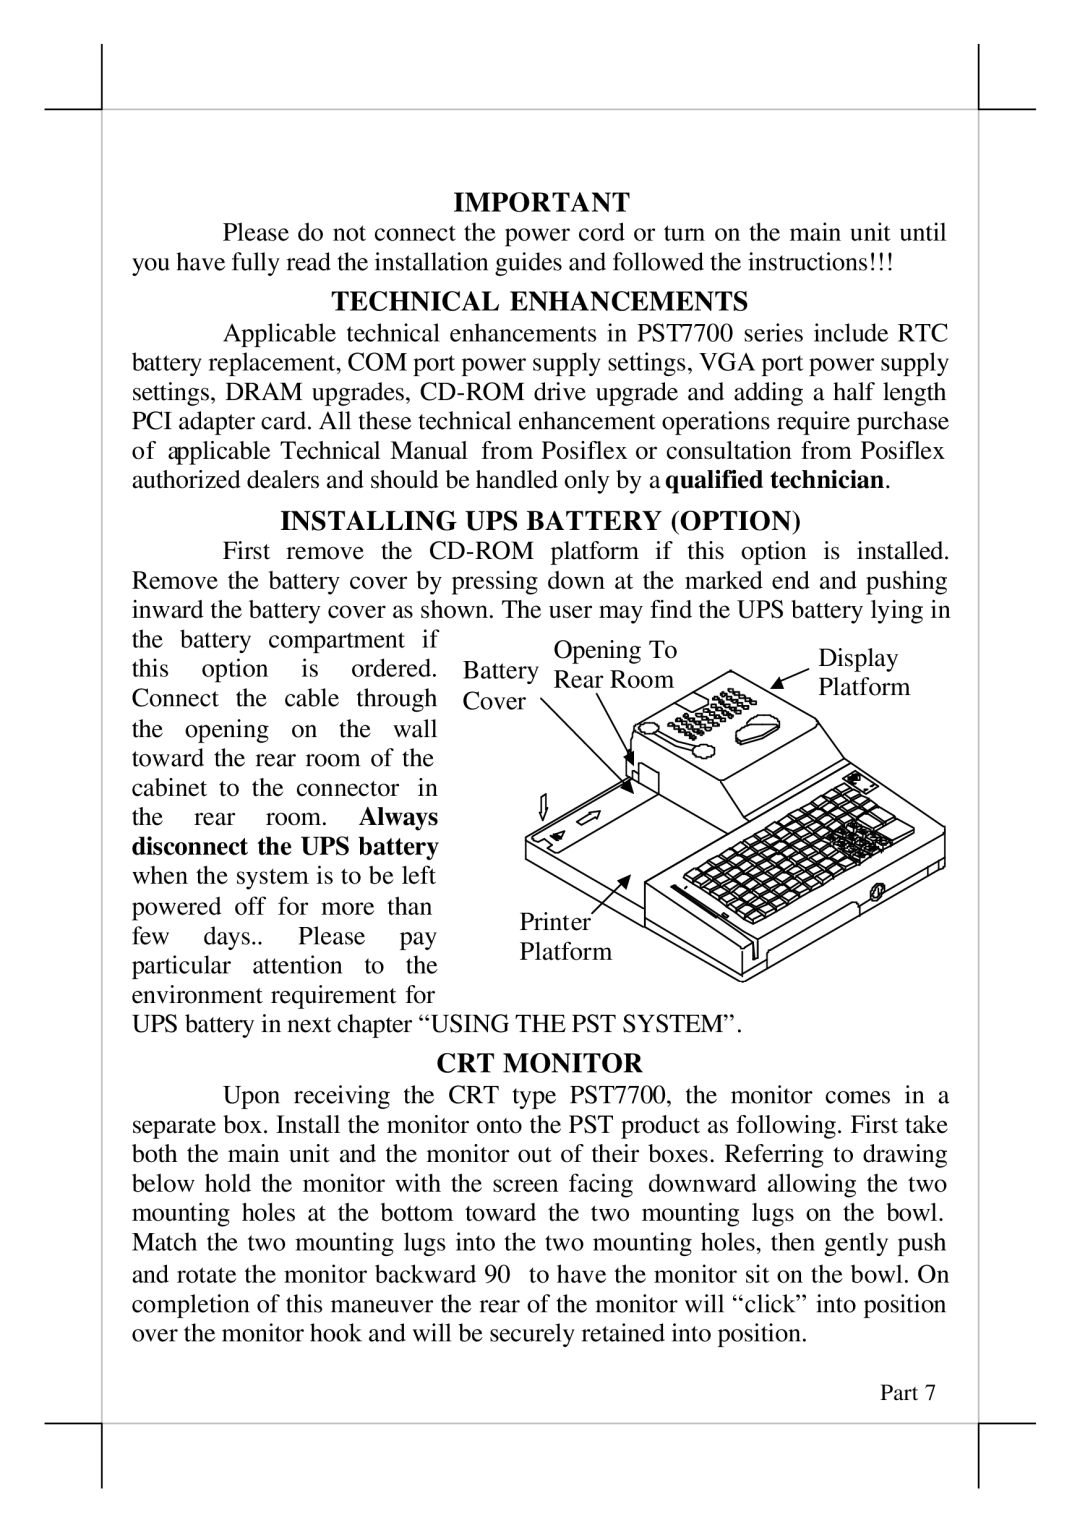
First remove the
the | battery | compartment if | Opening To | Display | ||||
this | option | is | ordered. | |||||
Battery Rear Room | Platform | |||||||
Connect the | cable | through | Cover |
| ||||
the opening on the wall | Press This |
| ||||||
toward the rear room of the |
| |||||||
cabinet to | the | connector | in | End Down |
| |||
the | rear | room. | Always | Push This |
| |||
disconnect the UPS battery | Way To Open |
| ||||||
when the system is to be left |
|
| ||||||
powered off for more than | Printer |
| ||||||
few | days.. | Please | pay |
| ||||
Platform |
| |||||||
particular | attention | to | the |
| ||||
|
| |||||||
environment requirement for
UPS battery in next chapter “USING THE PST SYSTEM”.
CRT MONITOR
Upon receiving the CRT type PST7700, the monitor comes in a separate box. Install the monitor onto the PST product as following. First take both the main unit and the monitor out of their boxes. Referring to drawing below hold the monitor with the screen facing downward allowing the two mounting holes at the bottom toward the two mounting lugs on the bowl. Match the two mounting lugs into the two mounting holes, then gently push and rotate the monitor backward 90° to have the monitor sit on the bowl. On completion of this maneuver the rear of the monitor will “click” into position over the monitor hook and will be securely retained into position.
Part 7
