PORTABILITY KIT INSTALLATION
TOOLS REQUIRED: 1/2”, 9/16", and 5/8” sockets and ratchets, block(s) of wood (minimum of 6” tall).
Refer to the parts list on page 9.
WHEEL INSTALLATION
1.Block up end of generator opposite the fuel tank cap to install wheel kit.
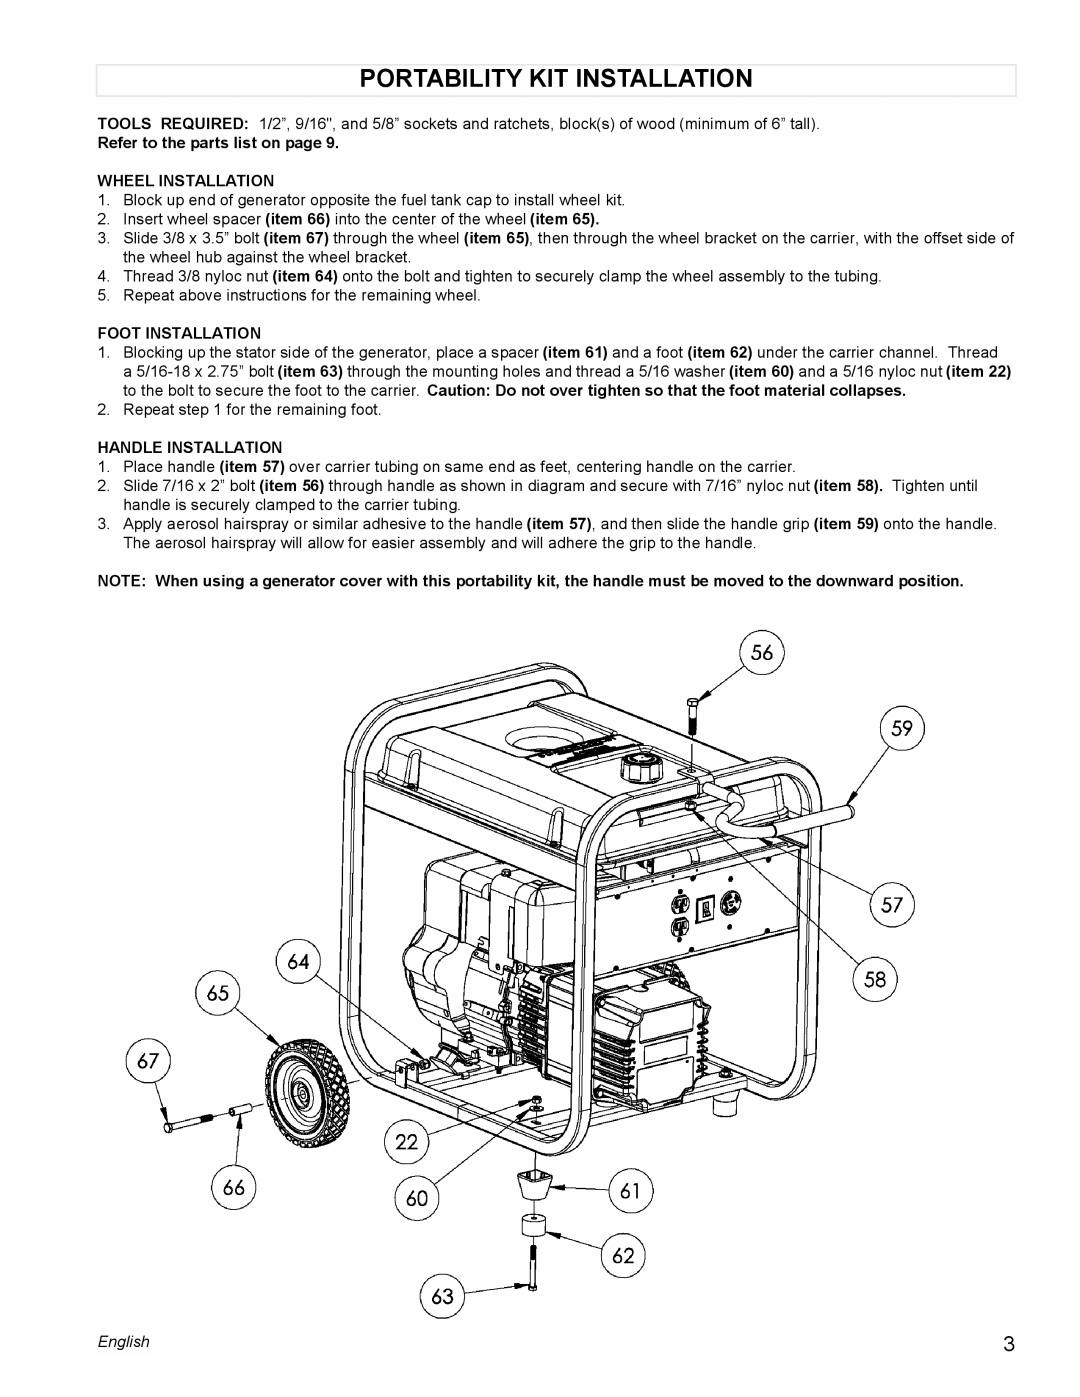
2.Insert wheel spacer (item 66) into the center of the wheel (item 65).
3.Slide 3/8 x 3.5” bolt (item 67) through the wheel (item 65), then through the wheel bracket on the carrier, with the offset side of the wheel hub against the wheel bracket.
4.Thread 3/8 nyloc nut (item 64) onto the bolt and tighten to securely clamp the wheel assembly to the tubing.
5.Repeat above instructions for the remaining wheel.
FOOT INSTALLATION
1.Blocking up the stator side of the generator, place a spacer (item 61) and a foot (item 62) under the carrier channel. Thread a
2.Repeat step 1 for the remaining foot.
HANDLE INSTALLATION
1.Place handle (item 57) over carrier tubing on same end as feet, centering handle on the carrier.
2.Slide 7/16 x 2” bolt (item 56) through handle as shown in diagram and secure with 7/16” nyloc nut (item 58). Tighten until handle is securely clamped to the carrier tubing.
3.Apply aerosol hairspray or similar adhesive to the handle (item 57), and then slide the handle grip (item 59) onto the handle. The aerosol hairspray will allow for easier assembly and will adhere the grip to the handle.
NOTE: When using a generator cover with this portability kit, the handle must be moved to the downward position.
English |
| 3 |
| ||
|
|
|
