IMPORTANT: Be sure that the height of front and rear rollers are the same. And the table rollers must always be set parallel to the table.
Cutterhead
Although your planer was carefully adjusted at the factory, it should be checked before being put into operation. Any inaccuracies due to rough handling in transit can be corrected by following the directions in this manual.
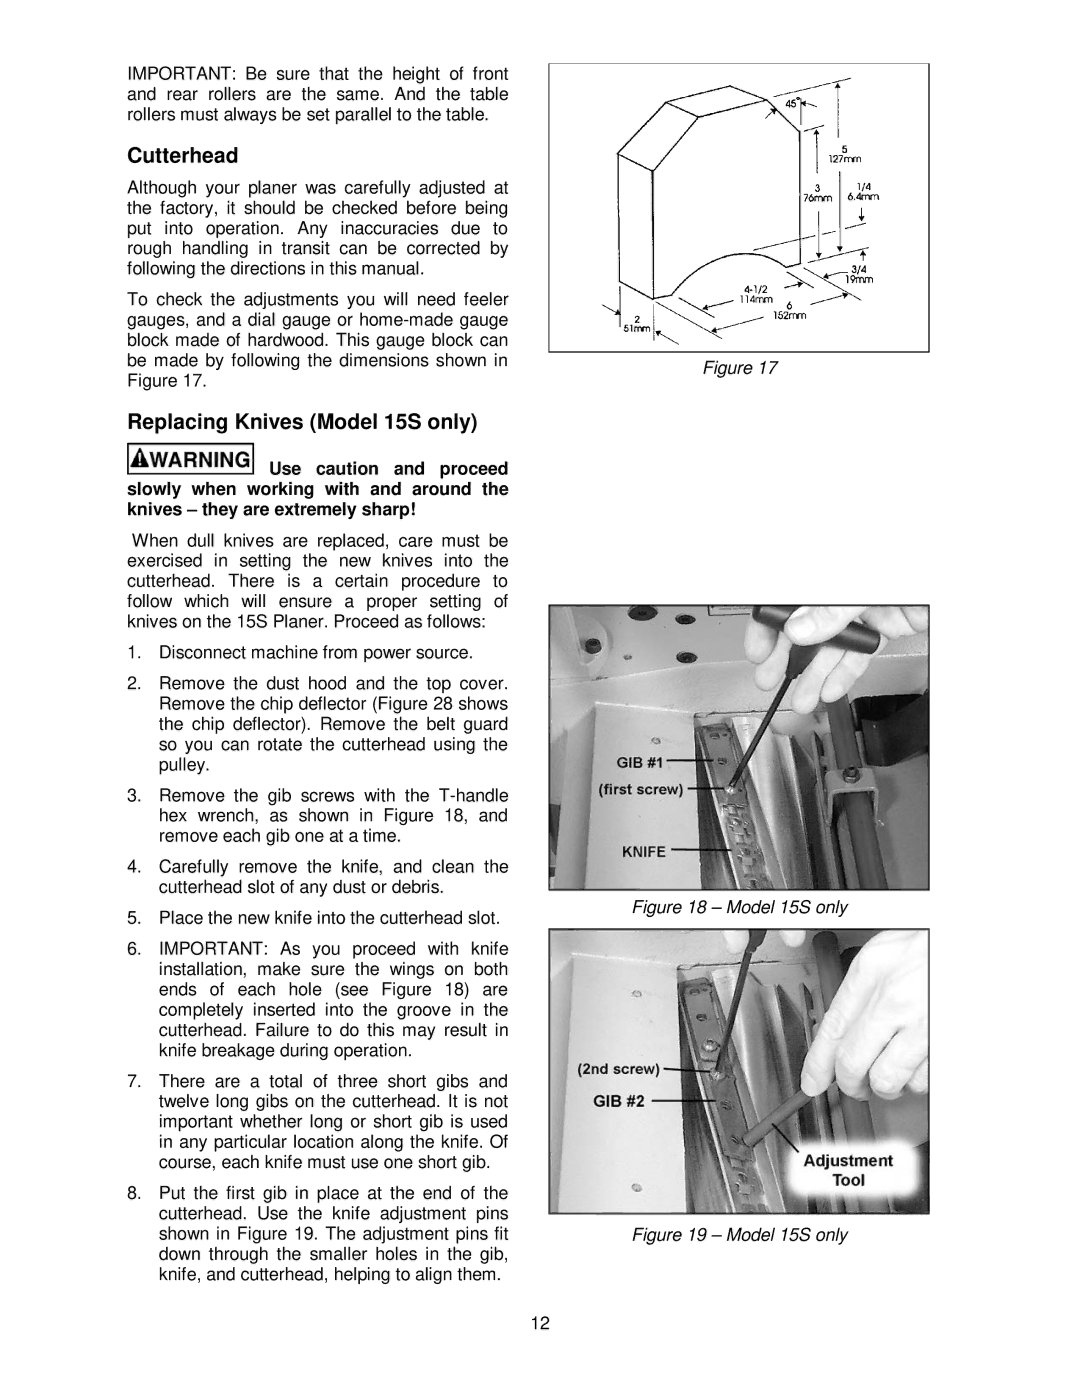
To check the adjustments you will need feeler gauges, and a dial gauge or
Replacing Knives (Model 15S only)
![]() Use caution and proceed slowly when working with and around the knives – they are extremely sharp!
Use caution and proceed slowly when working with and around the knives – they are extremely sharp!
When dull knives are replaced, care must be exercised in setting the new knives into the cutterhead. There is a certain procedure to follow which will ensure a proper setting of knives on the 15S Planer. Proceed as follows:
1.Disconnect machine from power source.
2.Remove the dust hood and the top cover. Remove the chip deflector (Figure 28 shows the chip deflector). Remove the belt guard so you can rotate the cutterhead using the pulley.
3.Remove the gib screws with the
4.Carefully remove the knife, and clean the cutterhead slot of any dust or debris.
5.Place the new knife into the cutterhead slot.
6.IMPORTANT: As you proceed with knife installation, make sure the wings on both ends of each hole (see Figure 18) are completely inserted into the groove in the cutterhead. Failure to do this may result in knife breakage during operation.
7.There are a total of three short gibs and twelve long gibs on the cutterhead. It is not important whether long or short gib is used in any particular location along the knife. Of course, each knife must use one short gib.
8.Put the first gib in place at the end of the cutterhead. Use the knife adjustment pins shown in Figure 19. The adjustment pins fit down through the smaller holes in the gib, knife, and cutterhead, helping to align them.
Figure 17
Figure 18 – Model 15S only
Figure 19 – Model 15S only
12