Adjustments
90° Chisel to Worktable Calibration
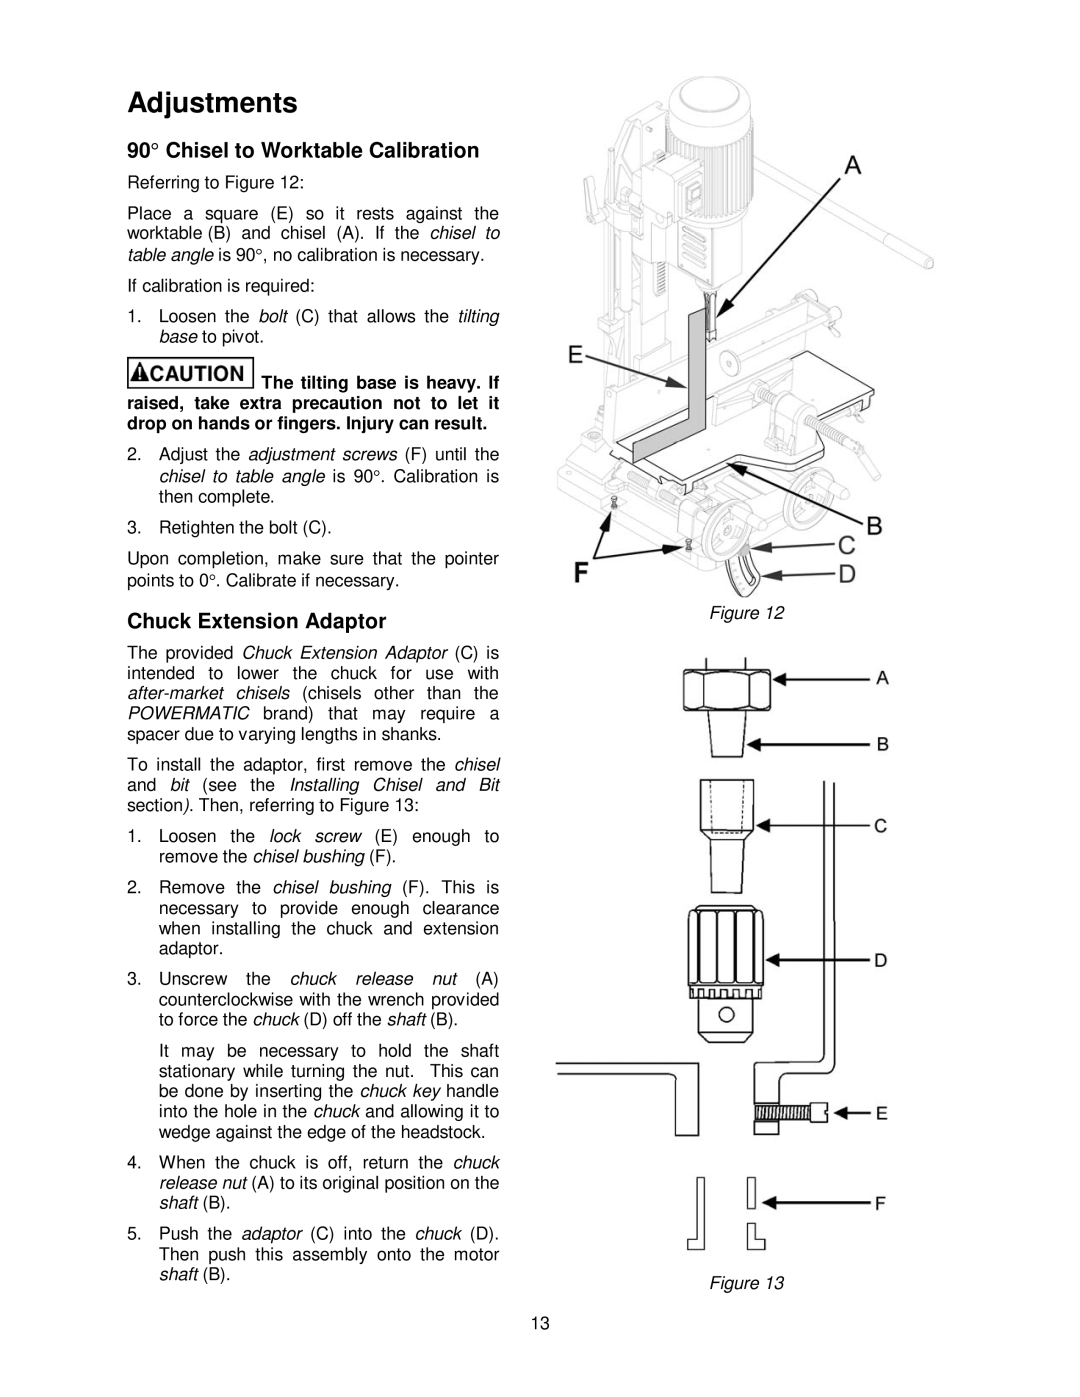
Referring to Figure 12:
Place a square (E) so it rests against the worktable (B) and chisel (A). If the chisel to
table angle is 90°, no calibration is necessary. If calibration is required:
1.Loosen the bolt (C) that allows the tilting base to pivot.
![]() The tilting base is heavy. If raised, take extra precaution not to let it drop on hands or fingers. Injury can result.
The tilting base is heavy. If raised, take extra precaution not to let it drop on hands or fingers. Injury can result.
2.Adjust the adjustment screws (F) until the chisel to table angle is 90°. Calibration is then complete.
3.Retighten the bolt (C).
Upon completion, make sure that the pointer points to 0°. Calibrate if necessary.
Chuck Extension Adaptor
The provided Chuck Extension Adaptor (C) is intended to lower the chuck for use with
To install the adaptor, first remove the chisel and bit (see the Installing Chisel and Bit section). Then, referring to Figure 13:
1.Loosen the lock screw (E) enough to remove the chisel bushing (F).
2.Remove the chisel bushing (F). This is necessary to provide enough clearance when installing the chuck and extension adaptor.
3.Unscrew the chuck release nut (A) counterclockwise with the wrench provided to force the chuck (D) off the shaft (B).
It may be necessary to hold the shaft stationary while turning the nut. This can be done by inserting the chuck key handle into the hole in the chuck and allowing it to wedge against the edge of the headstock.
4.When the chuck is off, return the chuck release nut (A) to its original position on the shaft (B).
5.Push the adaptor (C) into the chuck (D). Then push this assembly onto the motor shaft (B).
Figure 12
Figure 13
13