Buffer Pads
The polyethylene buffer pads (shown in Figure
20)have slots through which they are secured to the fences by screws. These buffer pads at times may need to be
To adjust a buffer pad, loosen the two hex cap screws (Figure 20) with a 13mm wrench. Slide the buffer pad as necessary. Retighten both hex cap screws when finished.
Cutter Height
This adjustment will change the height of the tails on the tenon (male) cut, and how deep the mortise (female) cut goes into the thickness of the workpiece.
1. | Disconnect machine from power source. |
|
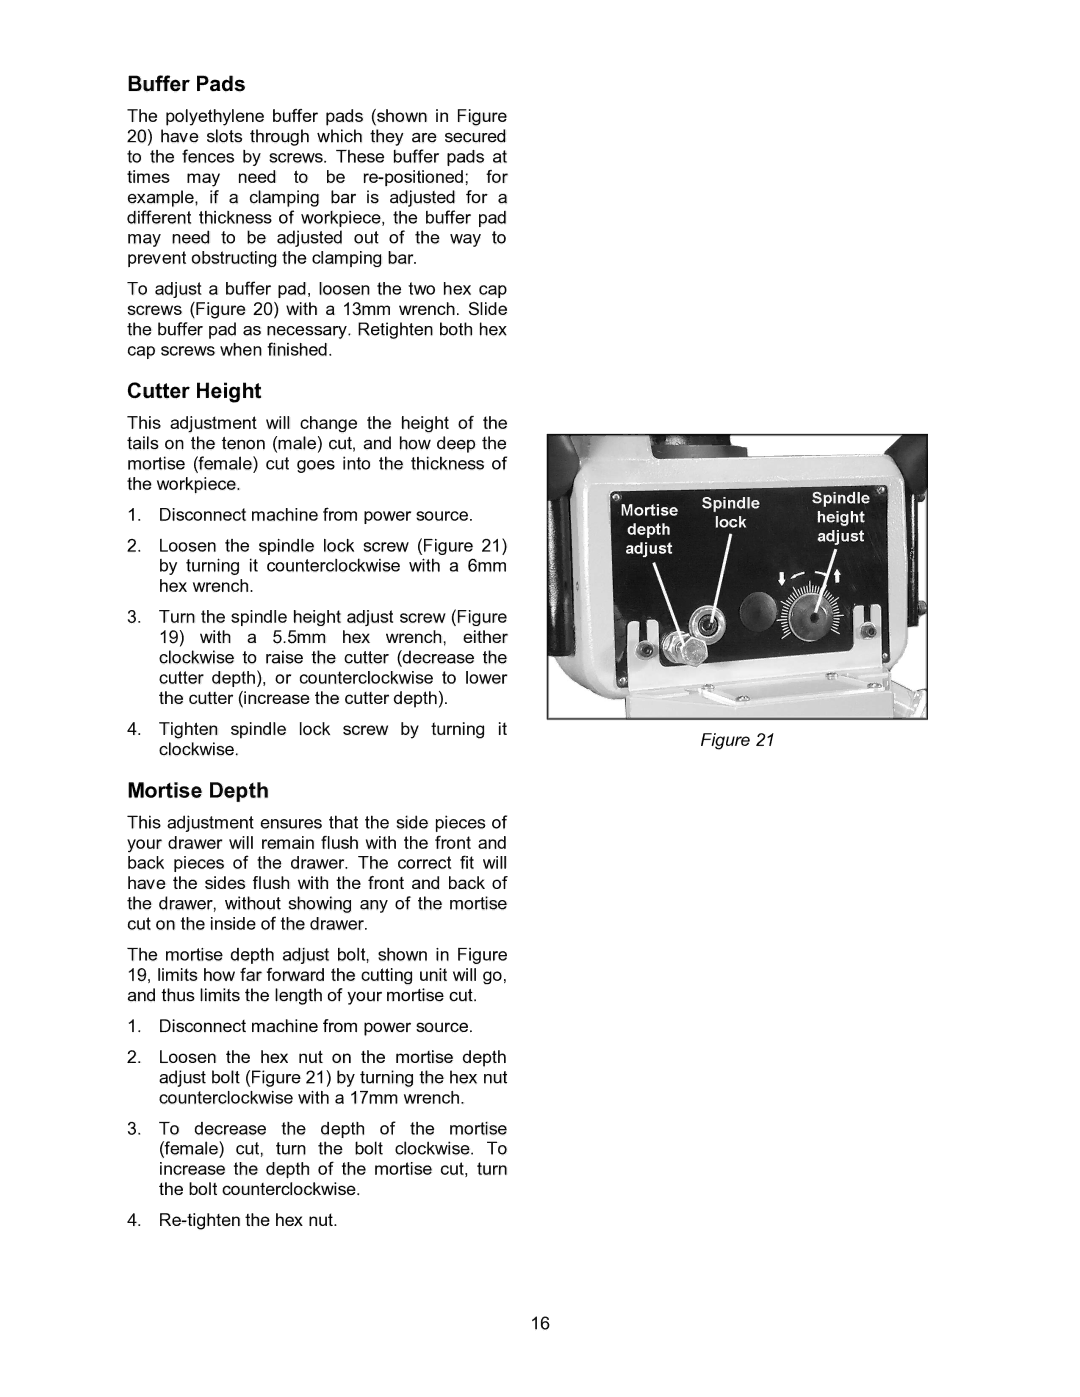
2. | Loosen the spindle lock screw (Figure 21) |
|
| by turning it counterclockwise with a 6mm |
|
| hex wrench. |
|
3. | Turn the spindle height adjust screw (Figure |
|
| 19) with a 5.5mm hex wrench, either |
|
| clockwise to raise the cutter (decrease the |
|
| cutter depth), or counterclockwise to lower |
|
| the cutter (increase the cutter depth). |
|
4. | Tighten spindle lock screw by turning it | Figure 21 |
| clockwise. | |
|
|
Mortise Depth
This adjustment ensures that the side pieces of your drawer will remain flush with the front and back pieces of the drawer. The correct fit will have the sides flush with the front and back of the drawer, without showing any of the mortise cut on the inside of the drawer.
The mortise depth adjust bolt, shown in Figure 19, limits how far forward the cutting unit will go, and thus limits the length of your mortise cut.
1.Disconnect machine from power source.
2.Loosen the hex nut on the mortise depth adjust bolt (Figure 21) by turning the hex nut counterclockwise with a 17mm wrench.
3.To decrease the depth of the mortise (female) cut, turn the bolt clockwise. To increase the depth of the mortise cut, turn the bolt counterclockwise.
4.
16