IMPORTANT: Make sure the workpiece has been cut square before making dovetails. An
1.Set the appropriate template size, fence positions, clamping bar thickness, and cutter depth for your particular job. Refer to “Adjustments” section starting on page 13.
2.Move the headstock all the way to the right and out of the way.
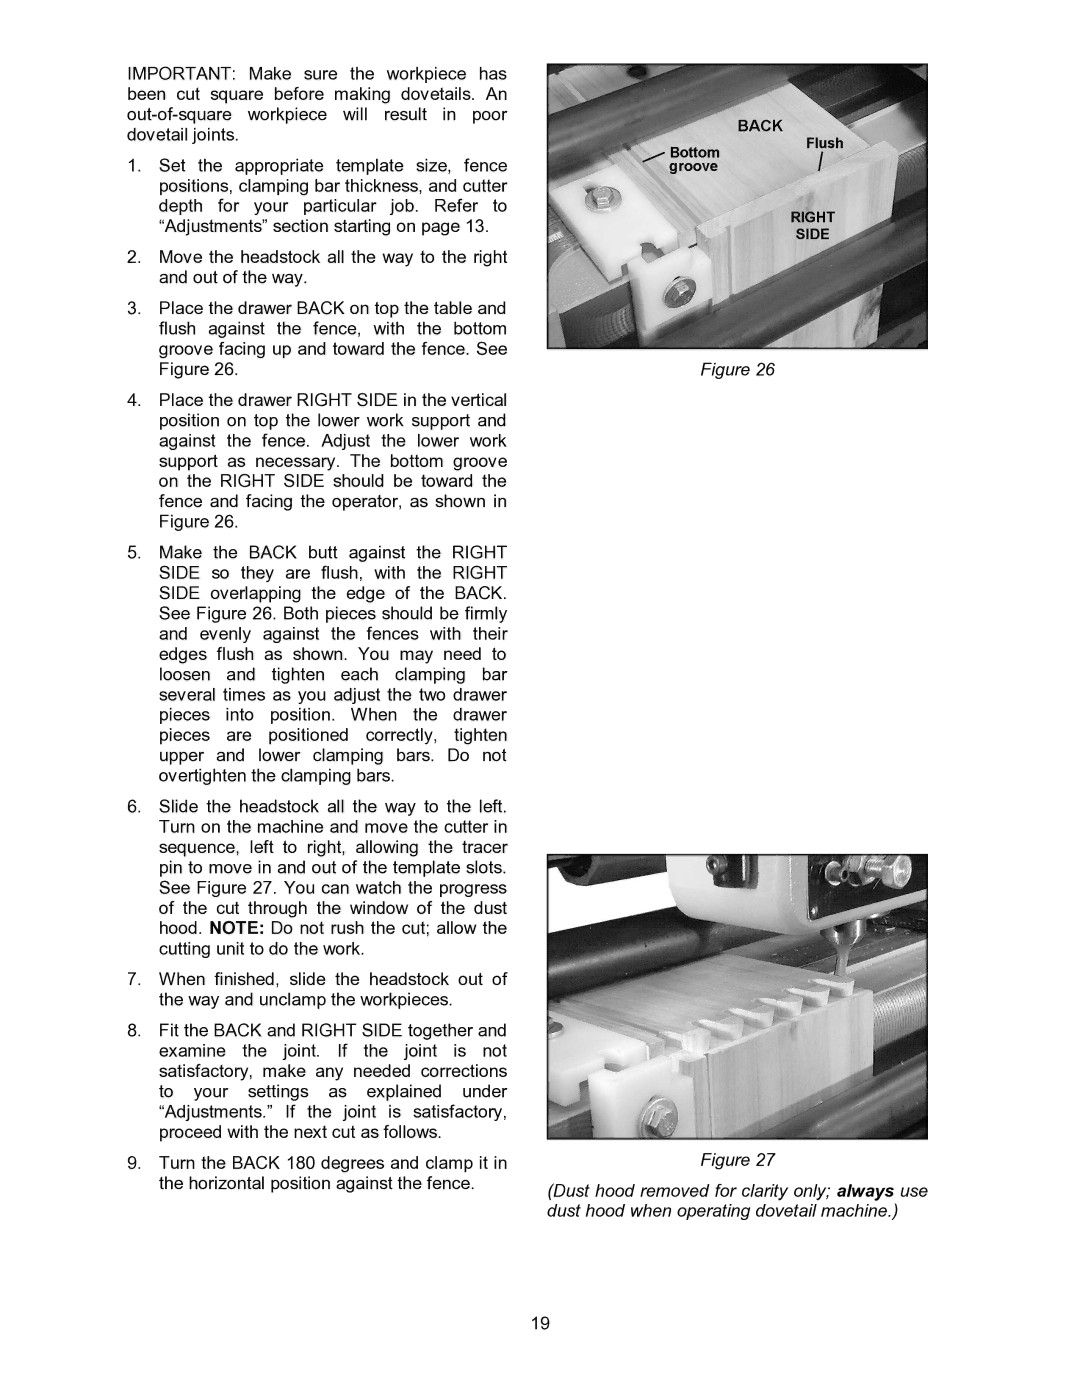
3.Place the drawer BACK on top the table and flush against the fence, with the bottom groove facing up and toward the fence. See Figure 26.
4.Place the drawer RIGHT SIDE in the vertical position on top the lower work support and against the fence. Adjust the lower work support as necessary. The bottom groove on the RIGHT SIDE should be toward the fence and facing the operator, as shown in Figure 26.
5.Make the BACK butt against the RIGHT SIDE so they are flush, with the RIGHT SIDE overlapping the edge of the BACK. See Figure 26. Both pieces should be firmly and evenly against the fences with their edges flush as shown. You may need to loosen and tighten each clamping bar several times as you adjust the two drawer pieces into position. When the drawer pieces are positioned correctly, tighten upper and lower clamping bars. Do not overtighten the clamping bars.
6.Slide the headstock all the way to the left. Turn on the machine and move the cutter in sequence, left to right, allowing the tracer pin to move in and out of the template slots. See Figure 27. You can watch the progress of the cut through the window of the dust hood. NOTE: Do not rush the cut; allow the cutting unit to do the work.
7.When finished, slide the headstock out of the way and unclamp the workpieces.
8.Fit the BACK and RIGHT SIDE together and examine the joint. If the joint is not satisfactory, make any needed corrections to your settings as explained under “Adjustments.” If the joint is satisfactory, proceed with the next cut as follows.
9.Turn the BACK 180 degrees and clamp it in the horizontal position against the fence.
Figure 26
Figure 27
(Dust hood removed for clarity only; always use dust hood when operating dovetail machine.)
19