ENDPLATE DIAGRAM
Pro6800
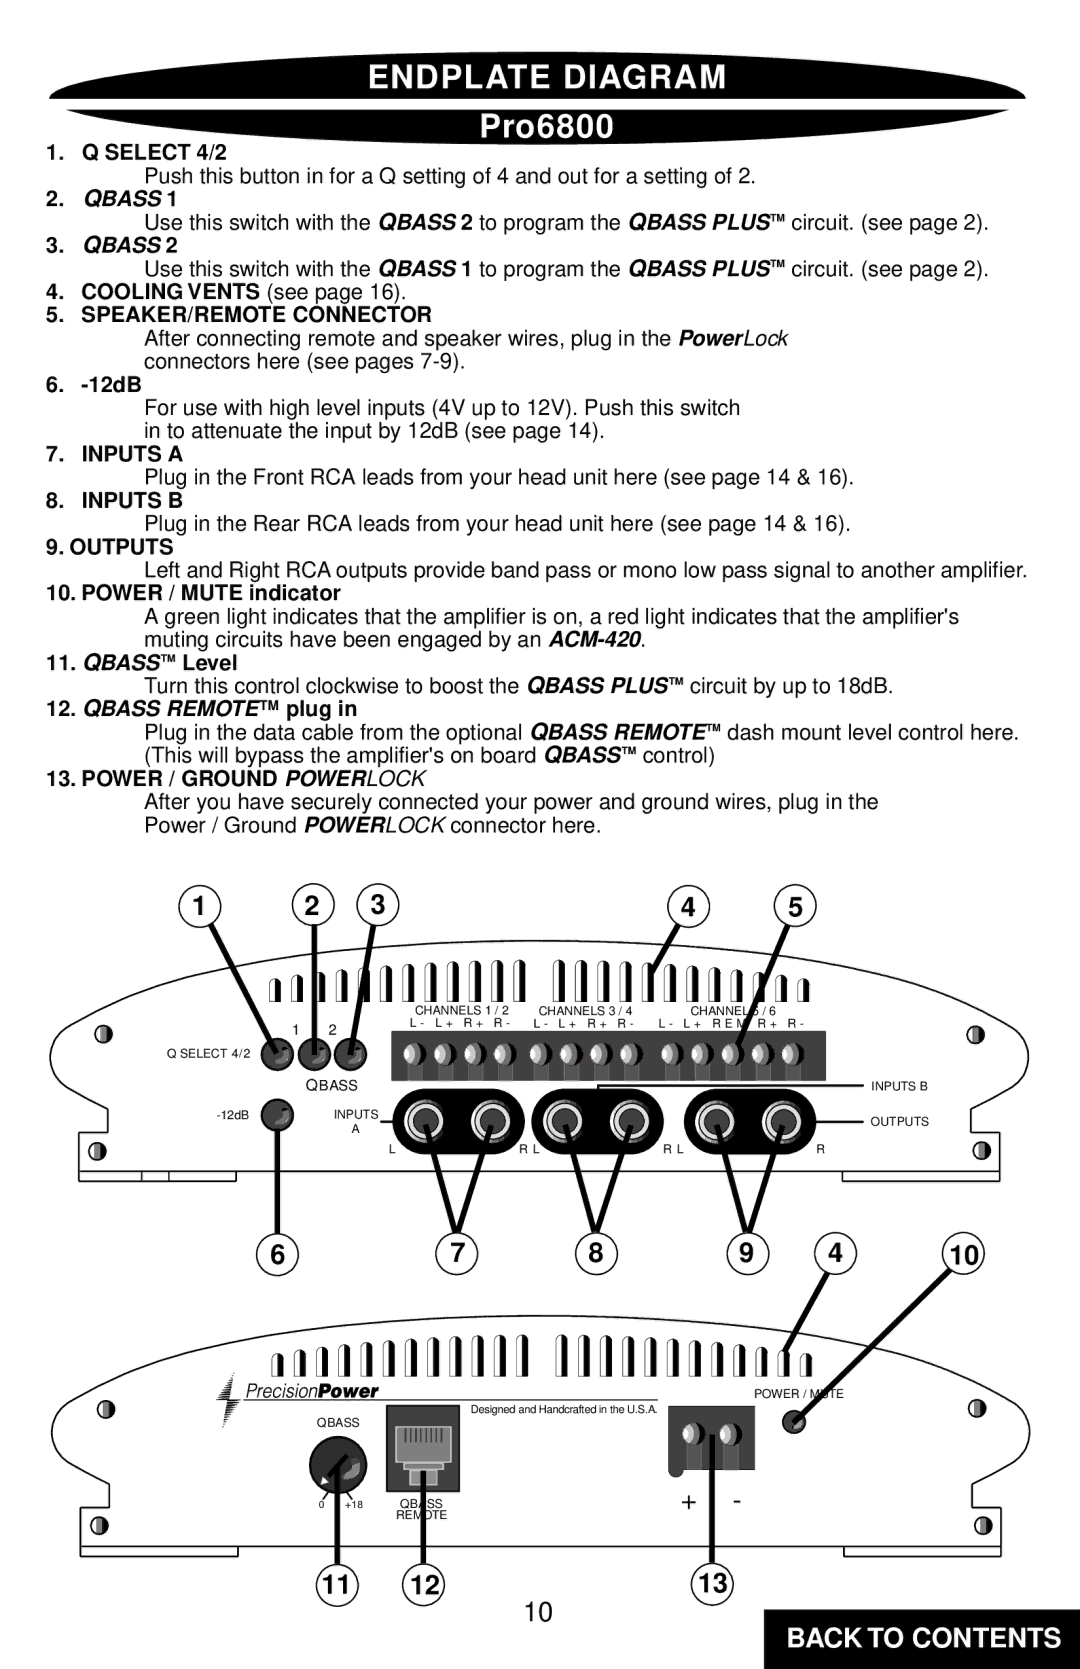
1. Q SELECT 4/2
Push this button in for a Q setting of 4 and out for a setting of 2.
2.QBASS 1
Use this switch with the QBASS 2 to program the QBASS PLUS™
3.QBASS 2
Use this switch with the QBASS 1 to program the QBASS PLUS™
4.COOLING VENTS (see page 16).
5.SPEAKER/REMOTE CONNECTOR
After connecting remote and speaker wires, plug in the PowerLock connectors here (see pages
6. -12dB
circuit. (see page 2).
circuit. (see page 2).
For use with high level inputs (4V up to 12V). Push this switch in to attenuate the input by 12dB (see page 14).
7. INPUTS A
Plug in the Front RCA leads from your head unit here (see page 14 & 16).
8. INPUTS B
Plug in the Rear RCA leads from your head unit here (see page 14 & 16).
9. OUTPUTS
Left and Right RCA outputs provide band pass or mono low pass signal to another amplifier.
10. POWER / MUTE indicator
A green light indicates that the amplifier is on, a red light indicates that the amplifier's muting circuits have been engaged by an
11. QBASS™ Level
Turn this control clockwise to boost the QBASS PLUS™ circuit by up to 18dB.
12.QBASS REMOTE™ plug in
Plug in the data cable from the optional QBASS REMOTE™ dash mount level control here. (This will bypass the amplifier's on board QBASS™ control)
13. POWER / GROUND POWERLOCK
After you have securely connected your power and ground wires, plug in the
Power / Ground POWERLOCK connector here.
1 | 2 |
| 3 |
| 4 | 5 |
|
|
| CHANNELS 1 / 2 | CHANNELS 3 / 4 | CHANNEL 5 / 6 |
|
1 |
| 2 | L - L + R + R - | L - L + R + R - | L - L + R E M R + R - | |
|
|
|
|
| ||
Q SELECT 4/2 |
|
|
|
|
|
|
| QBASS |
INPUTS | |
| A |
L
R LR L
INPUTS B
OUTPUTS
R
6 | 7 | 8 | 9 | 4 | 10 |
QBASS
0 | +18 |
|
|
POWER / MUTE
Designed and Handcrafted in the U.S.A.
| + | - |
QBASS | ||
REMOTE |
|
|
11 | 12 | 13 |
10
BACK TO CONTENTS
