AM250
Concrete Mounting
Concrete anchors must be used for concrete installation. They can be purchased at your local hardware store. The mounting surface must be a minimum 6” thick.
Step 1. Begin by placing the mount into position against the wall, keeping it level. Step 2. Mark off four holes to be used for securing the mount.
Step 3. Next, drill holes using a masonry bit for your anchors (recommended 5/16” masonry bit).
Step 4. Insert a commercially available concrete anchor into each hole (recommended 3/8” wedge anchors).
Step 5. If necessary, a hammer can be used to lightly tap each anchor into place so that they are flush with the wall. Step 6. Once all of the anchors are in place, move the wall bracket into position.
Step 7. Attach the nut onto the threaded shaft that is protruding from the wall. Step 8. Do not tighten until all nuts are in place.
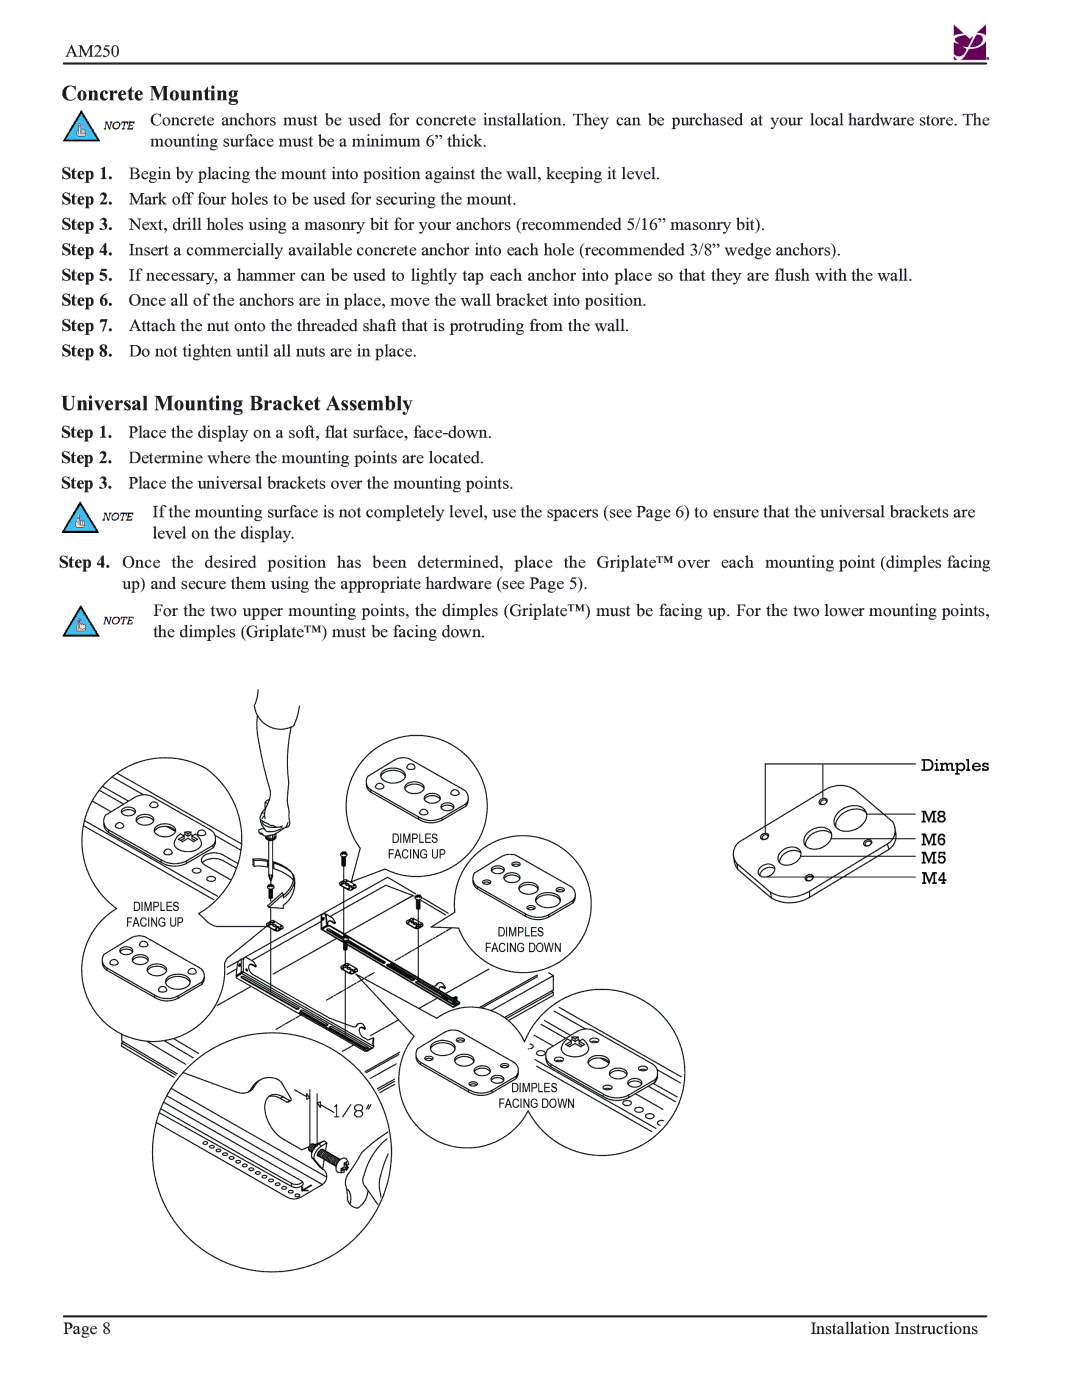
Universal Mounting Bracket Assembly
Step 1. Place the display on a soft, flat surface,
If the mounting surface is not completely level, use the spacers (see Page 6) to ensure that the universal brackets are level on the display.
Step 4. Once the desired position has been determined, place the Griplate™ over each mounting point (dimples facing up) and secure them using the appropriate hardware (see Page 5).
For the two upper mounting points, the dimples (Griplate™) must be facing up. For the two lower mounting points, the dimples (Griplate™) must be facing down.
Dimples
| M8 |
DIMPLES | M6 |
FACING UP | M5 |
M4
DIMPLES FACING UP
DIMPLES
FACING DOWN
![]()
![]()
![]() DIMPLES
DIMPLES
FACING DOWN
Page 8 | Installation Instructions |