XL6000CM
Ceiling Installation
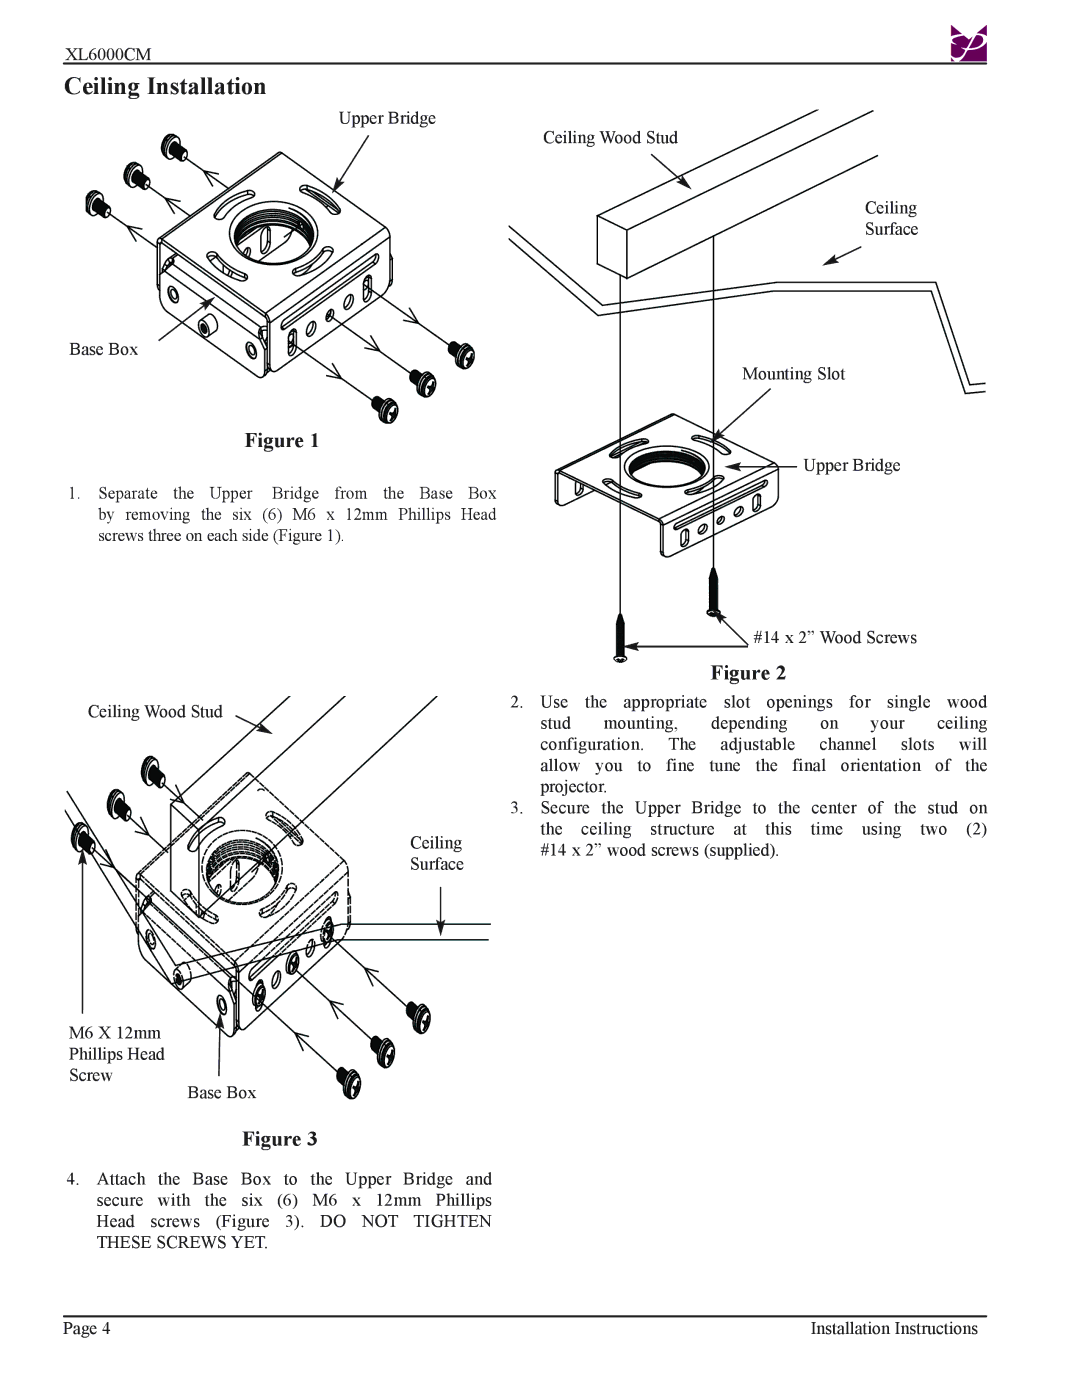
Upper Bridge
Ceiling Wood Stud
Ceiling
Surface
Base Box
Mounting Slot
Figure 1
![]()
![]() Upper Bridge
Upper Bridge
1. Separate the Upper Bridge from the Base Box by removing the six (6) M6 x 12mm Phillips Head screws three on each side (Figure 1).
![]() #14 x 2” Wood Screws
#14 x 2” Wood Screws
Ceiling Wood Stud
Figure 2
2.Use the appropriate slot openings for single wood stud mounting, depending on your ceiling configuration. The adjustable channel slots will allow you to fine tune the final orientation of the projector.
3.Secure the Upper Bridge to the center of the stud on
M6 X 12mm
Phillips Head
Screw
Ceiling
Surface
Base Box
the ceiling structure at this time using two (2) #14 x 2” wood screws (supplied).
Figure 3
4.Attach the Base Box to the Upper Bridge and secure with the six (6) M6 x 12mm Phillips Head screws (Figure 3). DO NOT TIGHTEN THESE SCREWS YET.
Page 4 | Installation Instructions |