Continued from front page
7.With the help of an assistant, position the wall plate against the wall and line up the mounting slots with drilled holes.
8.For each location, insert a lag bolt and washer into the wall.
9.Tighten each bolt with an open ended socket wrench by turning clockwise until tight.
WARNING: Do NOT
CAUTION: Do not release the wall plate until it is properly mounted and secured to the wall.
Concrete Mounting
NOTE: The concrete anchors must be used for concrete installation.
They can be purchased at your local hardware store.
1.Begin by placing the wall plate into position against the wall, keeping it level.
2.Mark off six holes to be used for securing the mount and place the wall plate aside.
3.Next, drill holes using an electric drill and masonry bit.
4.Insert a concrete anchor into each hole.
5.If necessary, a hammer can be used to lightly tap each anchor into place so that they are flush with the wall.
6.Once all of the anchors are in place, move the wall plate back into position.
7.Attach the nut onto the threaded shaft that is protruding from the wall.
8.Do not tighten until all nuts are in place.
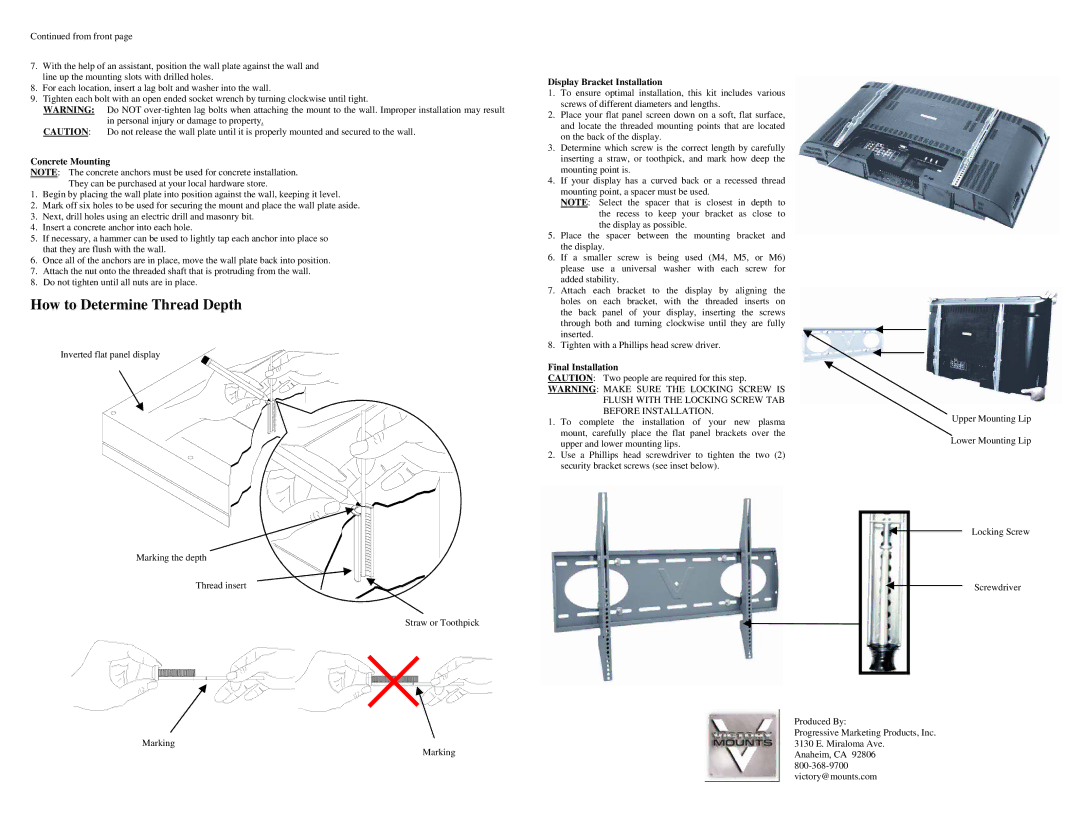
How to Determine Thread Depth
Inverted flat panel display
Marking the depth
Thread insert
Straw or Toothpick
Marking
Marking
Display Bracket Installation
1.To ensure optimal installation, this kit includes various screws of different diameters and lengths.
2.Place your flat panel screen down on a soft, flat surface, and locate the threaded mounting points that are located on the back of the display.
3.Determine which screw is the correct length by carefully inserting a straw, or toothpick, and mark how deep the mounting point is.
4.If your display has a curved back or a recessed thread mounting point, a spacer must be used.
NOTE: Select the spacer that is closest in depth to the recess to keep your bracket as close to the display as possible.
5.Place the spacer between the mounting bracket and the display.
6.If a smaller screw is being used (M4, M5, or M6) please use a universal washer with each screw for added stability.
7.Attach each bracket to the display by aligning the holes on each bracket, with the threaded inserts on the back panel of your display, inserting the screws through both and turning clockwise until they are fully inserted.
8.Tighten with a Phillips head screw driver.
Final Installation
CAUTION: Two people are required for this step.
WARNING: MAKE SURE THE LOCKING SCREW IS FLUSH WITH THE LOCKING SCREW TAB BEFORE INSTALLATION.
1.To complete the installation of your new plasma mount, carefully place the flat panel brackets over the upper and lower mounting lips.
2.Use a Phillips head screwdriver to tighten the two (2) security bracket screws (see inset below).
Upper Mounting Lip
Lower Mounting Lip
![]() Locking Screw
Locking Screw
Screwdriver
Produced By:
Progressive Marketing Products, Inc. 3130 E. Miraloma Ave.
Anaheim, CA 92806
