V I I . D I S A S S E M B L Y A N D A S S E M B L Y
DISASSEMBLY
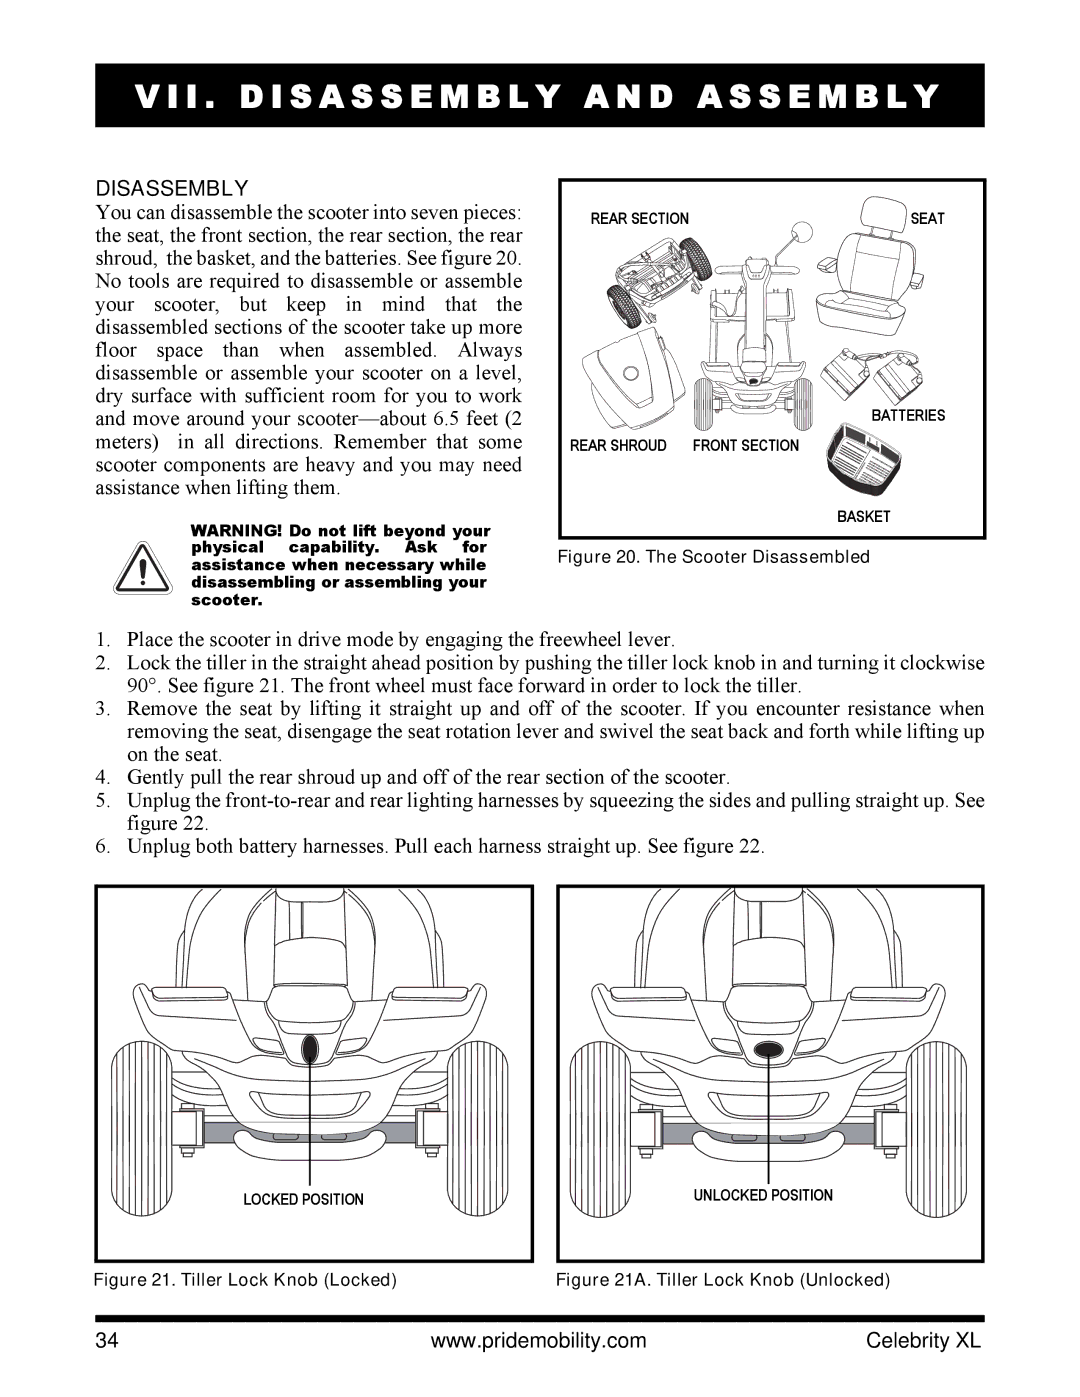
You can disassemble the scooter into seven pieces: the seat, the front section, the rear section, the rear shroud, the basket, and the batteries. See figure 20. No tools are required to disassemble or assemble your scooter, but keep in mind that the disassembled sections of the scooter take up more floor space than when assembled. Always disassemble or assemble your scooter on a level, dry surface with sufficient room for you to work and move around your
WARNING! Do not lift beyond your physical capability. Ask for assistance when necessary while disassembling or assembling your scooter.
REAR SECTION | SEAT |
BATTERIES
REAR SHROUD FRONT SECTION
BASKET
Figure 20. The Scooter Disassembled
1.Place the scooter in drive mode by engaging the freewheel lever.
2.Lock the tiller in the straight ahead position by pushing the tiller lock knob in and turning it clockwise 90°. See figure 21. The front wheel must face forward in order to lock the tiller.
3.Remove the seat by lifting it straight up and off of the scooter. If you encounter resistance when removing the seat, disengage the seat rotation lever and swivel the seat back and forth while lifting up on the seat.
4.Gently pull the rear shroud up and off of the rear section of the scooter.
5.Unplug the
6.Unplug both battery harnesses. Pull each harness straight up. See figure 22.
LOCKED POSITION |
Figure 21. Tiller Lock Knob (Locked)
UNLOCKED POSITION |
Figure 21A. Tiller Lock Knob (Unlocked)
34 | www.pridemobility.com | Celebrity XL |