V . S E R V I C E
13. Reconnect the left and right motor connectors. Be certain to match the left connector to the left motor and the right connector to the right motor. The connectors are labeled left and right.
14. Pick up the seat by the frame and set the seat onto the towers so the holes align with those on the seat towers.
15.Insert the ball detent pin into each seat tower.
16.Match the two tabs at the back of the foot platform mounting
bracket with the two semicircular notches in the vertical bar of the front frame.
17.Push the tabs through the matching notches.
18.Slide the foot platform down into place.
19.Reconnect the controller cable to the power base. See figure 6.
MANDATORY! Do not place the controller cable so that it can be pinched in the seat frame or the power base frame.
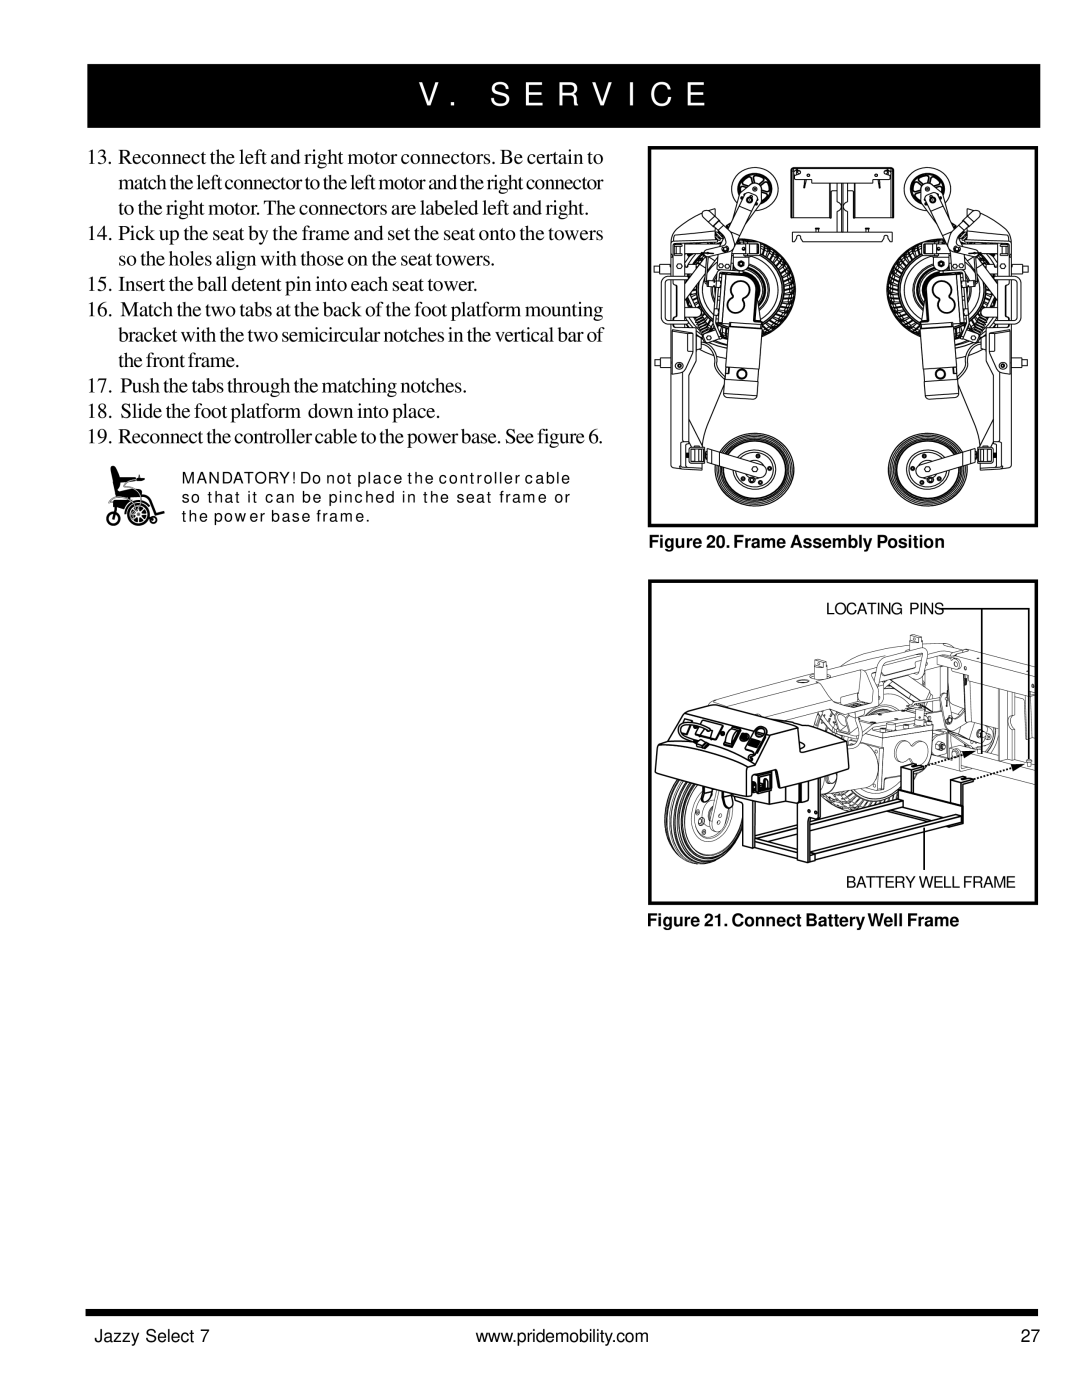
Figure 20. Frame Assembly Position
LOCATING PINS |
BATTERY WELL FRAME |
Figure 21. Connect Battery Well Frame
Jazzy Select 7 | www.pridemobility.com | 27 |