V I I . D I S A S S E M B L Y A N D A S S E M B L Y | |||
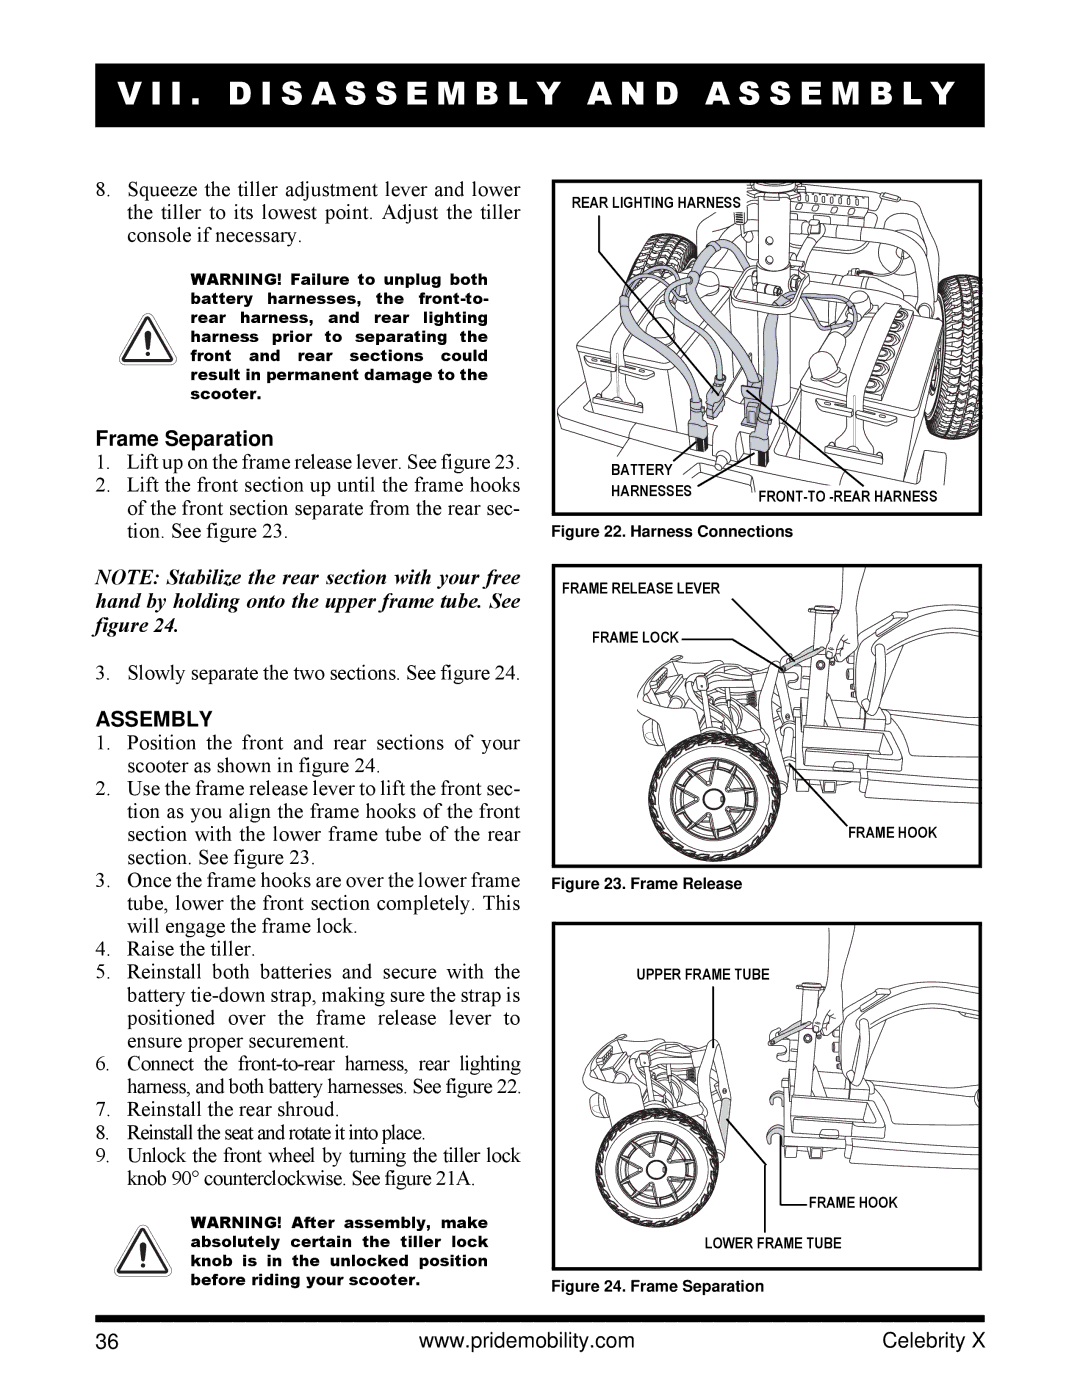
8. Squeeze the tiller adjustment lever and lower | REAR LIGHTING HARNESS |
| |
the tiller to its lowest point. Adjust the tiller |
| ||
|
| ||
console if necessary. |
|
| |
WARNING! Failure to unplug both |
|
| |
battery harnesses, the |
|
| |
rear harness, and rear lighting |
|
| |
harness prior to separating the |
|
| |
front and rear sections could |
|
| |
result in permanent damage to the |
|
| |
scooter. |
|
| |
Frame Separation |
|
| |
1. Lift up on the frame release lever. See figure 23. | BATTERY |
| |
2. Lift the front section up until the frame hooks | HARNESSES | ||
of the front section separate from the rear sec- | |||
|
| ||
tion. See figure 23. | Figure 22. Harness Connections | ||
NOTE: Stabilize the rear section with your free hand by holding onto the upper frame tube. See figure 24.
3. Slowly separate the two sections. See figure 24.
ASSEMBLY
1.Position the front and rear sections of your scooter as shown in figure 24.
2.Use the frame release lever to lift the front sec- tion as you align the frame hooks of the front section with the lower frame tube of the rear section. See figure 23.
3.Once the frame hooks are over the lower frame tube, lower the front section completely. This will engage the frame lock.
4.Raise the tiller.
5.Reinstall both batteries and secure with the battery
6.Connect the
7.Reinstall the rear shroud.
8.Reinstall the seat and rotate it into place.
9.Unlock the front wheel by turning the tiller lock knob 90° counterclockwise. See figure 21A.
WARNING! After assembly, make absolutely certain the tiller lock knob is in the unlocked position before riding your scooter.
FRAME RELEASE LEVER
FRAME LOCK
FRAME HOOK
Figure 23. Frame Release
UPPER FRAME TUBE |
FRAME HOOK |
LOWER FRAME TUBE |
Figure 24. Frame Separation
36 | www.pridemobility.com | Celebrity X |