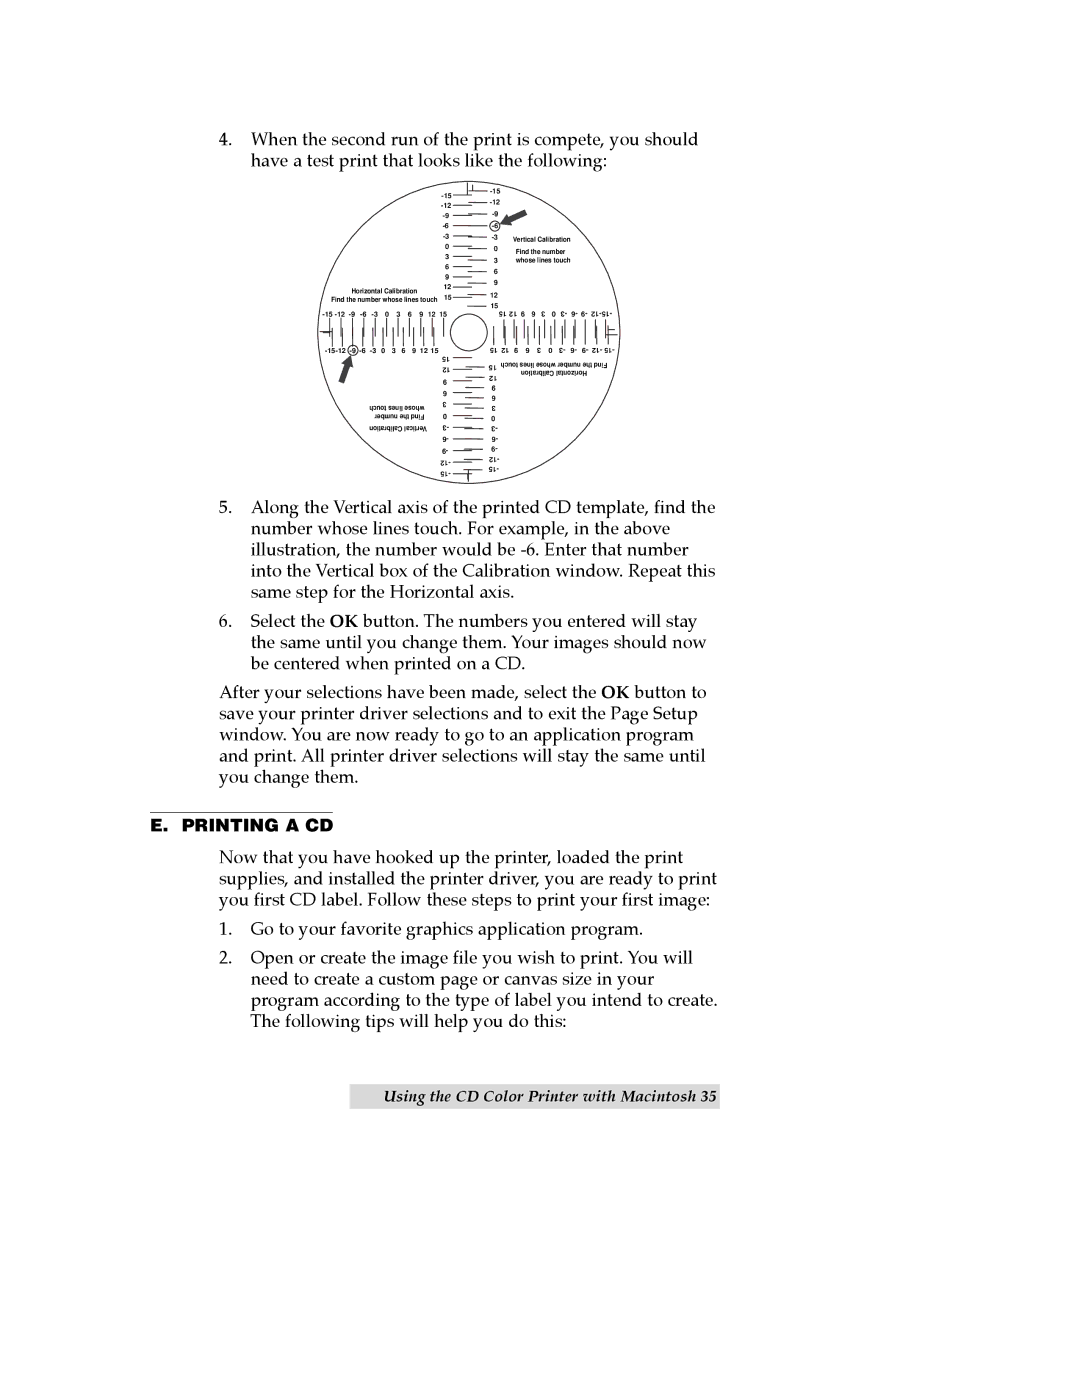
4.When the second run of the print is compete, you should have a test print that looks like the following:
-15 -12 -9 -6 -3
| |
| |
| |
| |
Vertical Calibration | |
|
Horizontal Calibration
0
3
6
9
12
0Find the number
3whose lines touch
6
9
Find the number whose lines touch 15
12
15
15 12 | 9 | 6 | 3 | 0 | 3- | 6- | 9- |
|
| 15 | |
| 12 | |
| 9 | |
| 6 | |
touch lines whose | 3 | |
0 | ||
number the Find | ||
Calibration Vertical | 3- | |
| 6- | |
| 9- | |
| 12- | |
| 15- |
15
15 12 9 6 3 0 3- 6- 9- 12- 15-
12 9 | 6 | 3 | 0 | 3- 6- 9- | 12- 15- |
touch lines whose number the Find | |||||
| Calibration Horizontal |
| |||
5.Along the Vertical axis of the printed CD template, find the number whose lines touch. For example, in the above illustration, the number would be
6.Select the OK button. The numbers you entered will stay the same until you change them. Your images should now be centered when printed on a CD.
After your selections have been made, select the OK button to save your printer driver selections and to exit the Page Setup window. You are now ready to go to an application program and print. All printer driver selections will stay the same until you change them.
E. PRINTING A CD
Now that you have hooked up the printer, loaded the print supplies, and installed the printer driver, you are ready to print you first CD label. Follow these steps to print your first image:
1.Go to your favorite graphics application program.
2.Open or create the image file you wish to print. You will need to create a custom page or canvas size in your program according to the type of label you intend to create. The following tips will help you do this:
Using the CD Color Printer with Macintosh 35
