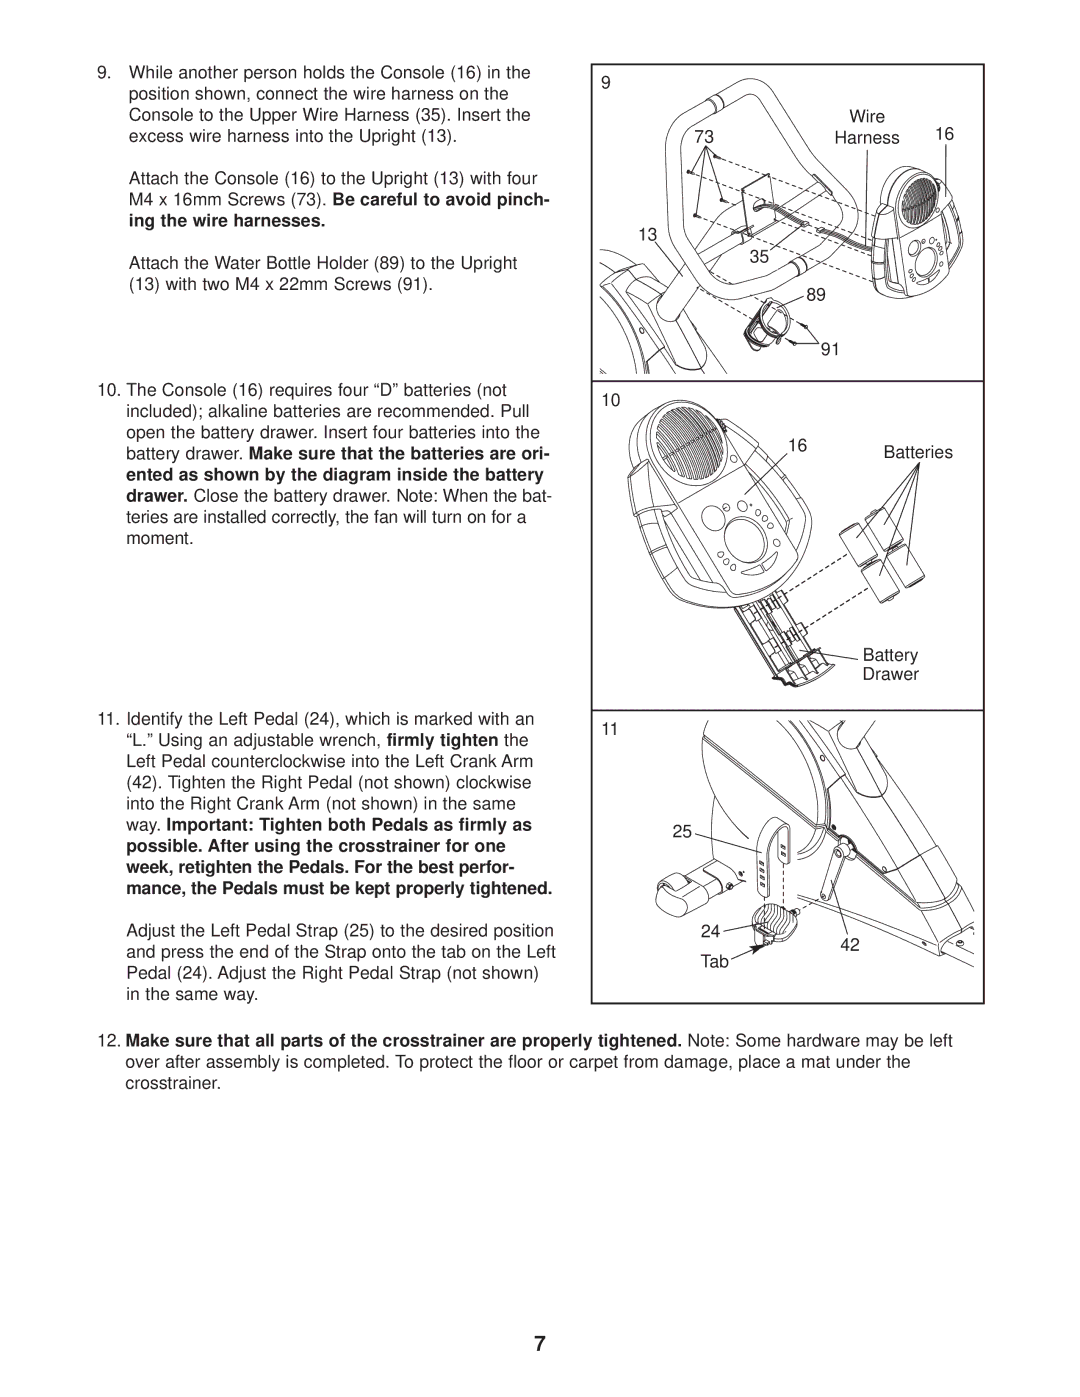
9.While another person holds the Console (16) in the position shown, connect the wire harness on the Console to the Upper Wire Harness (35). Insert the excess wire harness into the Upright (13).
Attach the Console (16) to the Upright (13) with four M4 x 16mm Screws (73). Be careful to avoid pinch- ing the wire harnesses.
Attach the Water Bottle Holder (89) to the Upright
(13)with two M4 x 22mm Screws (91).
10.The Console (16) requires four “D” batteries (not included); alkaline batteries are recommended. Pull open the battery drawer. Insert four batteries into the battery drawer. Make sure that the batteries are ori- ented as shown by the diagram inside the battery drawer. Close the battery drawer. Note: When the bat- teries are installed correctly, the fan will turn on for a moment.
11.Identify the Left Pedal (24), which is marked with an “L.” Using an adjustable wrench, firmly tighten the Left Pedal counterclockwise into the Left Crank Arm (42). Tighten the Right Pedal (not shown) clockwise into the Right Crank Arm (not shown) in the same way. Important: Tighten both Pedals as firmly as possible. After using the crosstrainer for one week, retighten the Pedals. For the best perfor- mance, the Pedals must be kept properly tightened.
Adjust the Left Pedal Strap (25) to the desired position and press the end of the Strap onto the tab on the Left Pedal (24). Adjust the Right Pedal Strap (not shown) in the same way.
9 |
|
|
|
73 |
| Wire | 16 |
| Harness | ||
13 |
|
|
|
| 35 |
|
|
| 89 |
| |
|
| 91 |
|
10 |
|
|
|
| 16 | Batteries | |
|
| ||
|
| Battery |
|
|
| Drawer |
|
11 |
|
|
|
25 |
|
|
|
24 |
| 42 |
|
Tab |
|
| |
|
|
| |
12.Make sure that all parts of the crosstrainer are properly tightened. Note: Some hardware may be left over after assembly is completed. To protect the floor or carpet from damage, place a mat under the crosstrainer.
7