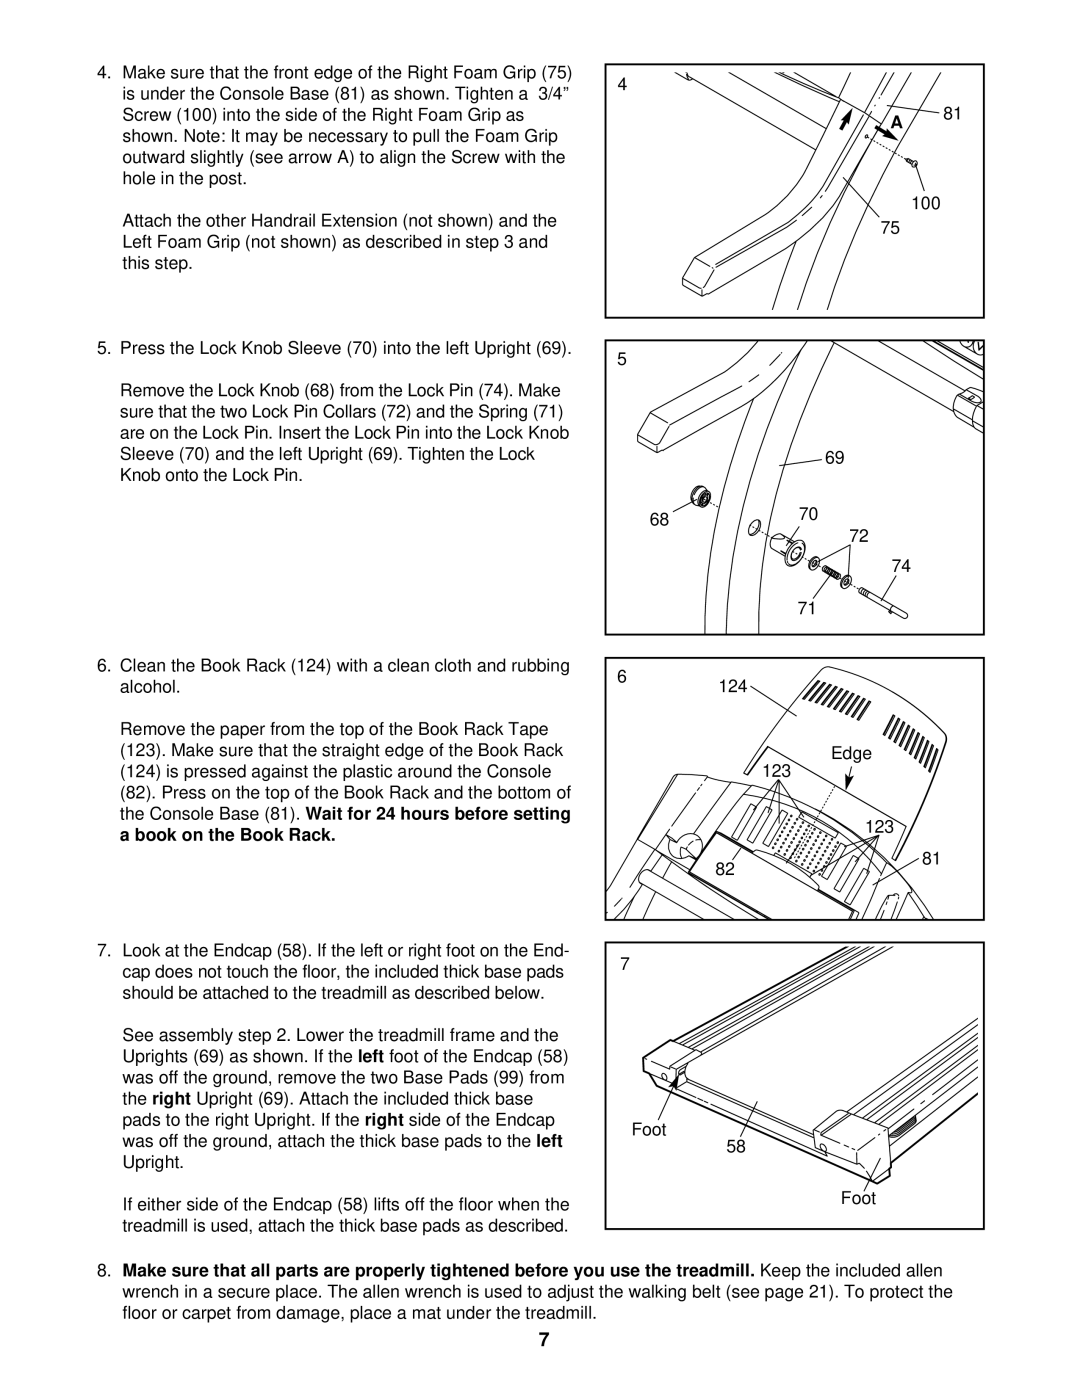
4. Make sure that the front edge of the Right Foam Grip (75) |
| 4 |
|
|
| ||||
is under the Console Base (81) as shown. Tighten a | 3/4” |
|
|
|
| ||||
|
|
|
|
| |||||
Screw (100) into the side of the Right Foam Grip as |
|
|
| A | 81 | ||||
shown. Note: It may be necessary to pull the Foam Grip |
|
|
|
| |||||
|
|
|
|
| |||||
outward slightly (see arrow A) to align the Screw with the |
|
|
|
|
| ||||
hole in the post. |
|
|
|
|
|
|
| ||
Attach the other Handrail Extension (not shown) and the |
|
|
| 100 |
| ||||
|
|
| 75 |
| |||||
Left Foam Grip (not shown) as described in step 3 and |
|
|
|
| |||||
|
|
|
|
| |||||
this step. |
|
|
|
|
|
|
|
| |
5. Press the Lock Knob Sleeve (70) into the left Upright (69). |
| 5 |
|
|
| ||||
|
|
|
|
|
|
|
|
| |
Remove the Lock Knob (68) from the Lock Pin (74). Make |
|
|
|
|
| ||||
sure that the two Lock Pin Collars (72) and the Spring (71) |
|
|
|
|
| ||||
are on the Lock Pin. Insert the Lock Pin into the | Lock Knob |
|
|
|
| ||||
Sleeve (70) and the left U | pright (69). Tighten the Lock |
|
|
| 69 |
| |||
Knob onto the Lock Pin. |
|
|
|
|
|
|
| ||
|
|
|
|
|
| 68 |
| 70 |
|
|
|
|
|
|
|
| 72 |
| |
|
|
|
|
|
|
|
|
| |
|
|
|
|
|
|
|
| 74 |
|
|
|
|
|
|
|
|
| 71 |
|
6. Clean the Book Rack (124) with a clean cloth and rubbing |
| 6 |
|
|
| ||||
alcohol. |
|
|
|
| 124 |
|
| ||
|
|
|
|
|
|
| |||
Remove the paper from the top of the Book Rack Tape |
|
|
|
|
|
| |||
(123). Make sure that the straight edge of the Book Rack |
|
|
| Edge |
| ||||
(124) is pressed against the plastic around the Console |
|
|
| 123 |
| ||||
(82). Press on the top of the Book Rack and the bottom of |
|
|
|
|
| ||||
the Console Base (81). | Wait for 24 hours before setting |
|
|
| 123 |
| |||
a book on the Book Rack. |
|
|
|
|
|
| |||
|
|
|
|
|
|
| |||
|
|
|
|
|
|
| 82 | 81 |
|
|
|
|
|
|
|
|
|
| |
7. Look at the Endcap (58). If the left or right foot on the End- |
| 7 |
|
|
| ||||
cap does not touch the floor, the included thick base pads |
|
|
|
| |||||
|
|
|
|
| |||||
should be attached to the treadmill as described below. |
|
|
|
|
|
| |||
See assembly step 2. Lower the treadmill frame and the |
|
|
|
|
| ||||
Uprights (69) as shown. If the | left foot of the Endcap (58) |
|
|
|
|
| |||
was off the ground, remove the two Base Pads (99) from |
|
|
|
|
| ||||
the | right | Upright (69). Attach the included thick base |
|
|
|
|
| ||
pads to the right Upright. If the | right side of the Endcap |
| Foot |
|
|
| |||
was off the ground, attach the thick base pads to the |
| left | 58 |
|
| ||||
|
|
|
| ||||||
Upright. |
|
|
|
|
|
|
| ||
|
|
|
|
|
|
|
| ||
If either side of the Endcap (58) lifts off the floor when the |
|
|
| Foot |
| ||||
|
|
|
|
| |||||
treadmill is used, attach the thick base pads as described. |
|
|
|
|
| ||||
8. Make sure that all parts are properly tightened before you use the treadmill. |
|
|
| Keep the included allen |
| ||||
wrench in a secure place. The allen wrench is used to adjust the walking belt (see page 21). To protect the |
|
|
| ||||||
floor or carpet from damage, place a mat under the treadmill. |
|
|
|
|
| ||||
7