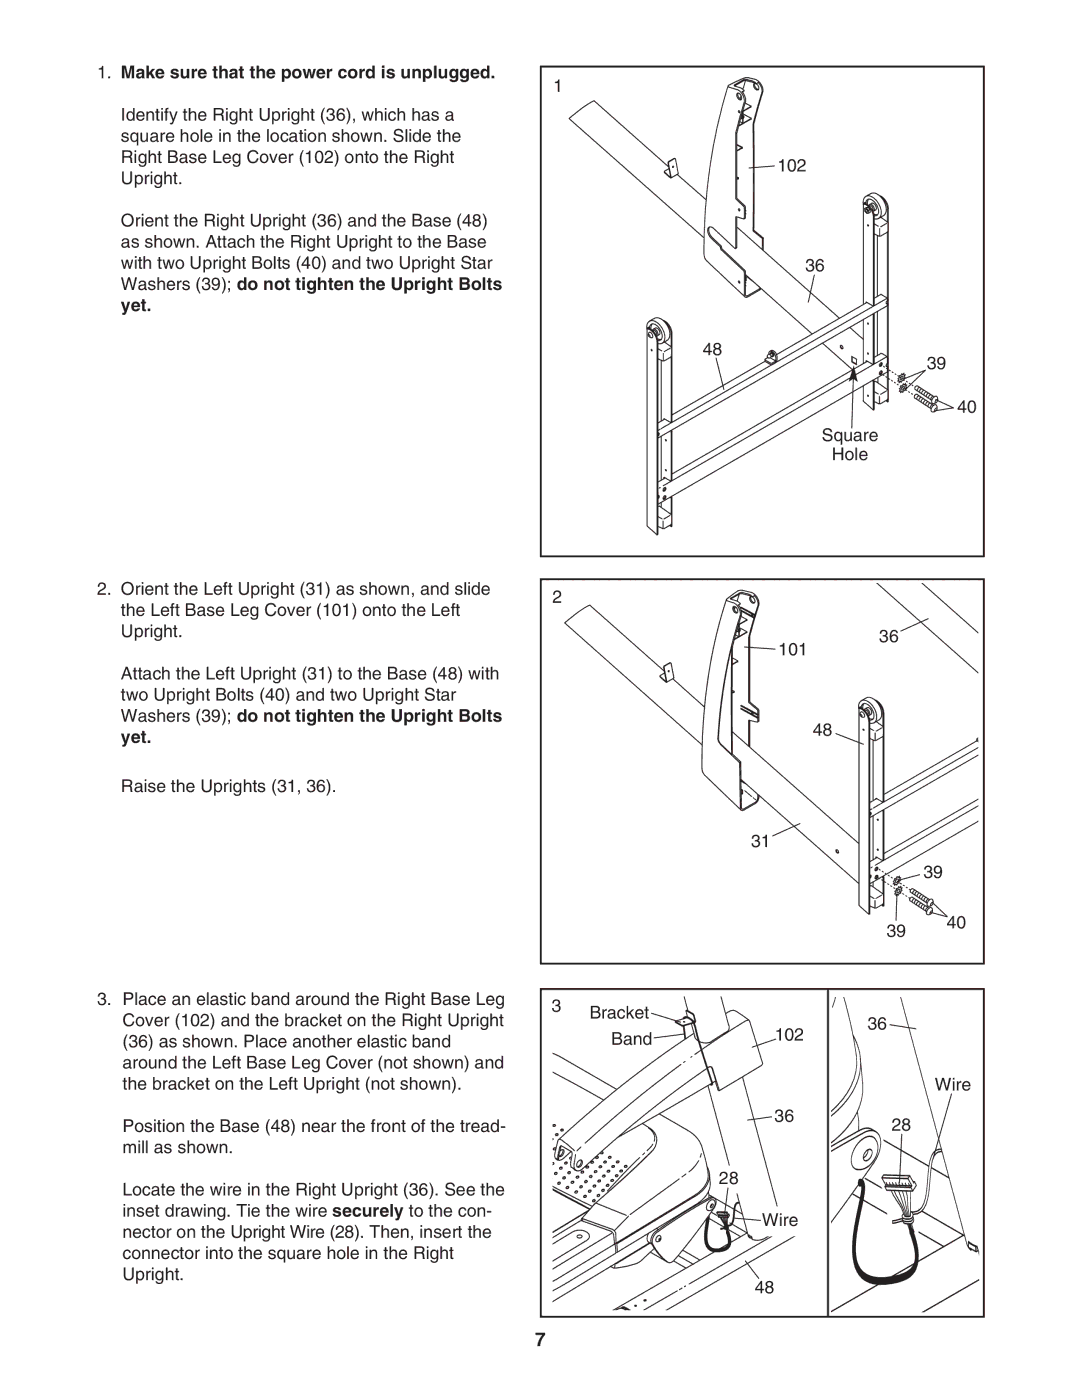
1.Make sure that the power cord is unplugged.
Identify the Right Upright (36), which has a square hole in the location shown. Slide the Right Base Leg Cover (102) onto the Right Upright.
Orient the Right Upright (36) and the Base (48) as shown. Attach the Right Upright to the Base with two Upright Bolts (40) and two Upright Star Washers (39); do not tighten the Upright Bolts yet.
2.Orient the Left Upright (31) as shown, and slide the Left Base Leg Cover (101) onto the Left Upright.
Attach the Left Upright (31) to the Base (48) with two Upright Bolts (40) and two Upright Star Washers (39); do not tighten the Upright Bolts yet.
Raise the Uprights (31, 36).
3.Place an elastic band around the Right Base Leg Cover (102) and the bracket on the Right Upright (36) as shown. Place another elastic band around the Left Base Leg Cover (not shown) and the bracket on the Left Upright (not shown).
Position the Base (48) near the front of the tread- mill as shown.
Locate the wire in the Right Upright (36). See the inset drawing. Tie the wire securely to the con- nector on the Upright Wire (28). Then, insert the connector into the square hole in the Right Upright.
1 |
|
|
|
|
|
| 102 |
|
|
|
| 36 |
| |
|
| 48 |
| 39 |
|
|
|
| |
|
|
|
| 40 |
|
|
| Square |
|
|
|
| Hole |
|
2 |
|
|
|
|
|
| 101 | 36 |
|
|
|
|
| |
|
|
| 48 |
|
|
| 31 |
|
|
|
|
|
| 39 |
|
|
| 39 | 40 |
|
|
|
| |
3 | Bracket |
| 36 |
|
|
|
| ||
| Band | 102 |
| |
|
|
| ||
|
|
|
| Wire |
|
| 36 | 28 |
|
|
|
|
| |
|
| 28 |
|
|
![]()
![]()
![]()
![]() Wire
Wire ![]()
48
7
