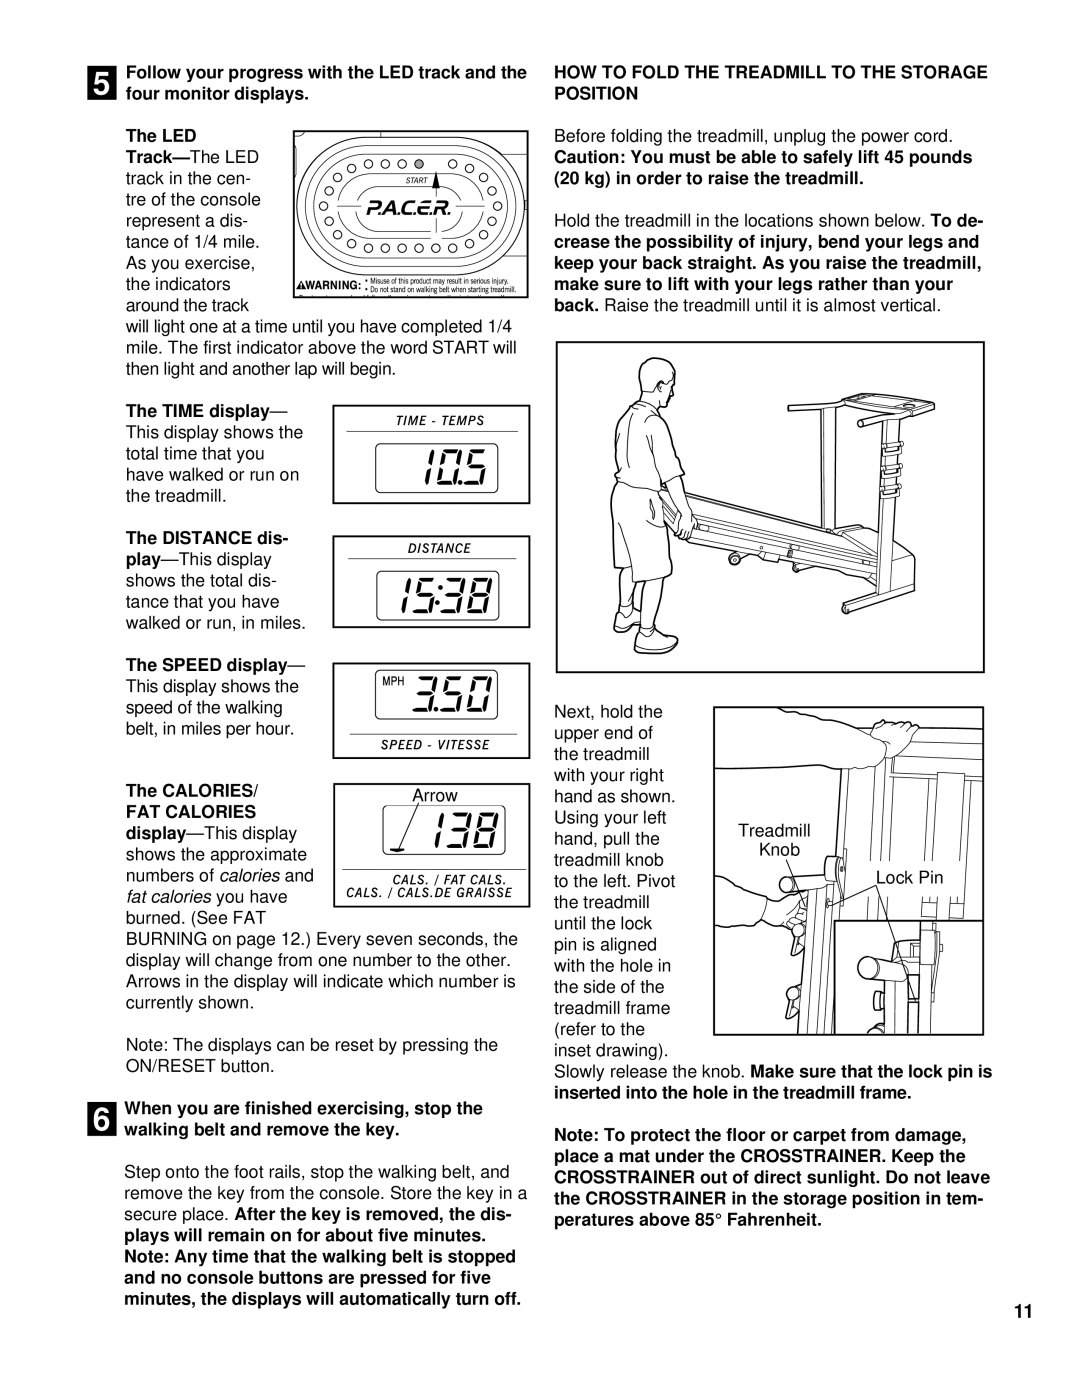
Follow your progress with the LED track and the
5 four monitor displays.
The LED
track in the cen- tre of the console
represent a dis-
tance of 1/4 mile. As you exercise,
the indicators around the track
will light one at a time until you have completed 1/4 mile. The first indicator above the word START will then light and another lap will begin.
The TIME display— This display shows the total time that you have walked or run on the treadmill.
The DISTANCE dis-
The SPEED display— This display shows the speed of the walking belt, in miles per hour.
The CALORIES/ |
| Arrow | |
FAT CALORIES |
|
|
|
|
|
| |
|
|
| |
shows the approximate |
|
|
|
numbers of calories and |
|
|
|
fat calories you have |
|
|
|
|
|
| |
burned. (See FAT |
|
|
|
BURNING on page 12.) Every seven seconds, the display will change from one number to the other. Arrows in the display will indicate which number is currently shown.
Note: The displays can be reset by pressing the ON/RESET button.
When you are finished exercising, stop the
6 walking belt and remove the key.
Step onto the foot rails, stop the walking belt, and remove the key from the console. Store the key in a secure place. After the key is removed, the dis- plays will remain on for about five minutes. Note: Any time that the walking belt is stopped and no console buttons are pressed for five minutes, the displays will automatically turn off.
HOW TO FOLD THE TREADMILL TO THE STORAGE POSITION
Before folding the treadmill, unplug the power cord.
Caution: You must be able to safely lift 45 pounds (20 kg) in order to raise the treadmill.
Hold the treadmill in the locations shown below. To de- crease the possibility of injury, bend your legs and keep your back straight. As you raise the treadmill, make sure to lift with your legs rather than your back. Raise the treadmill until it is almost vertical.
Next, hold the |
| |
upper end of |
| |
the treadmill |
| |
with your right |
| |
hand as shown. |
| |
Using your left | Treadmill | |
hand, pull the | ||
Knob | ||
treadmill knob | ||
Lock Pin | ||
to the left. Pivot | ||
the treadmill |
| |
until the lock |
| |
pin is aligned |
| |
with the hole in |
| |
the side of the |
| |
treadmill frame |
| |
(refer to the |
| |
inset drawing). |
|
Slowly release the knob. Make sure that the lock pin is inserted into the hole in the treadmill frame.
Note: To protect the floor or carpet from damage, place a mat under the CROSSTRAINER. Keep the CROSSTRAINER out of direct sunlight. Do not leave the CROSSTRAINER in the storage position in tem- peratures above 85° Fahrenheit.
11
