HOW TO OPERATE THE EXERCISE CYCLE
HANDLEBAR OPERATION
The handlebars can be used in either the
Dual-action Mode
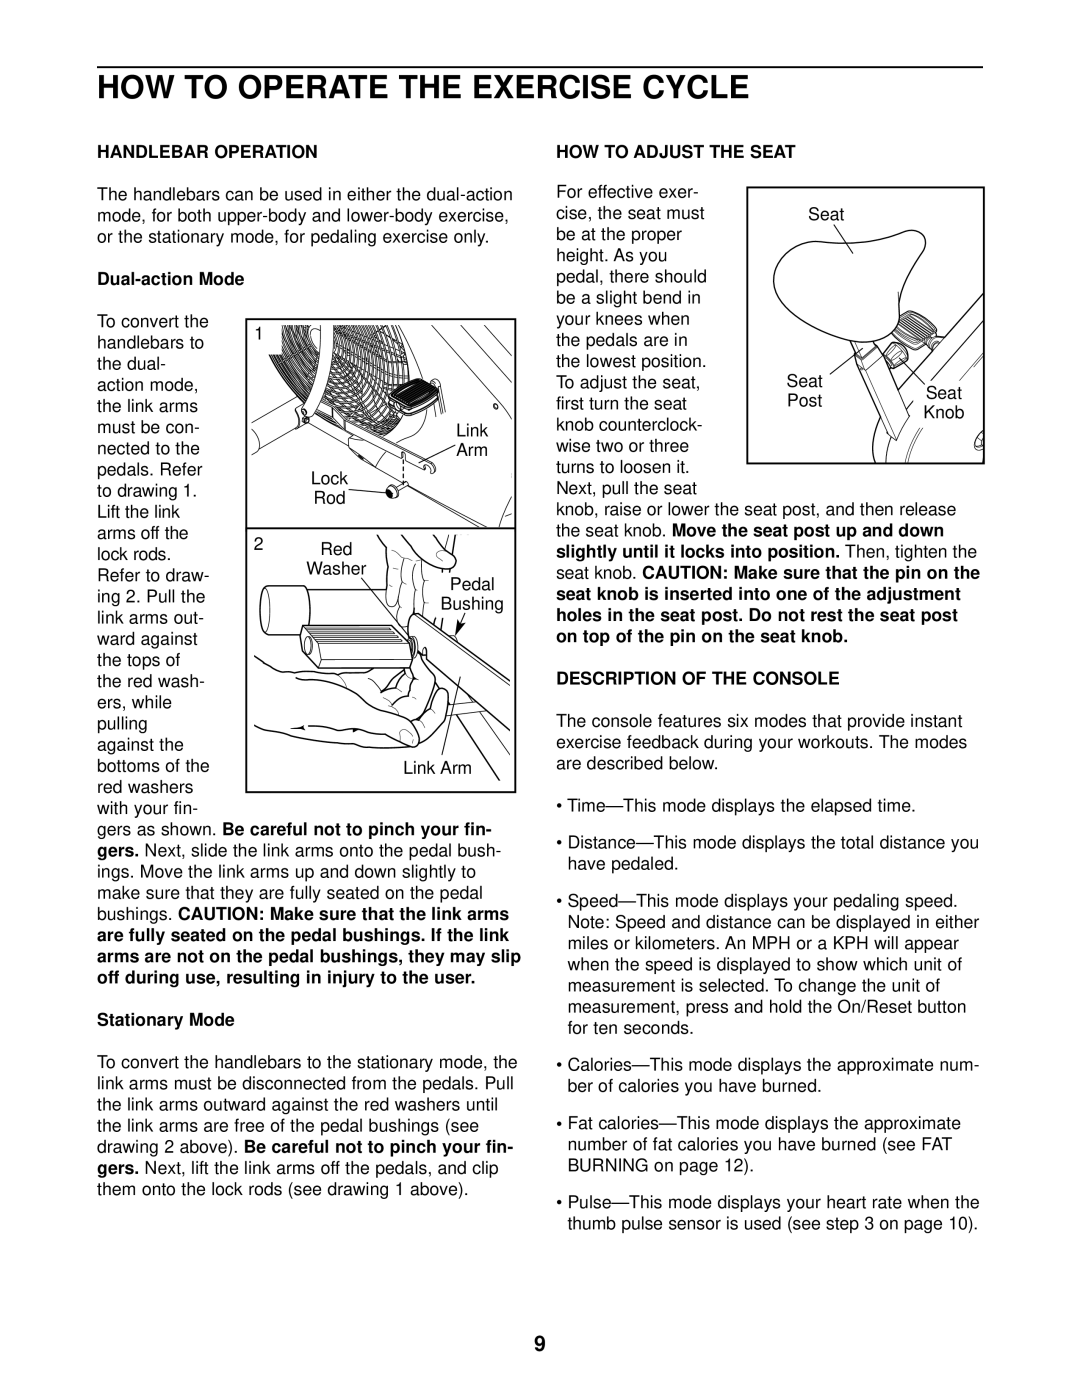
To convert the | 1 |
|
|
handlebars to |
|
| |
|
|
| |
the dual- |
|
|
|
action mode, |
|
|
|
the link arms |
|
|
|
must be con- |
|
| Link |
nected to the |
|
| Arm |
pedals. Refer |
| Lock |
|
to drawing 1. |
|
| |
| Rod |
| |
Lift the link |
|
| |
|
|
| |
arms off the | 2 | Red |
|
lock rods. |
| ||
|
| ||
| Washer |
| |
Refer to draw- |
| Pedal | |
|
| ||
ing 2. Pull the |
| ||
| Bushing | ||
link arms out- |
|
| |
|
|
| |
ward against |
|
|
|
the tops of |
|
|
|
the red wash- |
|
|
|
ers, while |
|
|
|
pulling |
|
|
|
against the |
|
|
|
bottoms of the |
|
| Link Arm |
red washers |
|
|
|
with your fin- |
|
| |
gers as shown. | Be careful not to pinch your fin- |
| |
gers. Next, slide the link arms onto the pedal bush- | |||
ings. Move the link arms up and down slightly to |
| ||
make sure that they are fully seated on the pedal |
| ||
bushings. | CAUTION: Make sure that the link arms |
| |
are fully seated on the pedal bushings. If the link arms are not on the pedal bushings, they may slip off during use, resulting in injury to the user.
Stationary Mode
To convert the handlebars to the stationary mode, the link arms must be disconnected from the pedals. Pull the link arms outward against the red washers until the link arms are free of the pedal bushings (see
drawing 2 above). Be careful not to pinch your fin- gers. Next, lift the link arms off the pedals, and clip them onto the lock rods (see drawing 1 above).
HOW TO ADJUST THE SEAT |
|
| ||
For effective exer- |
|
| ||
cise, the seat must | Seat |
| ||
be at the proper |
|
| ||
height. As you |
|
|
| |
pedal, there should |
|
| ||
be a slight bend in |
|
| ||
your knees when |
|
| ||
the pedals are in |
|
| ||
the lowest position. | Seat |
| ||
To adjust the seat, | Seat | |||
first turn the seat | Post | |||
Knob | ||||
knob counterclock- |
| |||
|
| |||
wise two or three |
|
| ||
turns to loosen it. |
|
| ||
Next, pull the seat |
|
| ||
knob, raise or lower the seat post, and then release |
| |||
the seat knob. | Move the seat post up and down |
| ||
slightly until it locks into position. |
| Then, tighten the | ||
seat knob. | CAUTION: Make sure that the pin on the |
| ||
seat knob is inserted into one of the adjustment holes in the seat post. Do not rest the seat post on top of the pin on the seat knob.
DESCRIPTION OF THE CONSOLE
The console features six modes that provide instant exercise feedback during your workouts. The modes are described below.
•
•
•
for ten seconds.
•
•Fat
•
9
