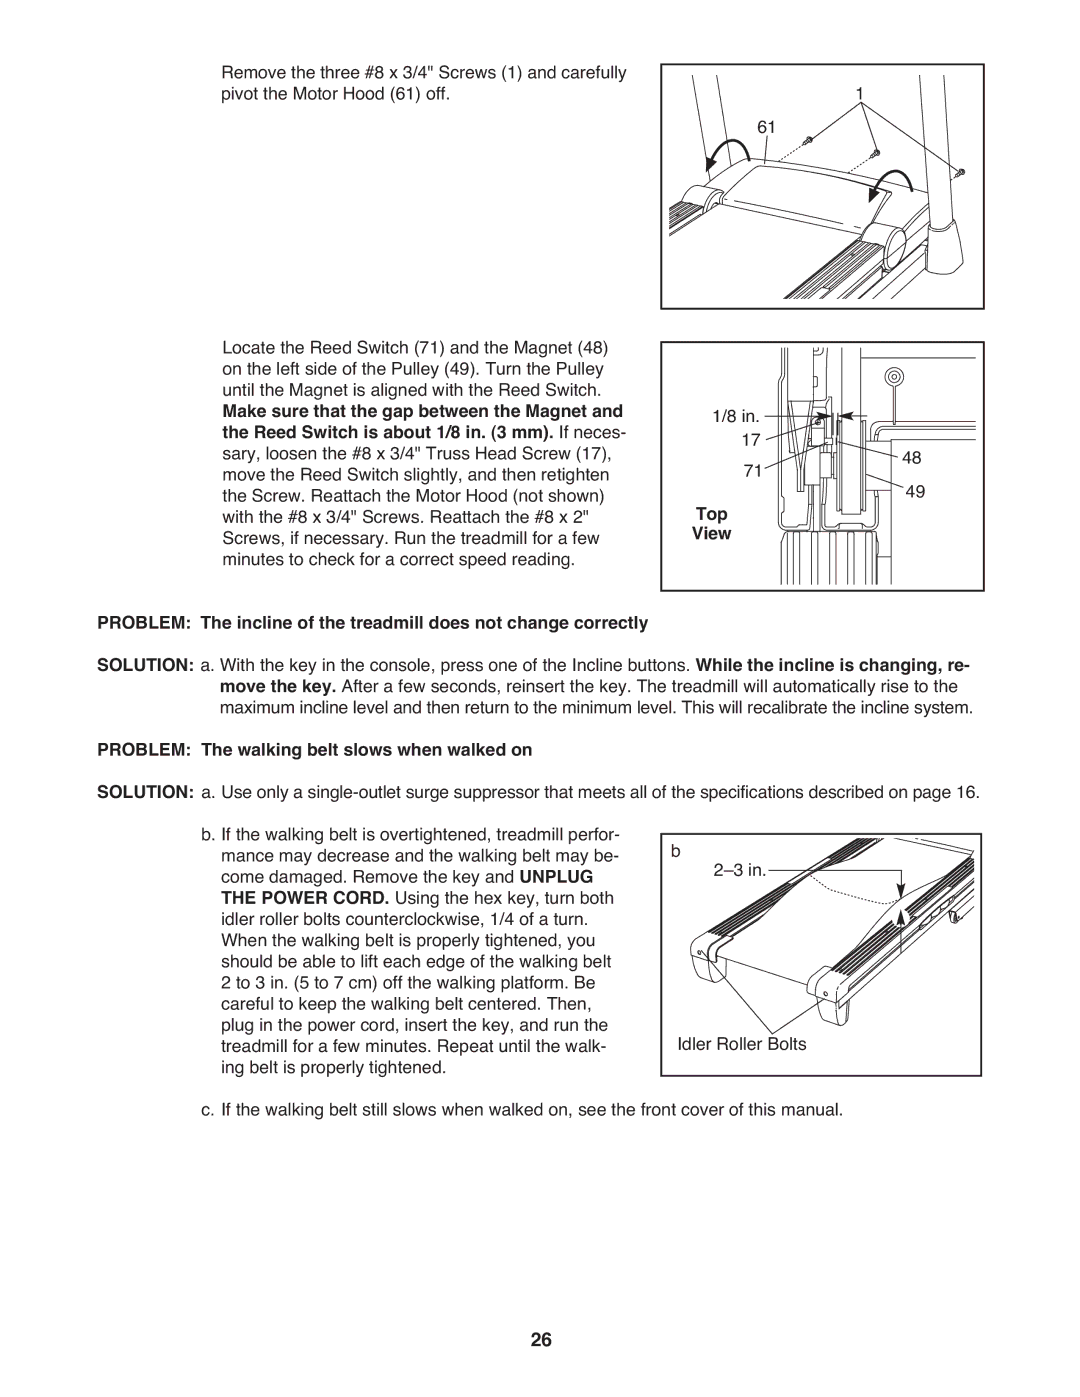
Remove the three #8 x 3/4" Screws (1) and carefully |
| 1 |
pivot the Motor Hood (61) off. | 61 | |
|
| |
Locate the Reed Switch (71) and the Magnet (48) |
|
|
on the left side of the Pulley (49). Turn the Pulley |
|
|
until the Magnet is aligned with the Reed Switch. | 1/8 in. |
|
Make sure that the gap between the Magnet and |
| |
the Reed Switch is about 1/8 in. (3 mm). If neces- | 17 |
|
sary, loosen the #8 x 3/4" Truss Head Screw (17), | 48 | |
move the Reed Switch slightly, and then retighten | 71 | |
the Screw. Reattach the Motor Hood (not shown) | Top | 49 |
with the #8 x 3/4" Screws. Reattach the #8 x 2" |
| |
Screws, if necessary. Run the treadmill for a few | View |
|
minutes to check for a correct speed reading. |
|
|
PROBLEM: The incline of the treadmill does not change correctly
SOLUTION: a. With the key in the console, press one of the Incline buttons. While the incline is changing, re- move the key. After a few seconds, reinsert the key. The treadmill will automatically rise to the maximum incline level and then return to the minimum level. This will recalibrate the incline system.
PROBLEM: The walking belt slows when walked on
SOLUTION: a. Use only a
b. If the walking belt is overtightened, treadmill perfor- b mance may decrease and the walking belt may be- come damaged. Remove the key and UNPLUG
THE POWER CORD. Using the hex key, turn both idler roller bolts counterclockwise, 1/4 of a turn. When the walking belt is properly tightened, you should be able to lift each edge of the walking belt 2 to 3 in. (5 to 7 cm) off the walking platform. Be careful to keep the walking belt centered. Then, plug in the power cord, insert the key, and run the treadmill for a few minutes. Repeat until the walk- ing belt is properly tightened.
c. If the walking belt still slows when walked on, see the front cover of this manual.
26