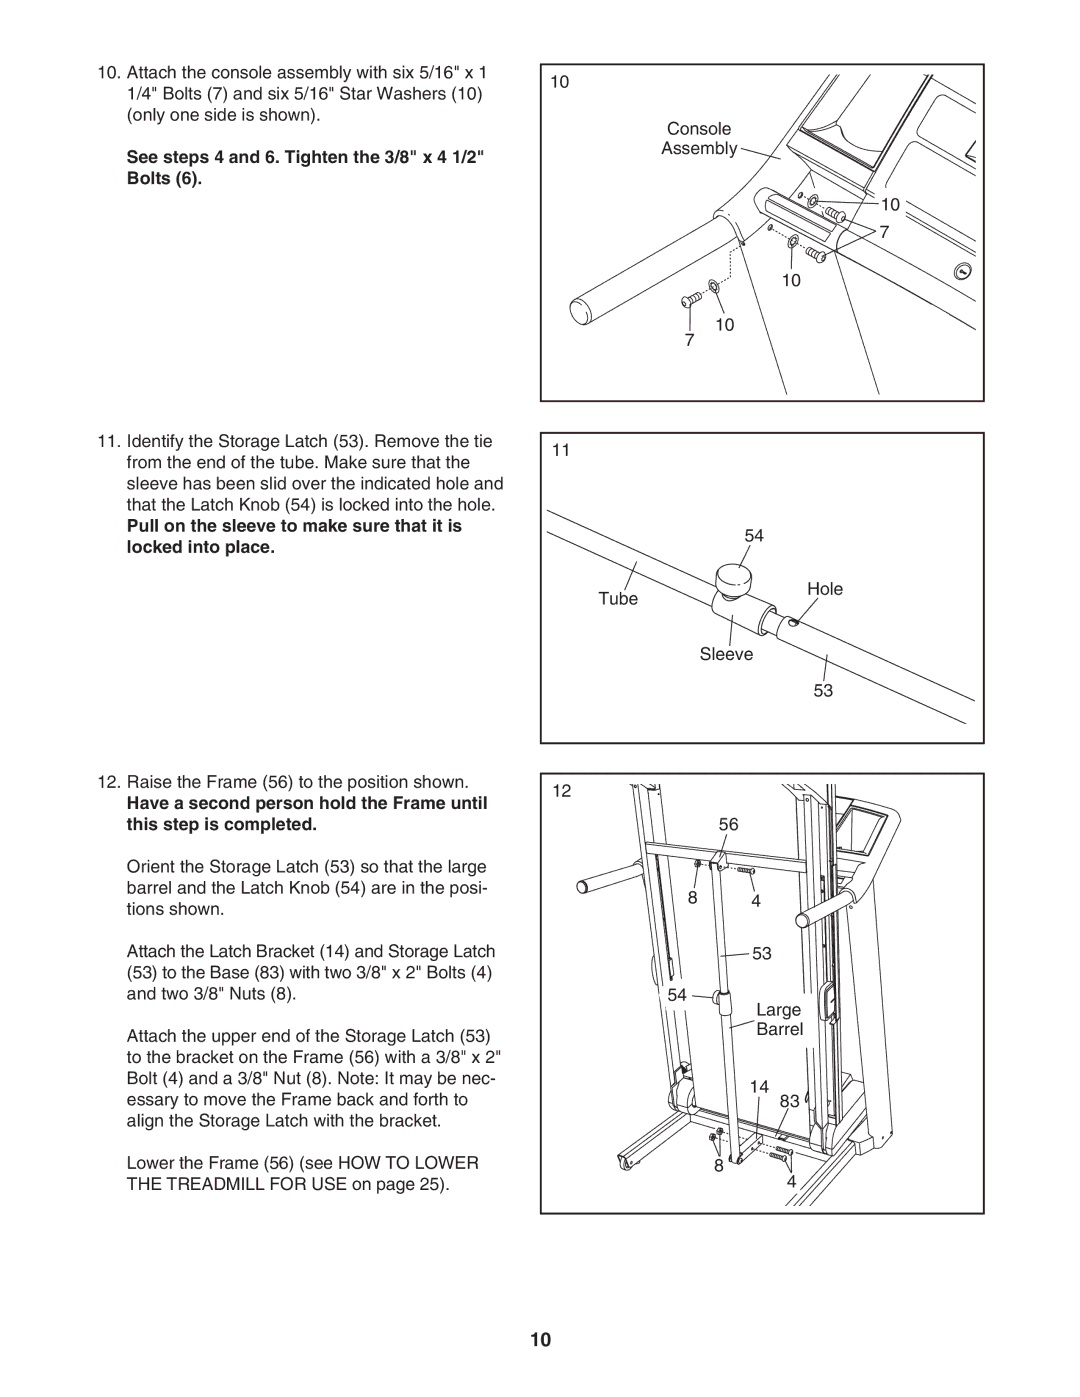
10. Attach the console assembly with six 5/16" x 1 | 10 |
| |
1/4" Bolts (7) and six 5/16" Star Washers (10) |
| ||
|
| ||
(only one side is shown). | Console |
| |
|
| ||
See steps 4 and 6. Tighten the 3/8" x 4 1/2" | Assembly |
| |
|
| ||
Bolts (6). |
|
| |
|
| 10 | |
|
| 7 | |
|
| 10 | |
| 10 |
| |
| 7 |
| |
11. Identify the Storage Latch (53). Remove the tie | 11 |
| |
from the end of the tube. Make sure that the |
| ||
|
| ||
sleeve has been slid over the indicated hole and |
|
| |
that the Latch Knob (54) is locked into the hole. |
|
| |
Pull on the sleeve to make sure that it is |
| 54 | |
locked into place. |
| ||
|
| ||
| Tube | Hole | |
|
| ||
| Sleeve | ||
|
| 53 | |
12. Raise the Frame (56) to the position shown. | 12 |
| |
Have a second person hold the Frame until |
| ||
|
| ||
this step is completed. | 56 |
| |
Orient the Storage Latch (53) so that the large |
|
| |
barrel and the Latch Knob (54) are in the posi- | 8 | 4 | |
tions shown. | |||
|
| ||
Attach the Latch Bracket (14) and Storage Latch |
| 53 | |
(53) to the Base (83) with two 3/8" x 2" Bolts (4) |
|
| |
and two 3/8" Nuts (8). | 54 | Large | |
|
| ||
Attach the upper end of the Storage Latch (53) |
| Barrel | |
|
| ||
to the bracket on the Frame (56) with a 3/8" x 2" |
|
| |
Bolt (4) and a 3/8" Nut (8). Note: It may be nec- |
| 14 | |
essary to move the Frame back and forth to |
| ||
| 83 | ||
align the Storage Latch with the bracket. |
|
| |
Lower the Frame (56) (see HOW TO LOWER | 8 | 4 | |
THE TREADMILL FOR USE on page 25). |
| ||
| 10 |
| |