D4 Profoto D4 – Generators
is 100% charged to the chosen power level.To change the ready signal mode, hold down or push repeatedly the Ready Signal Button [17] until the desired function is visible at the
Ready Signal Indicators [16]:
1.BEEP – a short acoustic signal indicates that the generator is fully charged.
2.BUZZ – an intermitting signal is audible while the generator is charging.
3.BEEP & DIM – the modelling light is dimmed while charging and a short acoustic signal indicates that the generator is fully charged.
4.BUZZ & DIM – an intermitting signal is audible and the modelling light is dimmed while charging.
5.DIM – the modelling light is dimmed while charging. After 5. the functions return to 1.
PLEASE NOTE! To guard against wrong exposures, it is not possible to release a flash while the generator is charging. If you try, a long beep will indicate that no flash was released.
Photo/IR-Cell
If the
Auxiliary Functions
The D4 series offers advanced functions like “Interval” for stroboscopic effects, “Sequence” for multi exposures or multi pops to increase the flash output, and “Delay” to create wipe effects or for pictures of fast moving objects made with an electronic release system.
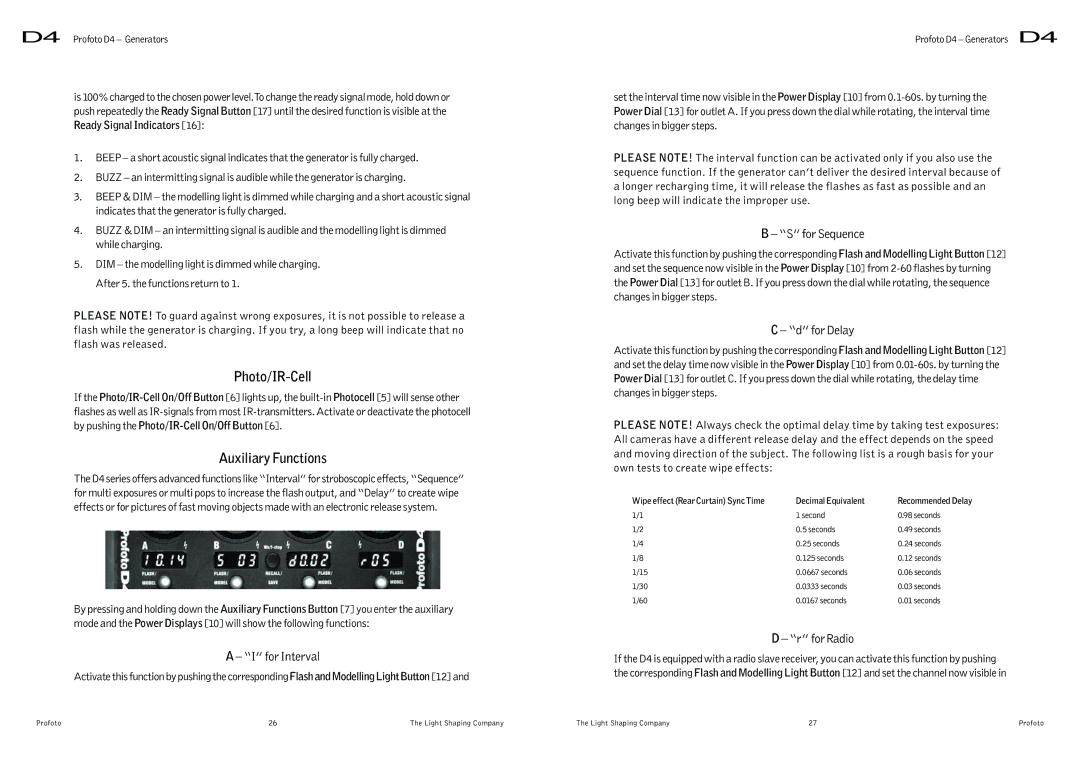
By pressing and holding down the Auxiliary Functions Button [7] you enter the auxiliary mode and the Power Displays [10] will show the following functions:
A – “I” for Interval
Activate this function by pushing the corresponding Flash and Modelling Light Button [12] and
Profoto D4 – Generators D4
set the interval time now visible in the Power Display [10] from
PLEASE NOTE! The interval function can be activated only if you also use the sequence function. If the generator can’t deliver the desired interval because of a longer recharging time, it will release the flashes as fast as possible and an long beep will indicate the improper use.
B – “S” for Sequence
Activate this function by pushing the corresponding Flash and Modelling Light Button [12] and set the sequence now visible in the Power Display [10] from
C – “d” for Delay
Activate this function by pushing the corresponding Flash and Modelling Light Button [12] and set the delay time now visible in the Power Display [10] from
PLEASE NOTE! Always check the optimal delay time by taking test exposures: All cameras have a different release delay and the effect depends on the speed and moving direction of the subject. The following list is a rough basis for your own tests to create wipe effects:
Wipe effect (Rear Curtain) Sync Time | Decimal Equivalent | Recommended Delay |
1/1 | 1 second | 0.98 seconds |
1/2 | 0.5 seconds | 0.49 seconds |
1/4 | 0.25 seconds | 0.24 seconds |
1/8 | 0.125 seconds | 0.12 seconds |
1/15 | 0.0667 seconds | 0.06 seconds |
1/30 | 0.0333 seconds | 0.03 seconds |
1/60 | 0.0167 seconds | 0.01 seconds |
D – “r” for Radio
If the D4 is equipped with a radio slave receiver, you can activate this function by pushing the corresponding Flash and Modelling Light Button [12] and set the channel now visible in
Profoto | 26 | The Light Shaping Company | The Light Shaping Company | 27 | Profoto |