Profoto Pro-7 manual ProHead, Available

Models: Pro-7

1 43
Download 43 pages 45.64 Kb
Page 8
Image 8

ProHead

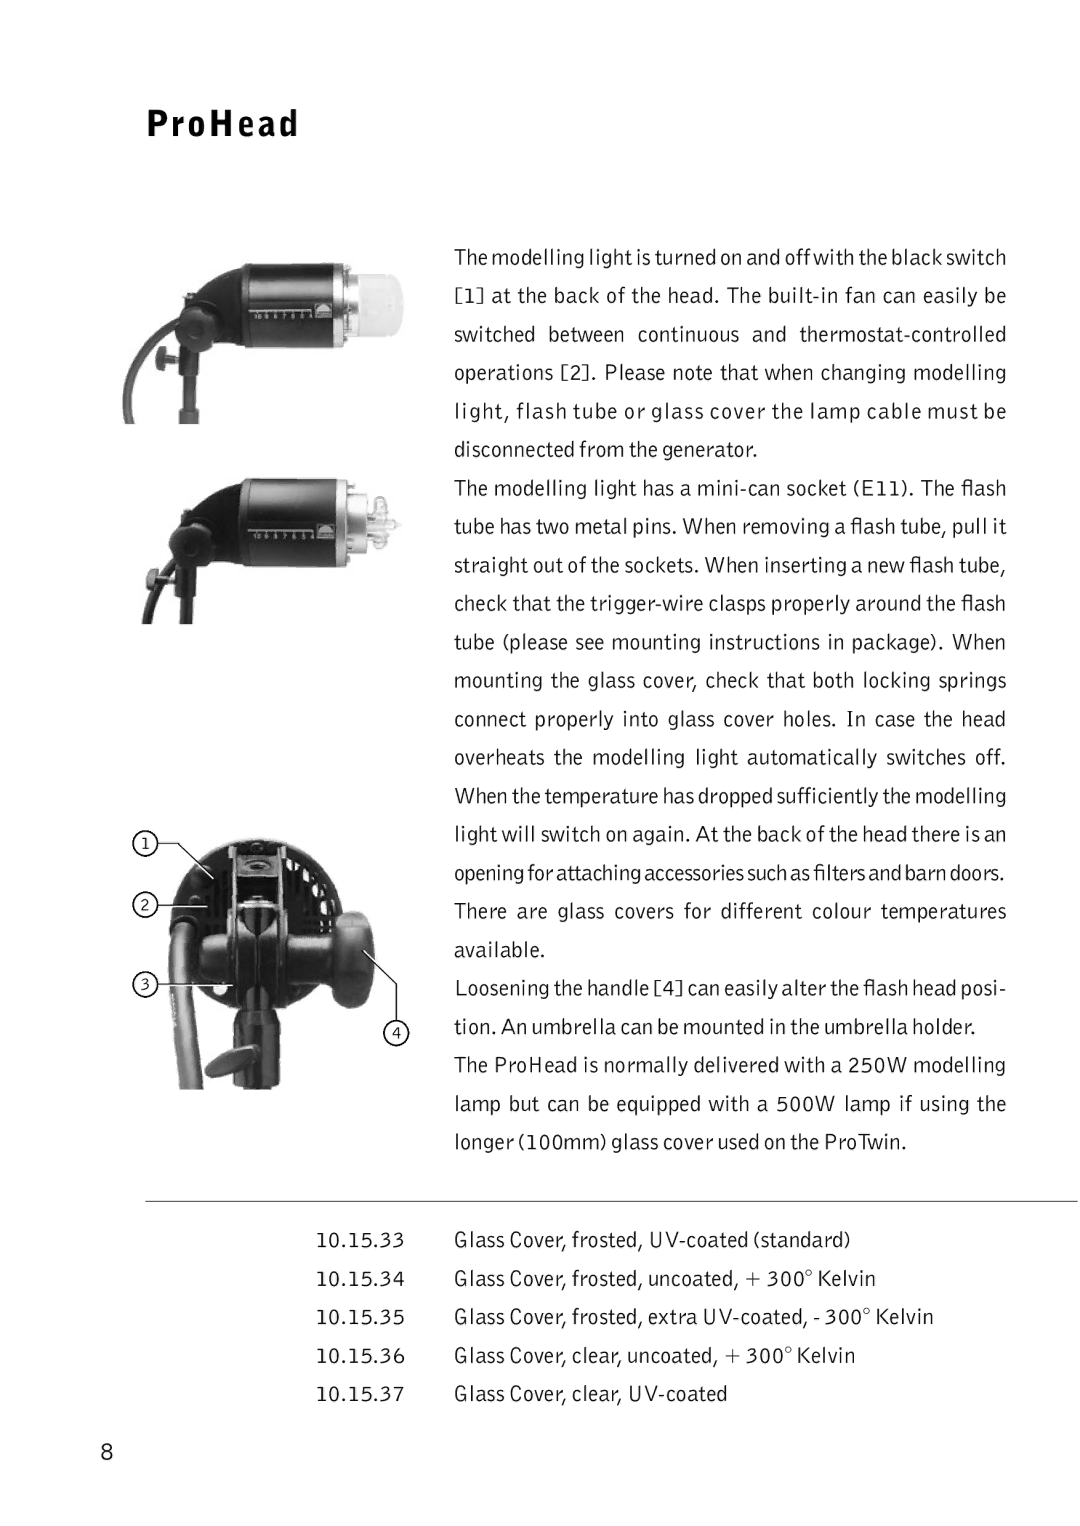
The modelling light is turned on and off with the black switch

[1]at the back of the head. The built-in fan can easily be switched between continuous and thermostat-controlled operations [2]. Please note that when changing modelling light, flash tube or glass cover the lamp cable must be disconnected from the generator.

The modelling light has a mini-can socket (E11). The flash tube has two metal pins. When removing a flash tube, pull it straight out of the sockets. When inserting a new flash tube, check that the trigger-wire clasps properly around the flash tube (please see mounting instructions in package). When mounting the glass cover, check that both locking springs connect properly into glass cover holes. In case the head overheats the modelling light automatically switches off. When the temperature has dropped sufficiently the modelling

1

light will switch on again. At the back of the head there is an


opening for attaching accessories such as filters and barn doors.

2

There are glass covers for different colour temperatures


available.

3

Loosening the handle [4] can easily alter the flash head posi-

4tion. An umbrella can be mounted in the umbrella holder. The ProHead is normally delivered with a 250W modelling lamp but can be equipped with a 500W lamp if using the longer (100mm) glass cover used on the ProTwin.

10.15.33Glass Cover, frosted, UV-coated (standard)

10.15.34Glass Cover, frosted, uncoated, + 300° Kelvin

10.15.35Glass Cover, frosted, extra UV-coated, - 300° Kelvin

10.15.36Glass Cover, clear, uncoated, + 300° Kelvin

10.15.37Glass Cover, clear, UV-coated

8

Page 8
Image 8
Profoto Pro-7 manual ProHead, Available