
PLVW1342 specifications
The PYLE Audio PLVW1342 is a versatile and vibrant 13.3-inch flip-down monitor designed for in-car entertainment. Known for its sleek design and array of features, this monitor enhances the viewing experience for passengers, making long trips enjoyable.One of the standout features of the PLVW1342 is its brilliant display. The 13.3-inch screen boasts a resolution that delivers clear and vibrant visuals, allowing passengers to enjoy movies, shows, and games with stunning detail. The flip-down capability makes it convenient for users, as it can easily be stored away when not in use. This space-saving design is ideal for various vehicle types, including SUVs, vans, and larger cars.
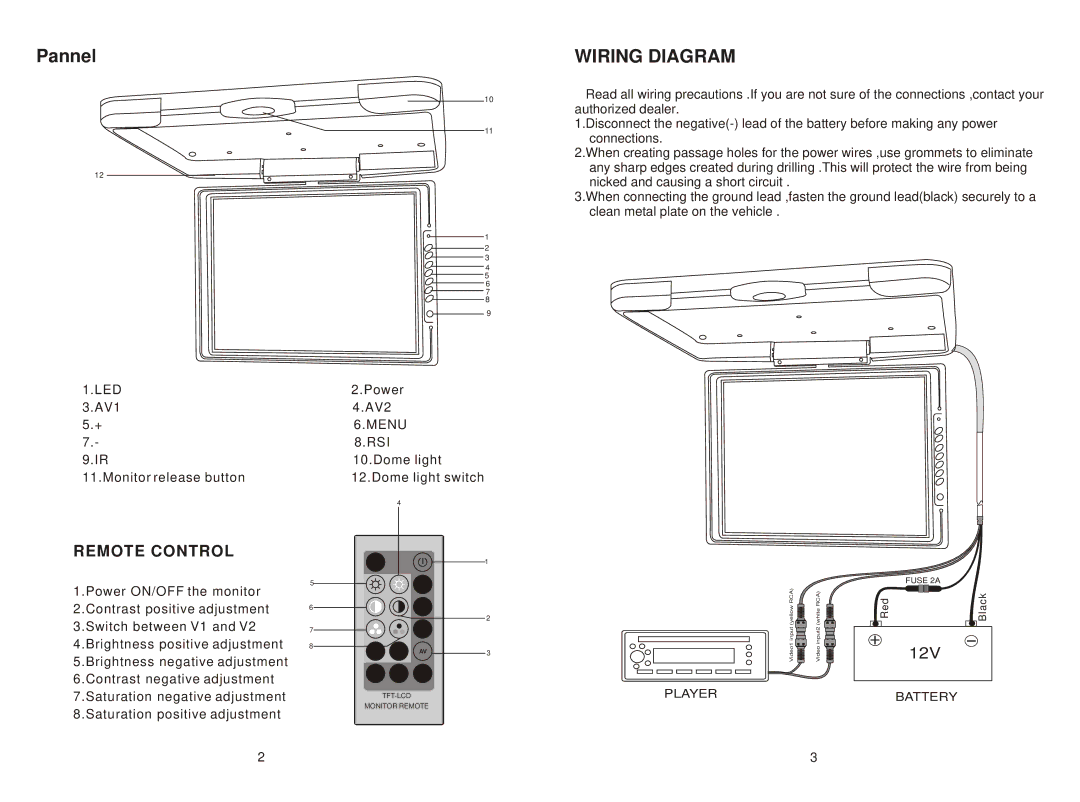
Additionally, the PLVW1342 is equipped with multiple input options, including HDMI, USB, and AV ports, enabling users to connect a variety of devices such as DVD players, gaming consoles, or even smartphones. This versatility allows for a comprehensive entertainment setup, giving users the freedom to access their favorite content seamlessly.
Another impressive feature of the PLVW1342 is its built-in theme. Users can choose from a selection of colorful LED lights that can be adjusted to suit their mood or preference. This aesthetic appeal enhances the overall experience, particularly during nighttime travel, creating an engaging and immersive environment for viewers.
The monitor also incorporates advanced audio capabilities, ensuring that sound quality matches the stunning visuals. Integrated speakers provide clear and balanced audio, while the monitor's compatibility with external speakers or wireless headphones offers various listening options to accommodate user preference.
In terms of installation, the PYLE Audio PLVW1342 is designed to be user-friendly, allowing for straightforward mounting in almost any vehicle. This ease of installation combined with its functionality makes it a favorite among car audio and video enthusiasts.
Overall, the PYLE Audio PLVW1342 stands as a prime example of innovative technology in mobile entertainment systems. Its combination of large display, versatile connectivity options, aesthetic appeal, and high-quality audio performance makes it a compelling choice for anyone looking to enhance their travel experience with immersive entertainment. Whether for a family road trip or daily commuting, the PLVW1342 ensures that passengers are entertained and engaged throughout their journey.