10.Tighten Handrail Clamp. (Diagram 7) Look underneath the upper handrail clamp and check to see that the handrail ends meet in the middle of the clamp. If necessary, realign the handrails and then, tighten the handrail clamps using the hex key (H) provided. Tighten the bolts securely.
Note: The black foam wrap on the handrails should be snug up against the handrail clamps.
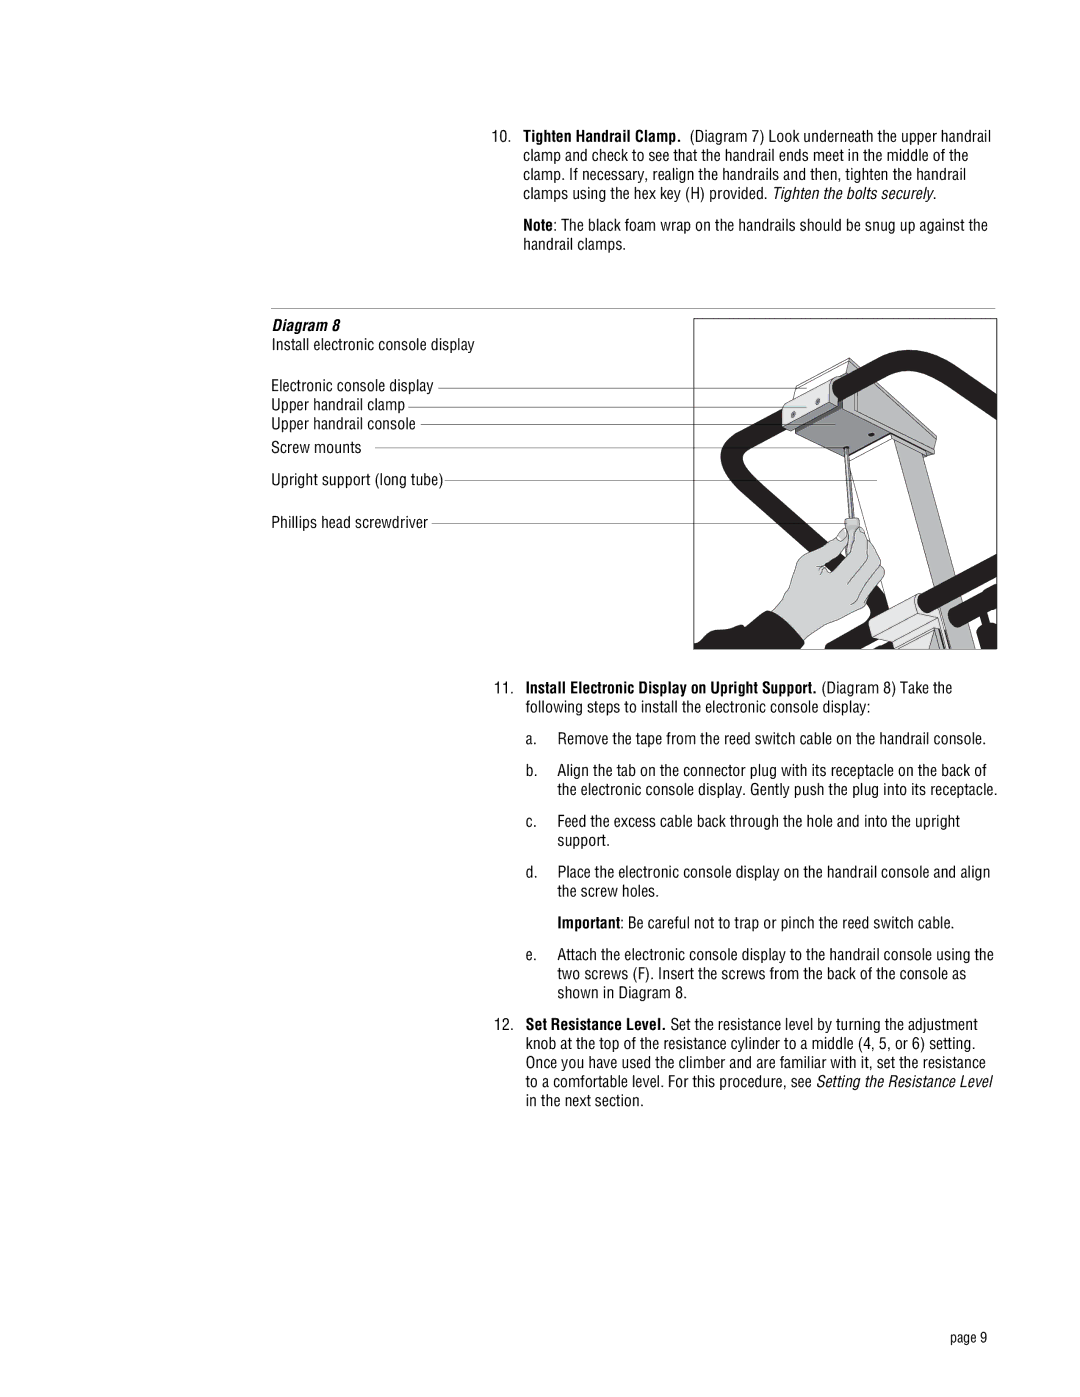
Diagram 8
Install electronic console display
Electronic console display
Upper handrail clamp
Upper handrail console
Screw mounts
Upright support (long tube)
Phillips head screwdriver
11.Install Electronic Display on Upright Support. (Diagram 8) Take the following steps to install the electronic console display:
a.Remove the tape from the reed switch cable on the handrail console.
b.Align the tab on the connector plug with its receptacle on the back of the electronic console display. Gently push the plug into its receptacle.
c.Feed the excess cable back through the hole and into the upright support.
d.Place the electronic console display on the handrail console and align the screw holes.
Important: Be careful not to trap or pinch the reed switch cable.
e.Attach the electronic console display to the handrail console using the two screws (F). Insert the screws from the back of the console as shown in Diagram 8.
12.Set Resistance Level. Set the resistance level by turning the adjustment knob at the top of the resistance cylinder to a middle (4, 5, or 6) setting. Once you have used the climber and are familiar with it, set the resistance to a comfortable level. For this procedure, see Setting the Resistance Level in the next section.
page 9
