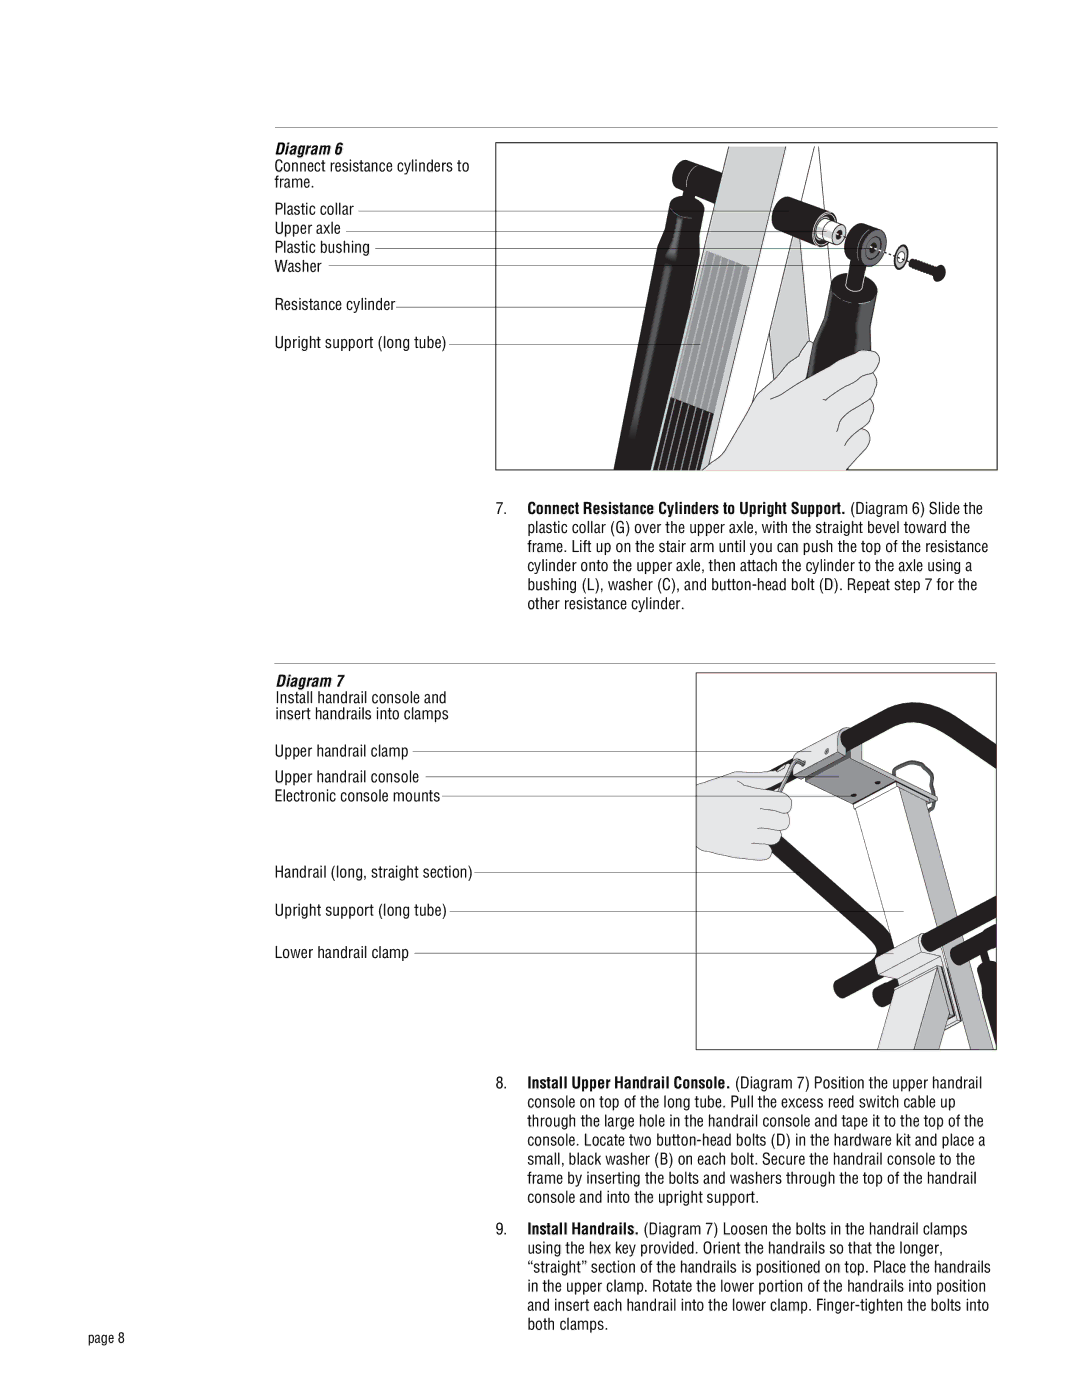
Diagram 6 |
Connect resistance cylinders to |
frame. |
Plastic collar |
Upper axle |
Plastic bushing |
Washer |
Resistance cylinder |
Upright support (long tube) |
7.Connect Resistance Cylinders to Upright Support. (Diagram 6) Slide the plastic collar (G) over the upper axle, with the straight bevel toward the frame. Lift up on the stair arm until you can push the top of the resistance cylinder onto the upper axle, then attach the cylinder to the axle using a bushing (L), washer (C), and
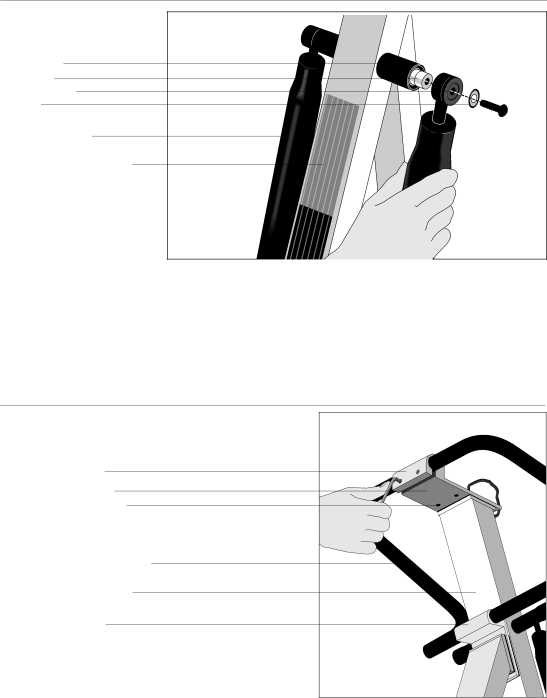
Diagram 7
Install handrail console and insert handrails into clamps
Upper handrail clamp
Upper handrail console
Electronic console mounts
Handrail (long, straight section)
Upright support (long tube)
Lower handrail clamp
8.Install Upper Handrail Console. (Diagram 7) Position the upper handrail console on top of the long tube. Pull the excess reed switch cable up through the large hole in the handrail console and tape it to the top of the console. Locate two
9.Install Handrails. (Diagram 7) Loosen the bolts in the handrail clamps using the hex key provided. Orient the handrails so that the longer, “straight” section of the handrails is positioned on top. Place the handrails in the upper clamp. Rotate the lower portion of the handrails into position and insert each handrail into the lower clamp.
page 8