Time Schedule Recording:
From the Record Setup screen, set the Rec Mode to “TIME SCHEDULE RECORD” and click “SCHEDULE” in green. This will display the Schedule menu (C2). Select the channels (cameras) that you wish to record on a schedule. The options are: All,
Select APPLY to activate your customized schedule, and then reboot the DVR.
You can also click on the DEFAULT button to use the system defaults. The system default settings are:
Hr 01:00
Hr 08:00
Hr 19:00 pm- 00:59 am : Alarm recording (Motion Detection)
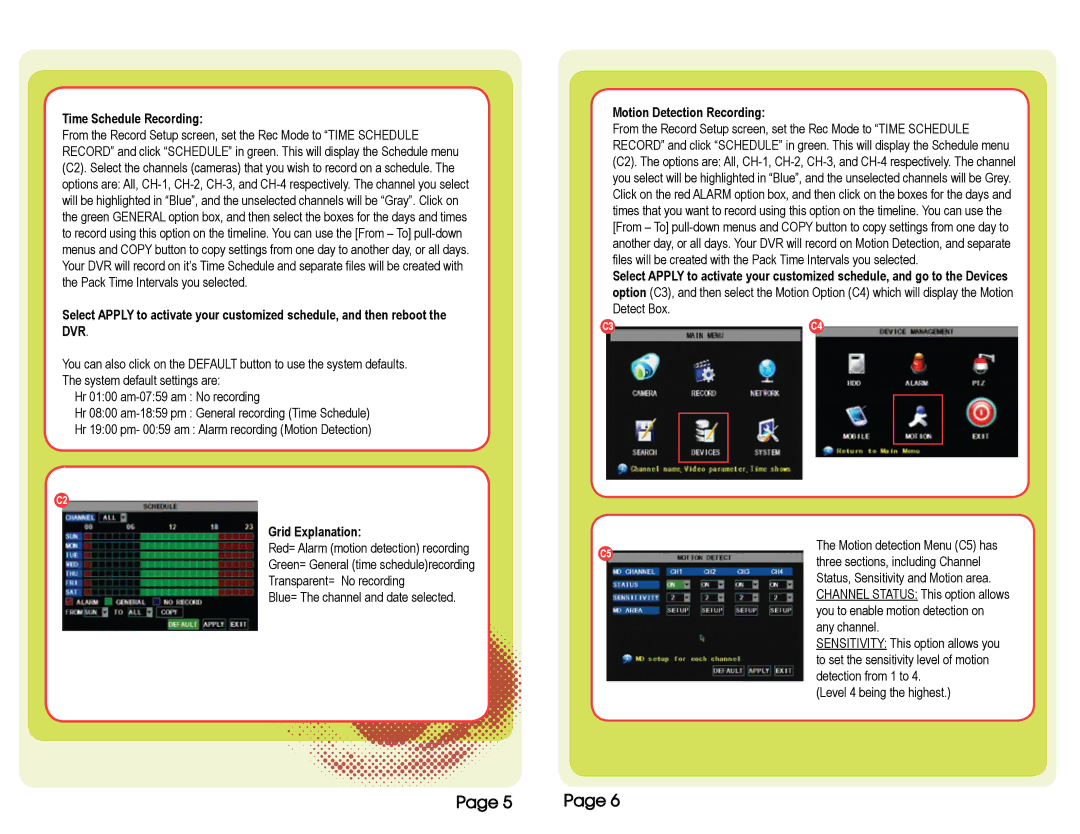
C2
Grid Explanation:
Red= Alarm (motion detection) recording
Green= General (time schedule)recording
Transparent= No recording
Blue= The channel and date selected.
Motion Detection Recording:
From the Record Setup screen, set the Rec Mode to “TIME SCHEDULE RECORD” and click “SCHEDULE” in green. This will display the Schedule menu (C2). The options are: All,
Select APPLY to activate your customized schedule, and go to the Devices option (C3), and then select the Motion Option (C4) which will display the Motion Detect Box.
C3C4
C5 | The Motion detection Menu (C5) has | |
three sections, including Channel | ||
| ||
| Status, Sensitivity and Motion area. | |
| CHANNEL STATUS: This option allows | |
| you to enable motion detection on | |
| any channel. | |
| SENSITIVITY: This option allows you | |
| to set the sensitivity level of motion | |
| detection from 1 to 4. | |
| (Level 4 being the highest.) |
Page 5 | Page 6 |