ENGLISH
CALIBRATING THE INSTRUMENT HD 9021
1)Open the instrument.
2)Connect the prods of a precision meter to the following pins on the input A (or B) connector: the positive to pin 7 (V+) and the negative to pin 6 (GND).
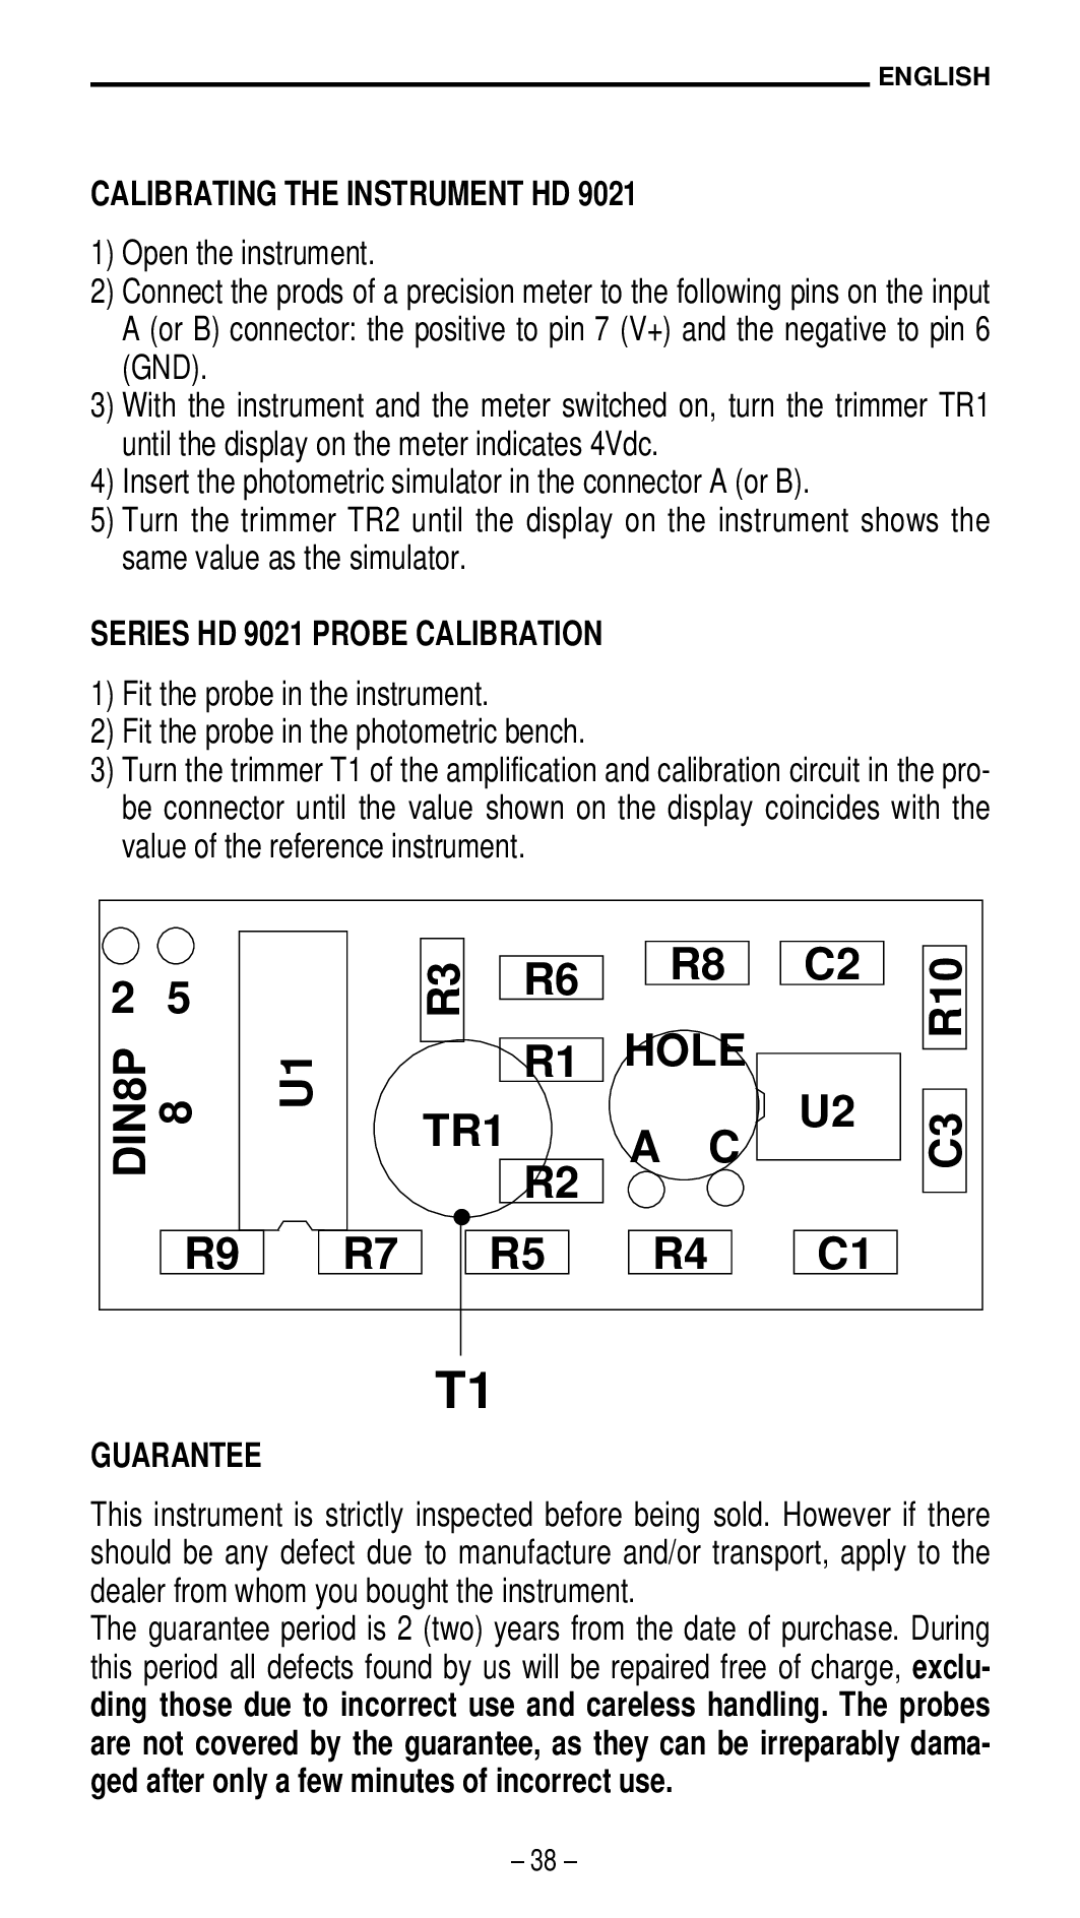
3)With the instrument and the meter switched on, turn the trimmer TR1 until the display on the meter indicates 4Vdc.
4)Insert the photometric simulator in the connector A (or B).
5)Turn the trimmer TR2 until the display on the instrument shows the same value as the simulator.
SERIES HD 9021 PROBE CALIBRATION
1)Fit the probe in the instrument.
2)Fit the probe in the photometric bench.
3)Turn the trimmer T1 of the amplification and calibration circuit in the pro- be connector until the value shown on the display coincides with the value of the reference instrument.
2 | 5 |
| R3 | R6 |
| R8 | C2 | R10 |
|
|
|
| |||||
|
|
|
|
| ||||
DIN8P |
| U1 | R1 | HOLE |
| |||
|
| U2 |
| |||||
8 | TR1 |
| A | C | C3 | |||
R2 |
| |||||||
|
| |||||||
|
|
|
| |||||
|
|
|
|
|
|
|
| |
| R9 | R7 | R5 | R4 | C1 |
| ||
|
|
| T1 |
|
|
|
|
|
GUARANTEE |
|
|
|
|
|
|
| |
This instrument is strictly inspected before being sold. However if there should be any defect due to manufacture and/or transport, apply to the dealer from whom you bought the instrument.
The guarantee period is 2 (two) years from the date of purchase. During this period all defects found by us will be repaired free of charge, exclu- ding those due to incorrect use and careless handling. The probes are not covered by the guarantee, as they can be irreparably dama- ged after only a few minutes of incorrect use.
– 38 –
