Playback a Tape | Record On aTape |

 Ready Check List
All connections are made. ![]()
![]() Your unit is plugged in.
Your unit is plugged in.
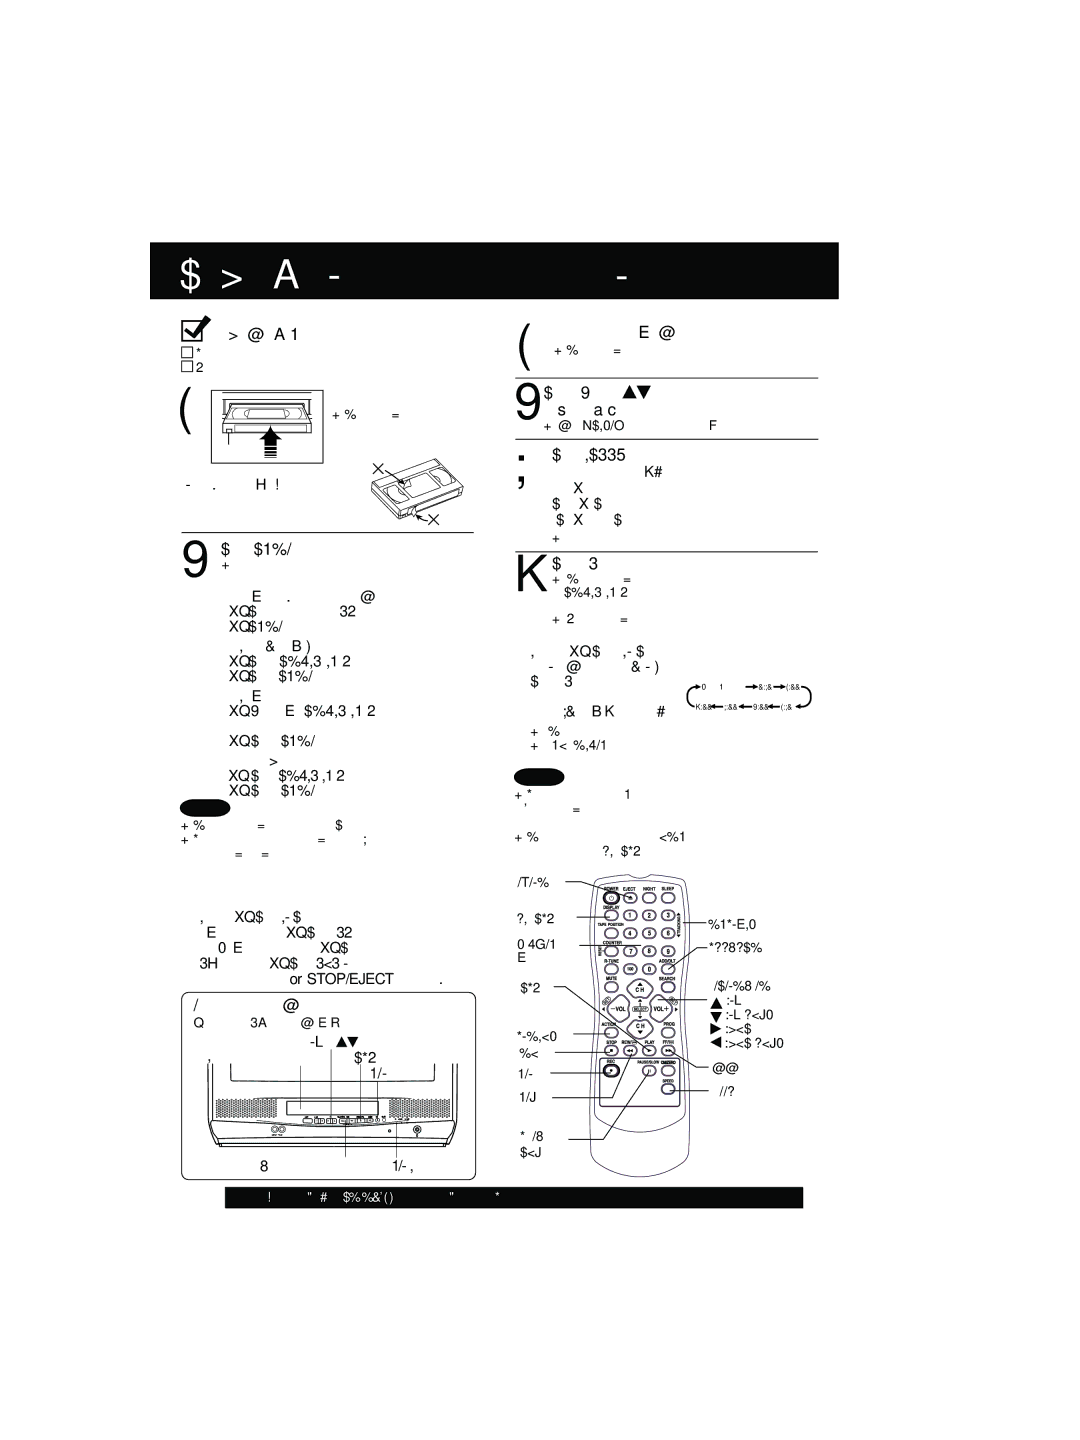
1 | Insert a cassette with record tab. |
• The unit power comes on automatically. |
1 |
Record |
tab |
To prevent tape jam, remove loose or peeling labels from tapes.
Insert a cassette.
•The unit power comes on automatically.
Press CH | or number keys |
2to select a channel. |
|
• For “LINE” input, see bottom of next page.
3 | Press SPEED | to select recording | |
speed | (see page 4). | ||
SP = Standard Play |
| ||
| LP | = Long Play |
|
| SLP = Super Long Play |
| |
| • Selected speed is displayed. | ||
2 Press PLAY.
• Playback begins if cassette has no record tab.
■Forward/Reverse scene search
=>Press FF | or REW |
=>PLAY | to release. |
■Still (Freeze) picture =>Press PAUSE/SLOW
=>Press PLAY | to release. |
■Slow Motion picture
=>Hold down PAUSE/SLOW | in | |
Still mode |
|
|
=>Press PLAY | to release. |
|
■Frame by Frame picture
=>Press PAUSE/SLOW | in Still mode | |
=>Press PLAY | to release. |
|
Notes
•These features work best in SP or SLP mode.
•After the unit is in Still or Slow mode for 3 minutes, it will switch to Stop mode automatically to protect the tape and the video head.
■Stop =>Press STOP
■ Rewind tape |
| =>Press REW | in Stop mode |
■ Fast forward tape | =>Press FF | in Stop mode | |
■ Eject tape | =>Press EJECT | on the remote | |
or STOP/EJECT on the unit.
You can operate on the unit
<Model
Insert | a | cassette. | CH |
|
| PLAY |
|
|
| ||||
|
|
|
|
|
| REC |
|
| POWER | VOL | CH | STOP/EJECT REW/ | PLAY/REPEAT FF/ REC TIMER |
■ Press to stop and/or eject tape. | REC Indicator |
4 | Press REC | to start recording. | press |
• To edit out unwanted portions, | |||
PAUSE/SLOW | to pause and resume |
| |
recording.
•You cannot view another channel during recording.
■Stop =>Press STOP
■One Touch Recording (OTR)
Press REC | repeatedly |
|
|
|
|
|
|
|
|
|
|
|
| ||
| Normal Rec | ||||||||||||||
| 0:30 | 1:00 | |||||||||||||
to set the | recording |
|
|
|
|
|
|
|
|
|
|
|
|
|
|
length (30 min - 4 | hours). | 4:00 |
| 3:00 |
|
| 2:00 |
|
| 1:30 |
| ||||
|
|
|
|
|
|
|
|
|
|
|
|
| |||
•The unit stops recording at a preset time.
•PROG TIMER indicator lights on the unit.
Notes
• After the unit has been in Rec Pause mode for 5 minutes, it will stop automatically to protect the tape and the video head.
•The remaining recording time of an OTR can be displayed by pressing DISPLAY.
EJECT
DISPLAY | TRACKING | |
| ||
NUMBER | ADD/DLT | |
Keys |
| |
PLAY | SELECT/SET | |
| :CH UP | |
| :CH DOWN | |
ACTION | :VOL UP | |
:VOL DOWN | ||
STOP | ||
FF | ||
REC | ||
| ||
REW | SPEED | |
| ||
PAUSE/ |
| |
SLOW |
|
12
For assistance, please call :