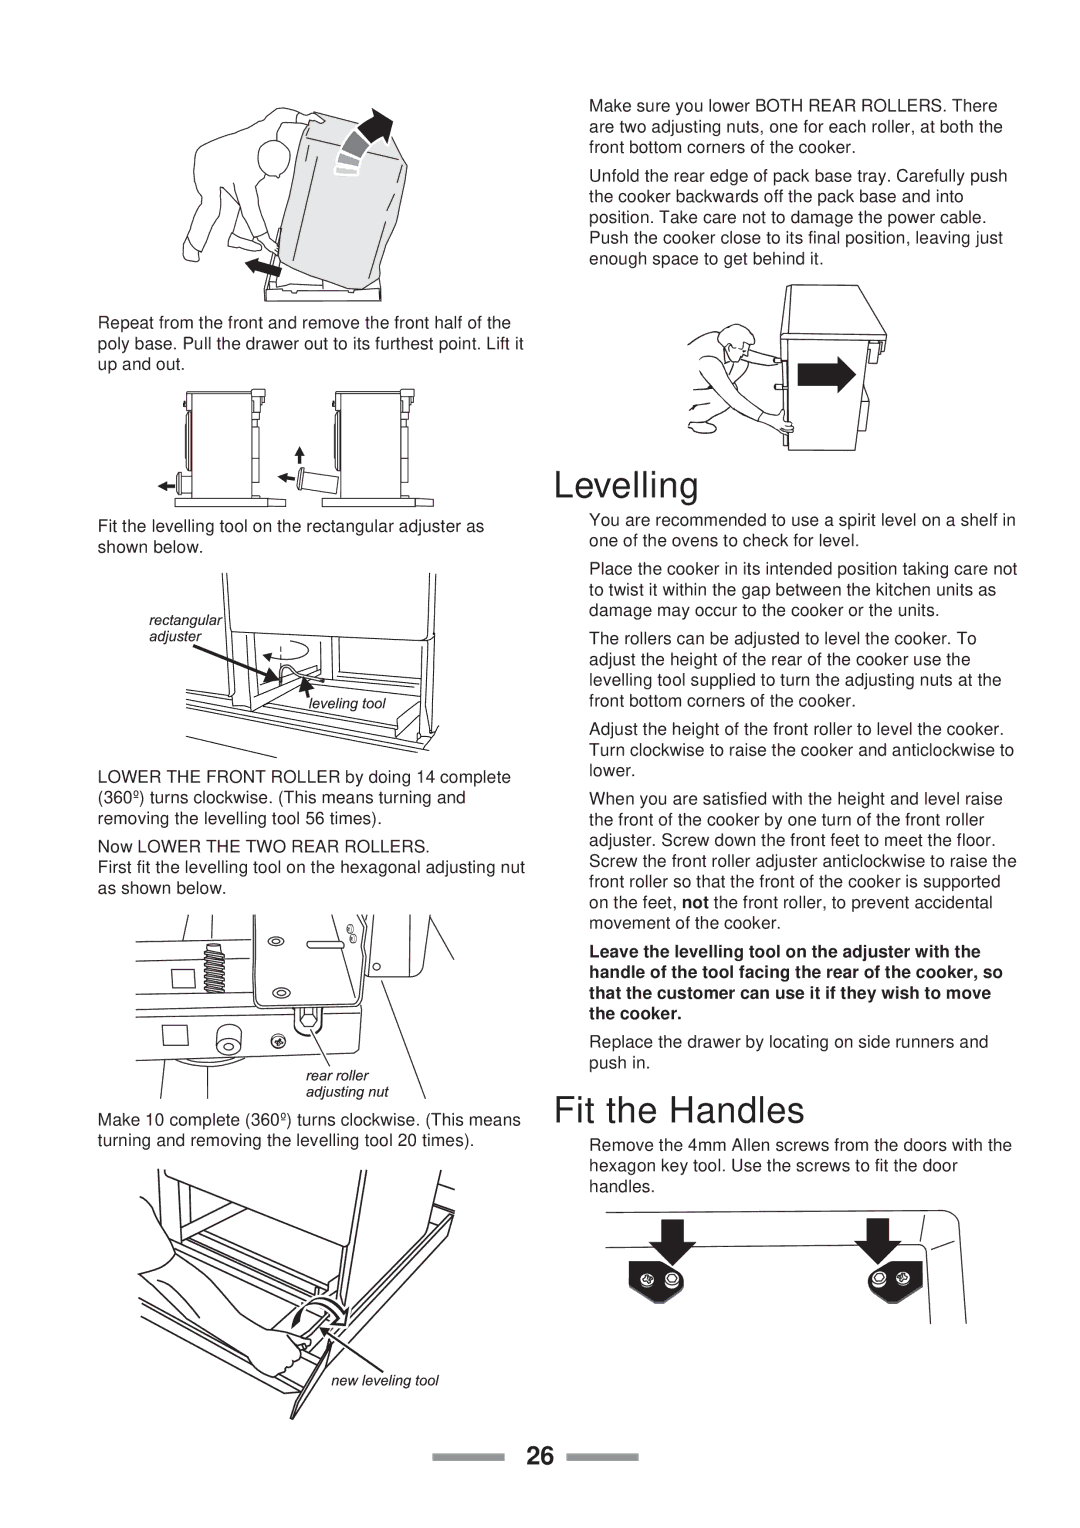
Classic 110 specifications
The Rangemaster Classic 110 is a quintessential choice for culinary enthusiasts who are seeking a combination of traditional design and modern performance in their kitchen. This freestanding range cooker brilliantly marries aesthetics with functionality, making it a centerpiece for any cooking space.One of the standout features of the Classic 110 is its impressive dual fuel system. It combines a gas hob with an electric oven, offering the best of both worlds. The gas burners provide instant heat and precise temperature control, while the electric oven allows for even baking, roasting, and grilling, thanks to its fan-assisted design. This dual system caters to a variety of cooking techniques, enhancing versatility in meal preparation.
The Classic 110 has a generous cooking capacity with five gas burners up top, including a powerful wok burner for those who love stir-frying. The hob design is not only functional but also features cast iron supports, offering stability and durability. The spacious oven compartment is divided into two distinct ovens, allowing for multiple dishes to be cooked simultaneously at different temperatures.
In addition to its cooking prowess, the Rangemaster Classic 110 is equipped with advanced technologies that enhance the cooking experience. The integrated programmable timer allows users to set cooking times, ensuring meals are prepared to perfection. Its easy-clean enamel interior makes maintaining cleanliness simple and hassle-free.
Another remarkable aspect of this range cooker is its style and finish. The Classic 110 is available in a variety of colors and finishes, including sleek chrome details and elegant handles that add a touch of sophistication to any kitchen décor. The traditional design elements combined with modern functionality create an appealing aesthetic that is both timeless and contemporary.
Safety features are also paramount in the design of the Classic 110. This range cooker incorporates flame failure devices that automatically shut off the gas supply if the flame goes out, providing peace of mind while cooking.
In summary, the Rangemaster Classic 110 is an impressive cooker that offers exceptional performance, a multitude of features, and a stylish design. Its combination of gas and electric cooking capabilities, alongside user-friendly technologies and safety measures, makes it a cherished tool for any home chef.