REMOTE CONTROL WIRING
Important Installation Notes for Remote or External Wiring Configuration
•Remote wiring must be run in separate conduit.
•Remote wiring must not be run parallel to high voltage lines.
•For runs of under 30 feet, remote wiring should have stranded conductors with a minimum of 22 AWG, 600V, cable twisting 1.5 to 2.5 and jacketed.
•For runs over 30 feet, the conductors should be a minimum of 20 AWG, 600V, cable twisting 1.5 to 2.5 inch lay that is shielded and jacketed.
•Maximum cable length is 200 feet.
•For both two- and three- wire remote systems, the provided
Note: The remote wires must be connected to the
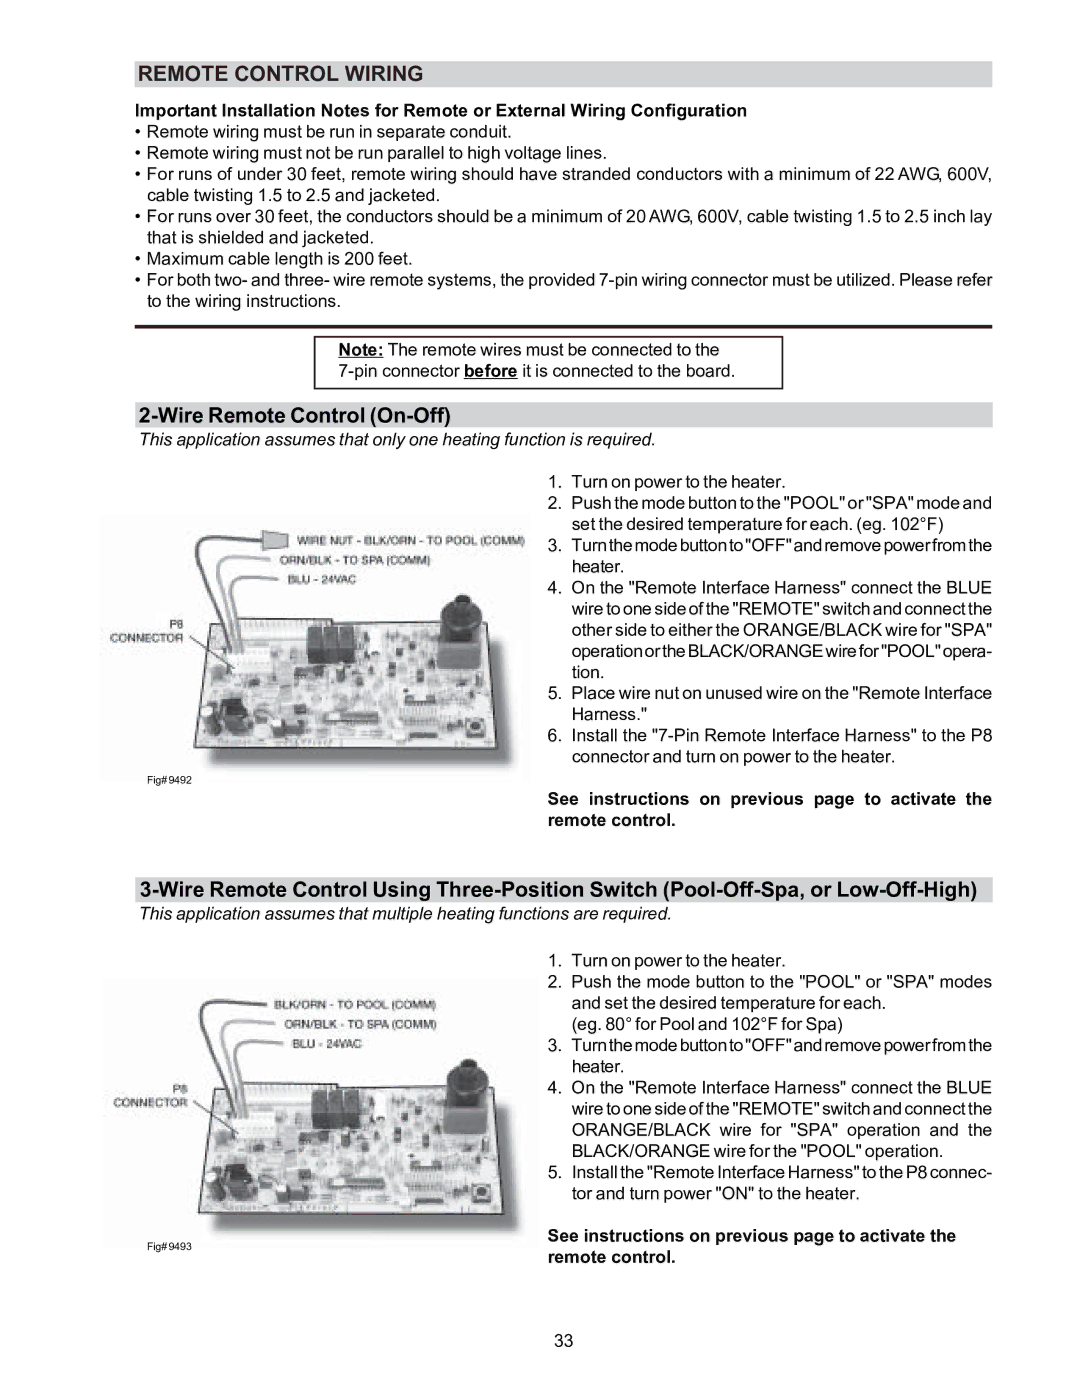
2-Wire Remote Control (On-Off)
This application assumes that only one heating function is required.
1.Turn on power to the heater.
2.Push the mode button to the "POOL" or "SPA" mode and set the desired temperature for each. (eg. 102°F)
3.Turnthemodebuttonto"OFF"andremovepowerfromthe heater.
4.On the "Remote Interface Harness" connect the BLUE wire to one side of the "REMOTE" switch and connect the other side to either the ORANGE/BLACK wire for "SPA" operationortheBLACK/ORANGEwirefor"POOL"opera- tion.
5.Place wire nut on unused wire on the "Remote Interface Harness."
6.Install the
Fig# 9492
See instructions on previous page to activate the remote control.
This application assumes that multiple heating functions are required.
Fig# 9493
1.Turn on power to the heater.
2.Push the mode button to the "POOL" or "SPA" modes and set the desired temperature for each.
(eg. 80° for Pool and 102°F for Spa)
3.Turnthemodebuttonto"OFF"andremovepowerfromthe heater.
4.On the "Remote Interface Harness" connect the BLUE wire to one side of the "REMOTE" switch and connect the ORANGE/BLACK wire for "SPA" operation and the BLACK/ORANGE wire for the "POOL" operation.
5.Install the "Remote Interface Harness" to the P8 connec- tor and turn power "ON" to the heater.
See instructions on previous page to activate the remote control.
33