ASSEMBLY AND SET-UP
❑Attaching the Front Fork
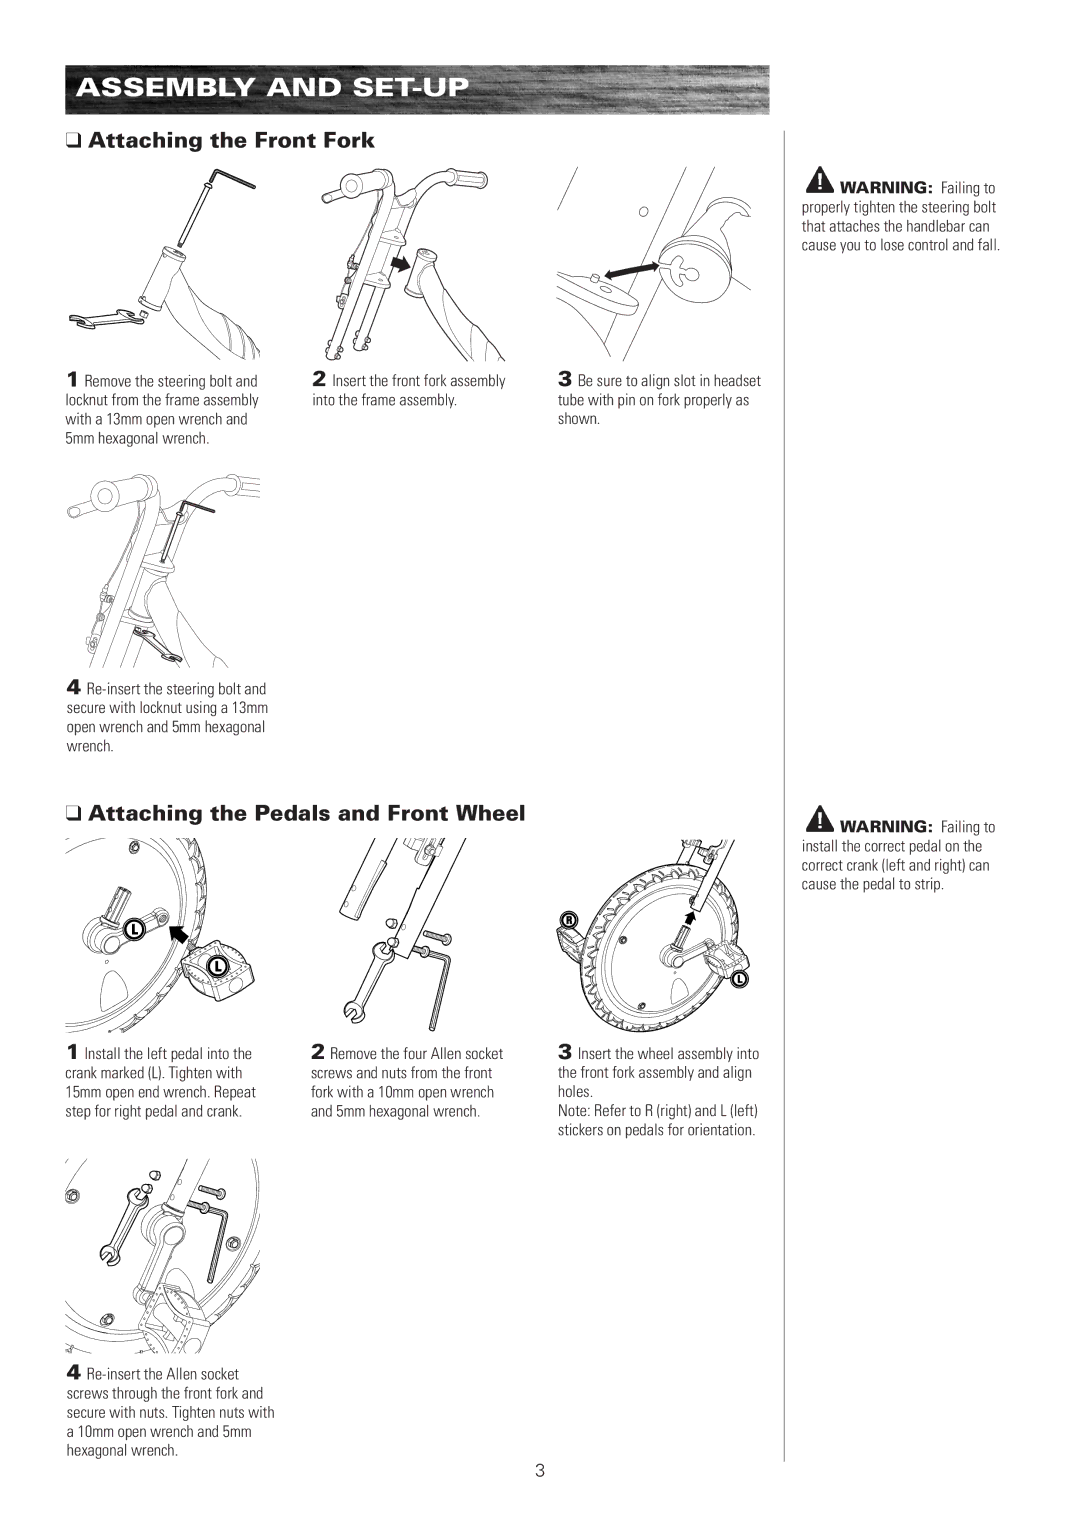
1 Remove the steering bolt and | 2 Insert the front fork assembly | 3 Be sure to align slot in headset |
locknut from the frame assembly | into the frame assembly. | tube with pin on fork properly as |
with a 13mm open wrench and |
| shown. |
5mm hexagonal wrench. |
|
|
4
❑Attaching the Pedals and Front Wheel
WARNING: Failing to properly tighten the steering bolt that attaches the handlebar can cause you to lose control and fall.
![]() WARNING: Failing to install the correct pedal on the correct crank (left and right) can cause the pedal to strip.
WARNING: Failing to install the correct pedal on the correct crank (left and right) can cause the pedal to strip.
1 Install the left pedal into the crank marked (L). Tighten with 15mm open end wrench. Repeat step for right pedal and crank.
4
2 Remove the four Allen socket | 3 Insert the wheel assembly into |
screws and nuts from the front | the front fork assembly and align |
fork with a 10mm open wrench | holes. |
and 5mm hexagonal wrench. | Note: Refer to R (right) and L (left) |
| stickers on pedals for orientation. |
3
