BEFORE YOU BEGIN
Remove contents from box. Remove the foam separators that protect the components from damage during shipping. Inspect the contents of the box for scratches in the paint, dents or kinked cables that may have occurred during shipping. Because the scooter is 95 percent assembled and packed at the factory, there should not be any problems, even if the box has a few scars or dents.
MAKE SURE POWER SWITCH IS TURNED “OFF” BEFORE CONDUCTING ANY ASSEMBLY OR MAINTENANCE PROCEDURES.
Estimated Assembly and Set-Up Time
Allow up to 10 minutes for assembly, not including initial charge time.
Allow up to 12 hours for initial charge (see page 5 for charging information)
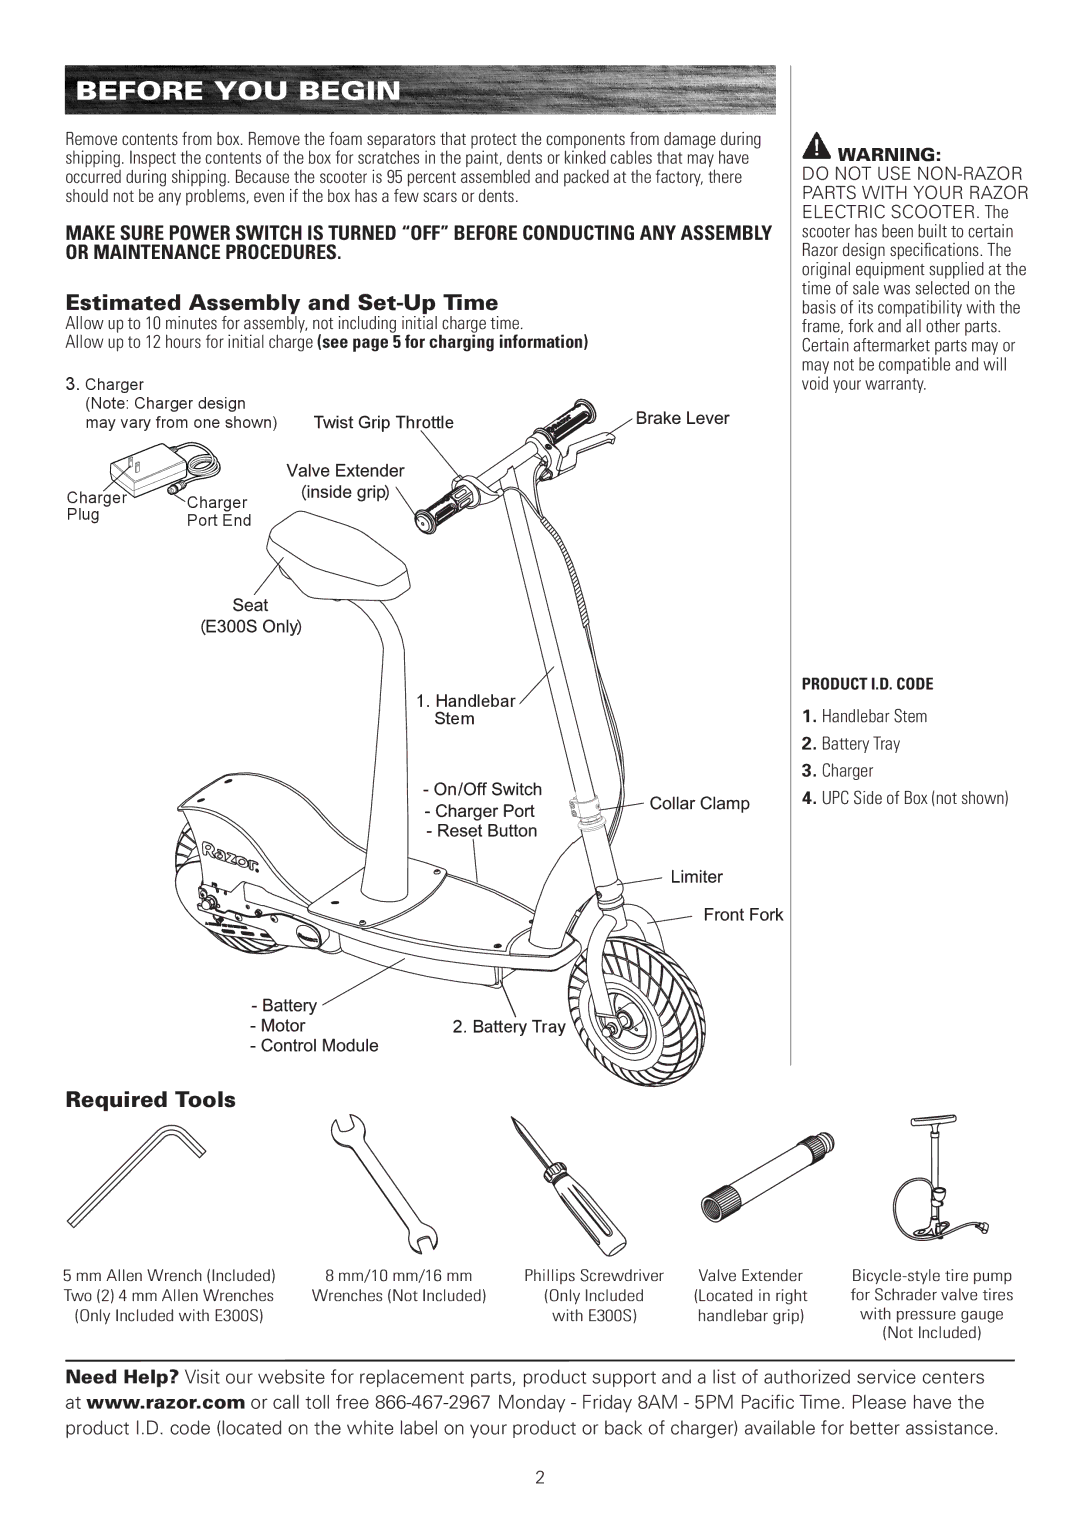
3.Charger
(Note: Charger design
may vary from one shown) | Twist Grip Throttle |
Charger | Charger |
Plug | Port End |
|
1. Handlebar 
Stem
2. Battery Tray
WARNING:
DO NOT USE
PRODUCT I.D. CODE
1.Handlebar Stem
2.Battery Tray
3.Charger
4.UPC Side of Box (not shown)
Required Tools
5 mm Allen Wrench (Included) | 8 mm/10 mm/16 mm | Phillips Screwdriver | Valve Extender | |
Two (2) 4 mm Allen Wrenches | Wrenches (Not Included) | (Only Included | (Located in right | for Schrader valve tires |
(Only Included with E300S) |
| with E300S) | handlebar grip) | with pressure gauge |
|
|
|
| (Not Included) |
Need Help? Visit our website for replacement parts, product support and a list of authorized service centers at www.razor.com or call toll free
2