Connections & Setup

Plug in the TV

Plug the flat end of the power cable into the power jack on the side of the TV. Go to page 10 for instructions on removing the jack panel door. Then plug the other end of the power cord into an appropriate wall outlet. Be sure to insert the plug completely. Do not plug into an outlet controlled by a light switch.

Note: When you first plug your TV into an outlet, the Power indicator and Backlight on the front panel will light and blink for approximately 30 seconds and then go off during the initialization of the TV. The TV can only be turned on after the Power indicator goes off. This happens every time the TV is unplugged and plugged back in.

Tip

When remote batteries are low, the component button(s) corresponding to the mode you’re in flashes when you press a button. Also, a message might appear on the TV screen and disappear within a few seconds. Press CLEAR and replace the batteries to remove the message.


ON-OFF


TV

TV


DVD

VCR

button


SATCAB

AUX AUDIO


PIP

SWAP CH. CTRL FREEZE

Put Batteries in the Remote

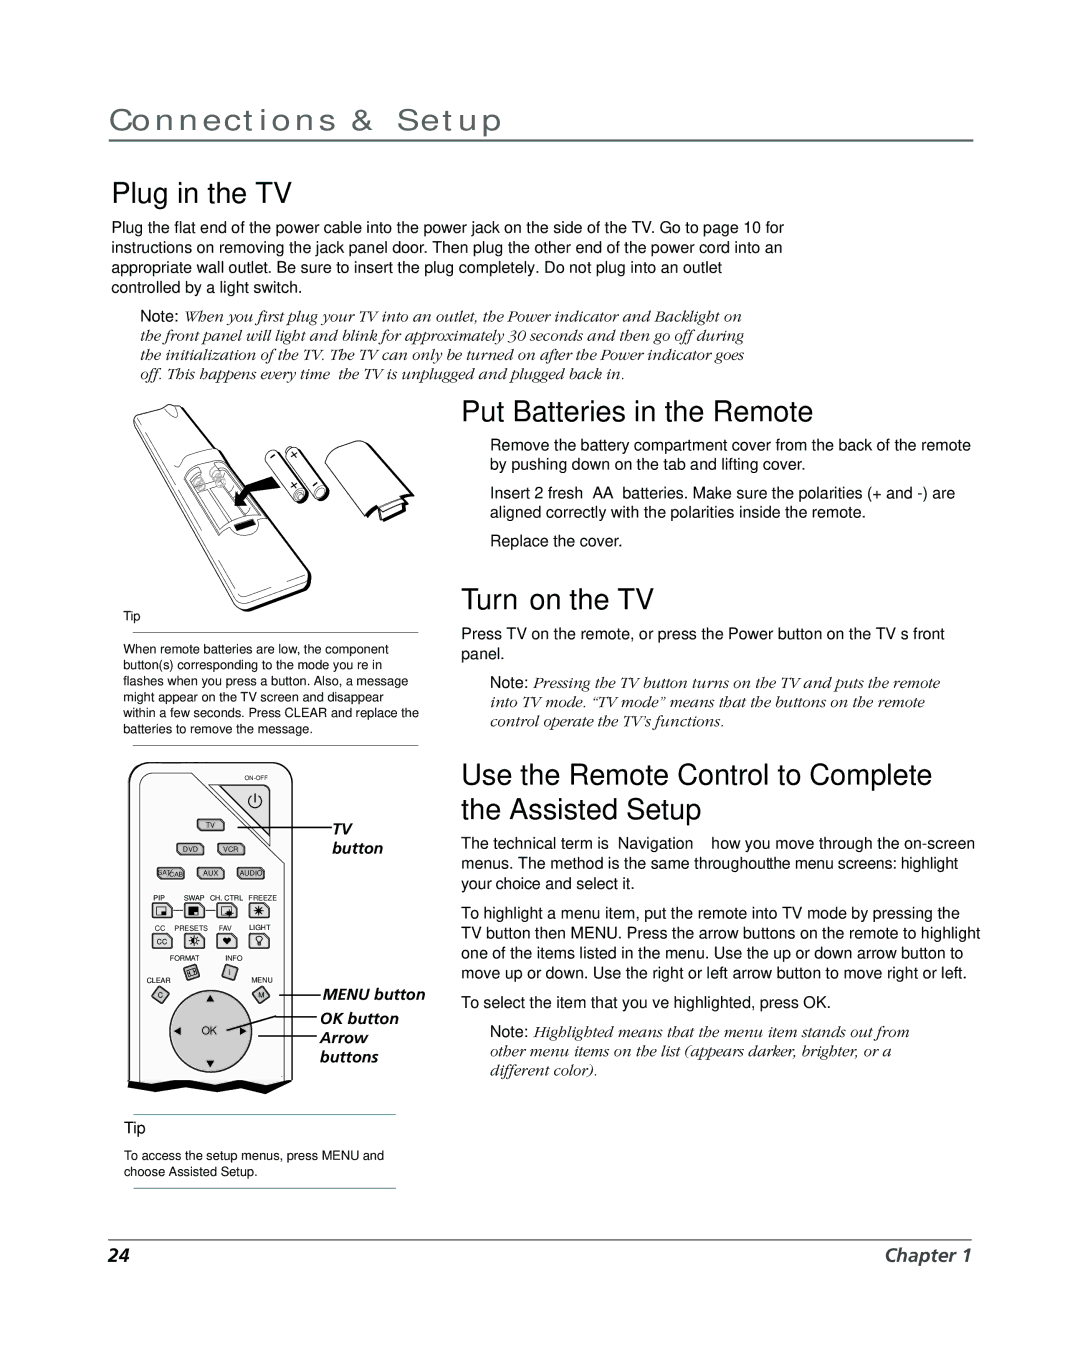
Remove the battery compartment cover from the back of the remote by pushing down on the tab and lifting cover.

Insert 2 fresh “AA” batteries. Make sure the polarities (+ and -) are aligned correctly with the polarities inside the remote.

Replace the cover.

Turn on the TV

Press TV on the remote, or press the Power button on the TV’s front panel.

Note: Pressing the TV button turns on the TV and puts the remote into TV mode. “TV mode” means that the buttons on the remote control operate the TV’s functions.

Use the Remote Control to Complete the Assisted Setup

The technical term is “Navigation” – how you move through the on-screen menus. The method is the same throughout the menu screens: highlight your choice and select it.

CC PRESETS

FAV LIGHT


CC


FORMAT

INFO


i


CLEAR

MENU

MENU button

C

M

OK


OK button


Arrow


buttons

Tip

To access the setup menus, press MENU and choose Assisted Setup.

To highlight a menu item, put the remote into TV mode by pressing the TV button then MENU. Press the arrow buttons on the remote to highlight one of the items listed in the menu. Use the up or down arrow button to move up or down. Use the right or left arrow button to move right or left.

To select the item that you’ve highlighted, press OK.

Note: Highlighted means that the menu item stands out from other menu items on the list (appears darker, brighter, or a different color).

24

Chapter 1

Page 26
Image 26
RCA DVR2080, DVR2160 manual Plug in the TV, Put Batteries in the Remote, Turn on the TV

DVR2080, DVR2160 specifications

The RCA DVR2160 and DVR2080 are advanced digital video recorders that have solidified their place in the home entertainment sector. Both models offer a compelling array of features and technologies designed to enhance user experience while delivering high-quality video recording and playback.

Starting with the RCA DVR2160, this model features a twin tuner system that allows users to watch one program while simultaneously recording another. This is particularly beneficial for families with varied viewing preferences. The DVR2160 has a storage capacity that can accommodate a significant number of hours of video content, allowing viewers to record their favorite shows without worrying about space constraints. The user interface is intuitive, making it easy to navigate through recorded content and scheduled programs.

One of the standout technologies in the DVR2160 is its digital video upscaling capability. This feature enhances standard definition content to near high-definition quality, providing an improved viewing experience for older content. Additionally, the unit supports various formats, including MPEG-2 and MPEG-4, which is essential for compatibility with different broadcasting standards.

Moving on to the RCA DVR2080, this model is a more budget-friendly option but doesn't skimp on essential features. The DVR2080 also boasts a twin tuner system, enabling simultaneous viewing and recording, similar to its counterpart. The storage capacity, while slightly lower than the DVR2160, still offers ample recording time for regular users.

One of the key characteristics of the DVR2080 is its user-friendly scheduling feature, which enables users to set recordings in advance with ease. This model also includes an electronic program guide that allows viewers to browse through available programming and set recordings with just a few clicks.

Both DVR models come equipped with HDMI outputs, ensuring high-quality video transmission to compatible TVs. They also support USB connections, allowing users to expand their storage or connect to additional devices easily.

In conclusion, the RCA DVR2160 and DVR2080 provide a versatile and user-friendly experience for anyone looking to take control of their viewing habits. With their dual tuner systems, ample storage, and advanced technologies, these DVRs are committed to making every viewer's experience enjoyable and hassle-free. Whether you are a casual viewer or a dedicated binge-watcher, RCA's DVR options cater to a variety of needs.