RS2047EN 3/1/06 1:53 PM Page 10
Display
Quick Start
EN
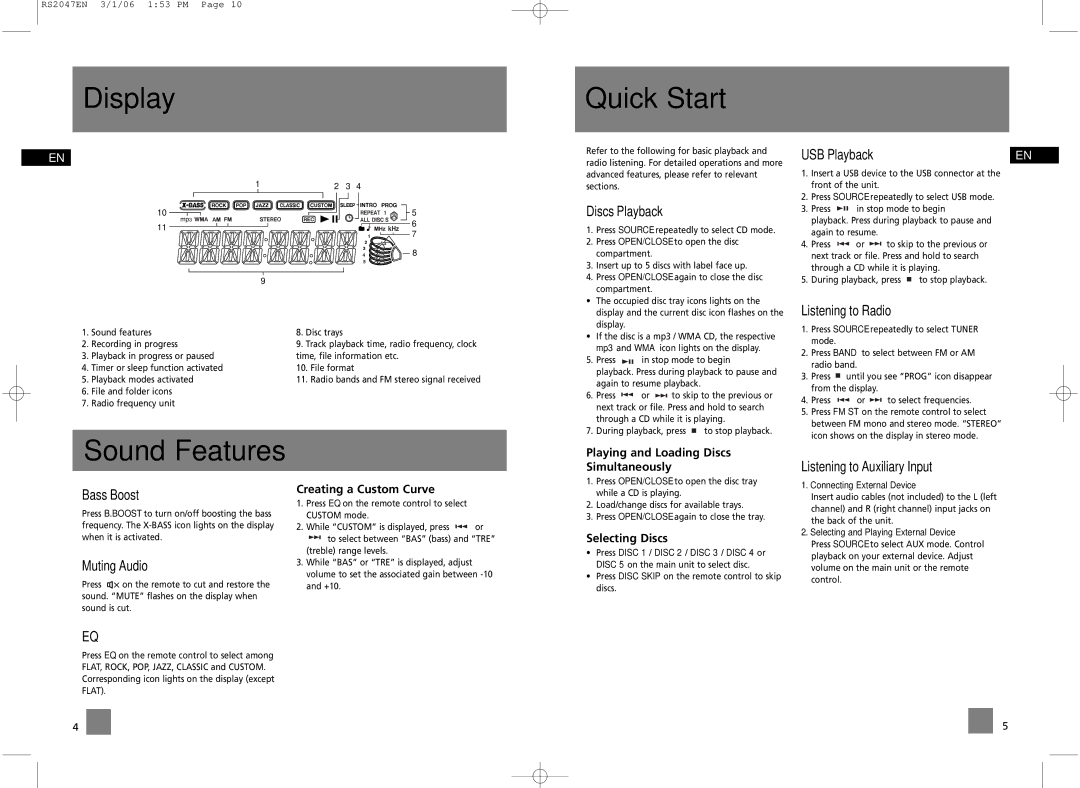
1 | 2 | 3 | 4 |
10 |
|
| 5 |
11 |
|
| 6 |
|
| 7 | |
|
|
| |
|
|
| 8 |
|
| 9 |
|
|
1. | Sound features | 8. | Disc trays | |
2. | Recording in progress | 9. | Track playback time, radio frequency, clock | |
3. | Playback in progress or paused | time, file information etc. | ||
4. | Timer or sleep function activated | 10. | File format | |
5. | Playback modes activated | 11. | Radio bands and FM stereo signal received | |
6.File and folder icons
7.Radio frequency unit
Sound Features
Refer to the following for basic playback and radio listening. For detailed operations and more advanced features, please refer to relevant sections.
Discs Playback
1.Press SOURCE repeatedly to select CD mode.
2.Press OPEN/CLOSE to open the disc compartment.
3.Insert up to 5 discs with label face up.
4.Press OPEN/CLOSE again to close the disc compartment.
•The occupied disc tray icons lights on the display and the current disc icon flashes on the display.
•If the disc is a mp3 / WMA CD, the respective mp3 and WMA icon lights on the display.
5. Press ![]()
![]()
![]() in stop mode to begin playback. Press during playback to pause and again to resume playback.
in stop mode to begin playback. Press during playback to pause and again to resume playback.
6.Press ![]()
![]() or
or ![]()
![]() to skip to the previous or next track or file. Press and hold to search through a CD while it is playing.
to skip to the previous or next track or file. Press and hold to search through a CD while it is playing.
7.During playback, press ![]() to stop playback.
to stop playback.
Playing and Loading Discs
Simultaneously
USB Playback | EN |
1.Insert a USB device to the USB connector at the front of the unit.
2.Press SOURCE repeatedly to select USB mode.
3. Press ![]()
![]()
![]() in stop mode to begin playback. Press during playback to pause and again to resume.
in stop mode to begin playback. Press during playback to pause and again to resume.
4.Press ![]()
![]() or
or ![]()
![]() to skip to the previous or next track or file. Press and hold to search through a CD while it is playing.
to skip to the previous or next track or file. Press and hold to search through a CD while it is playing.
5.During playback, press ![]() to stop playback.
to stop playback.
Listening to Radio
1.Press SOURCE repeatedly to select TUNER mode.
2.Press BAND to select between FM or AM radio band.
3.Press ![]() until you see “PROG” icon disappear from the display.
until you see “PROG” icon disappear from the display.
4.Press ![]()
![]() or
or ![]()
![]() to select frequencies.
to select frequencies.
5.Press FM ST on the remote control to select between FM mono and stereo mode. “STEREO” icon shows on the display in stereo mode.
Listening to Auxiliary Input
Bass Boost
Press B.BOOST to turn on/off boosting the bass frequency. The
Muting Audio
Press ![]() on the remote to cut and restore the sound. “MUTE” flashes on the display when sound is cut.
on the remote to cut and restore the sound. “MUTE” flashes on the display when sound is cut.
Creating a Custom Curve
1.Press EQ on the remote control to select CUSTOM mode.
2.While “CUSTOM” is displayed, press ![]()
![]() or
or
![]()
![]() to select between “BAS” (bass) and “TRE” (treble) range levels.
to select between “BAS” (bass) and “TRE” (treble) range levels.
3.While “BAS” or “TRE” is displayed, adjust volume to set the associated gain between
1.Press OPEN/CLOSE to open the disc tray while a CD is playing.
2.Load/change discs for available trays.
3.Press OPEN/CLOSE again to close the tray.
Selecting Discs
•Press DISC 1 / DISC 2 / DISC 3 / DISC 4 or DISC 5 on the main unit to select disc.
•Press DISC SKIP on the remote control to skip discs.
1.Connecting External Device
Insert audio cables (not included) to the L (left channel) and R (right channel) input jacks on the back of the unit.
2.Selecting and Playing External Device Press SOURCE to select AUX mode. Control playback on your external device. Adjust volume on the main unit or the remote control.
EQ
Press EQ on the remote control to select among FLAT, ROCK, POP, JAZZ, CLASSIC and CUSTOM. Corresponding icon lights on the display (except FLAT).
4
5
