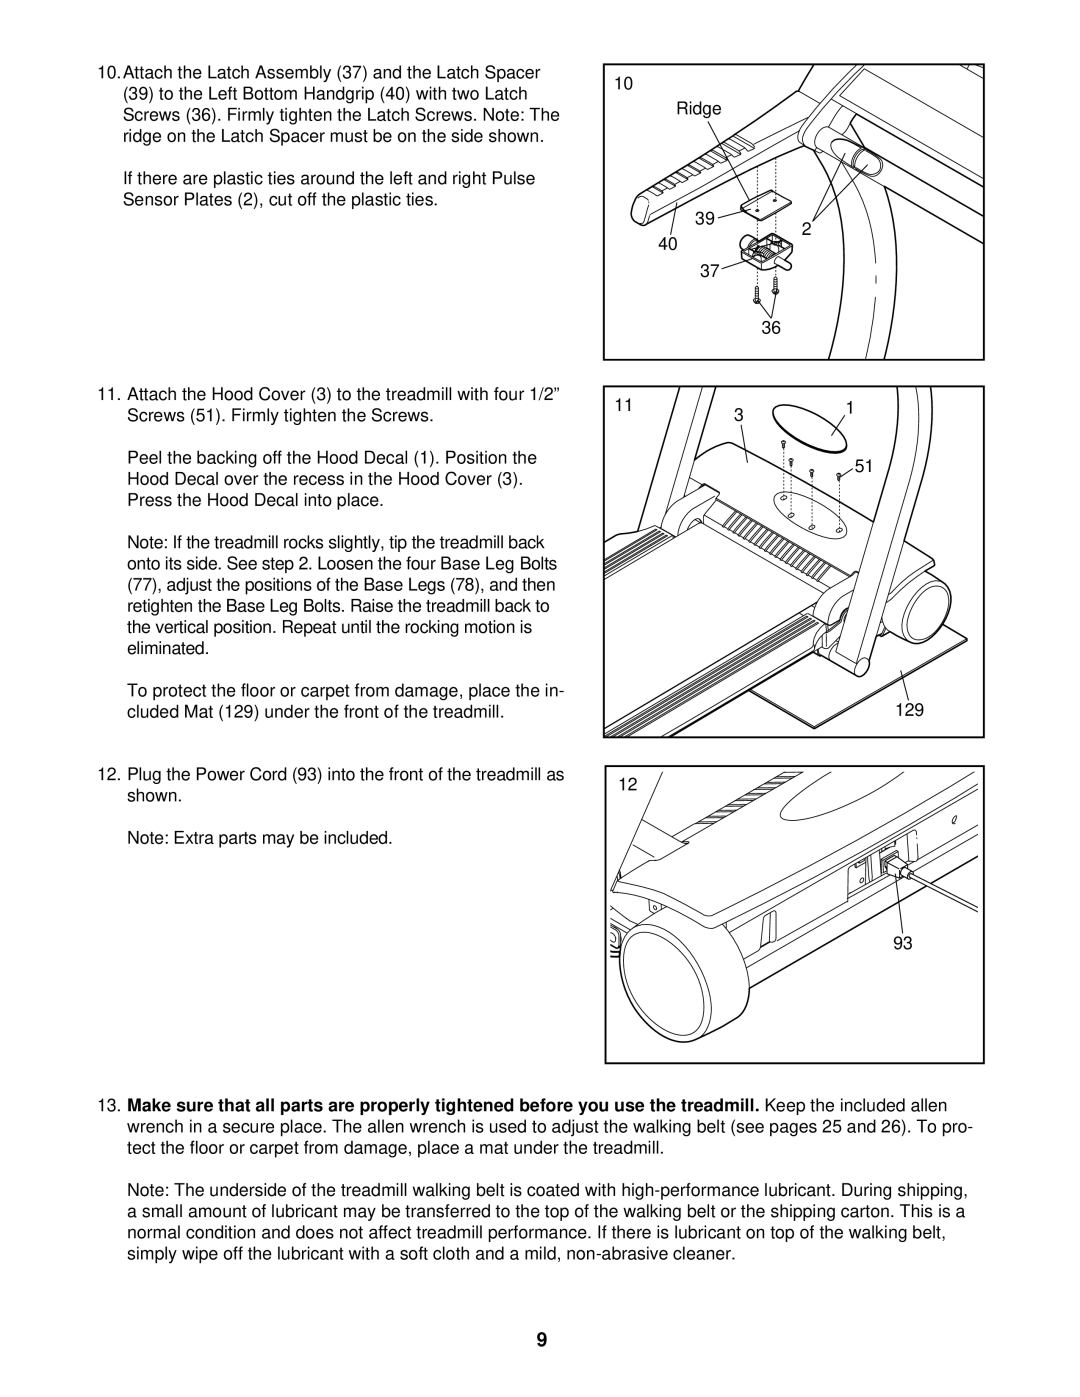
10.Attach the Latch Assembly (37) and the Latch Spacer
(39)to the Left Bottom Handgrip (40) with two Latch Screws (36). Firmly tighten the Latch Screws. Note: The ridge on the Latch Spacer must be on the side shown.
If there are plastic ties around the left and right Pulse
Sensor Plates (2), cut off the plastic ties.
11.Attach the Hood Cover (3) to the treadmill with four 1/2” Screws (51). Firmly tighten the Screws.
Peel the backing off the Hood Decal (1). Position the
Hood Decal over the recess in the Hood Cover (3).
Press the Hood Decal into place.
Note: If the treadmill rocks slightly, tip the treadmill back |
| ||
onto its side. See step 2. Loosen the four B |
| ase Leg | Bolts |
(77), adjust the positions of the | Base | Legs (78), and then | |
retighten the Base Leg Bolts. Raise the treadmill back to the vertical position. Repeat until the rocking motion is eliminated.
To protect the floor or carpet from damage, place the in- cluded Mat (129) under the front of the treadmill.
12.Plug the Power Cord (93) into the front of the treadmill as shown.
Note: Extra parts may be included.
10 |
|
|
|
| Ridge |
|
|
| 39 |
| 2 |
| 40 |
| |
|
|
| |
| 37 |
|
|
|
|
| 36 |
11 |
| 3 | 1 |
|
|
| |
|
|
| 51 |
|
|
| 129 |
12 |
|
|
|
|
|
| 93 |
13. Make sure that all parts are properly tightened before you use the treadmill. | Keep the included allen |
wrench in a secure place. The allen wrench is used to adjust the walking belt (see pages 25 and 26). To pro- |
|
tect the floor or carpet from damage, place a mat under the treadmill. |
|
Note: The underside of the treadmill walking belt is coated with |
|
a small amount of lubricant may be transferred to the top of the walking belt or the shipping carton. This is a |
|
normal condition and does not affect treadmill performance. If there is lubricant on top of the walking belt, |
|
simply wipe off the lubricant with a soft cloth and a mild, |
|
9