PROBLEM: The walking belt is
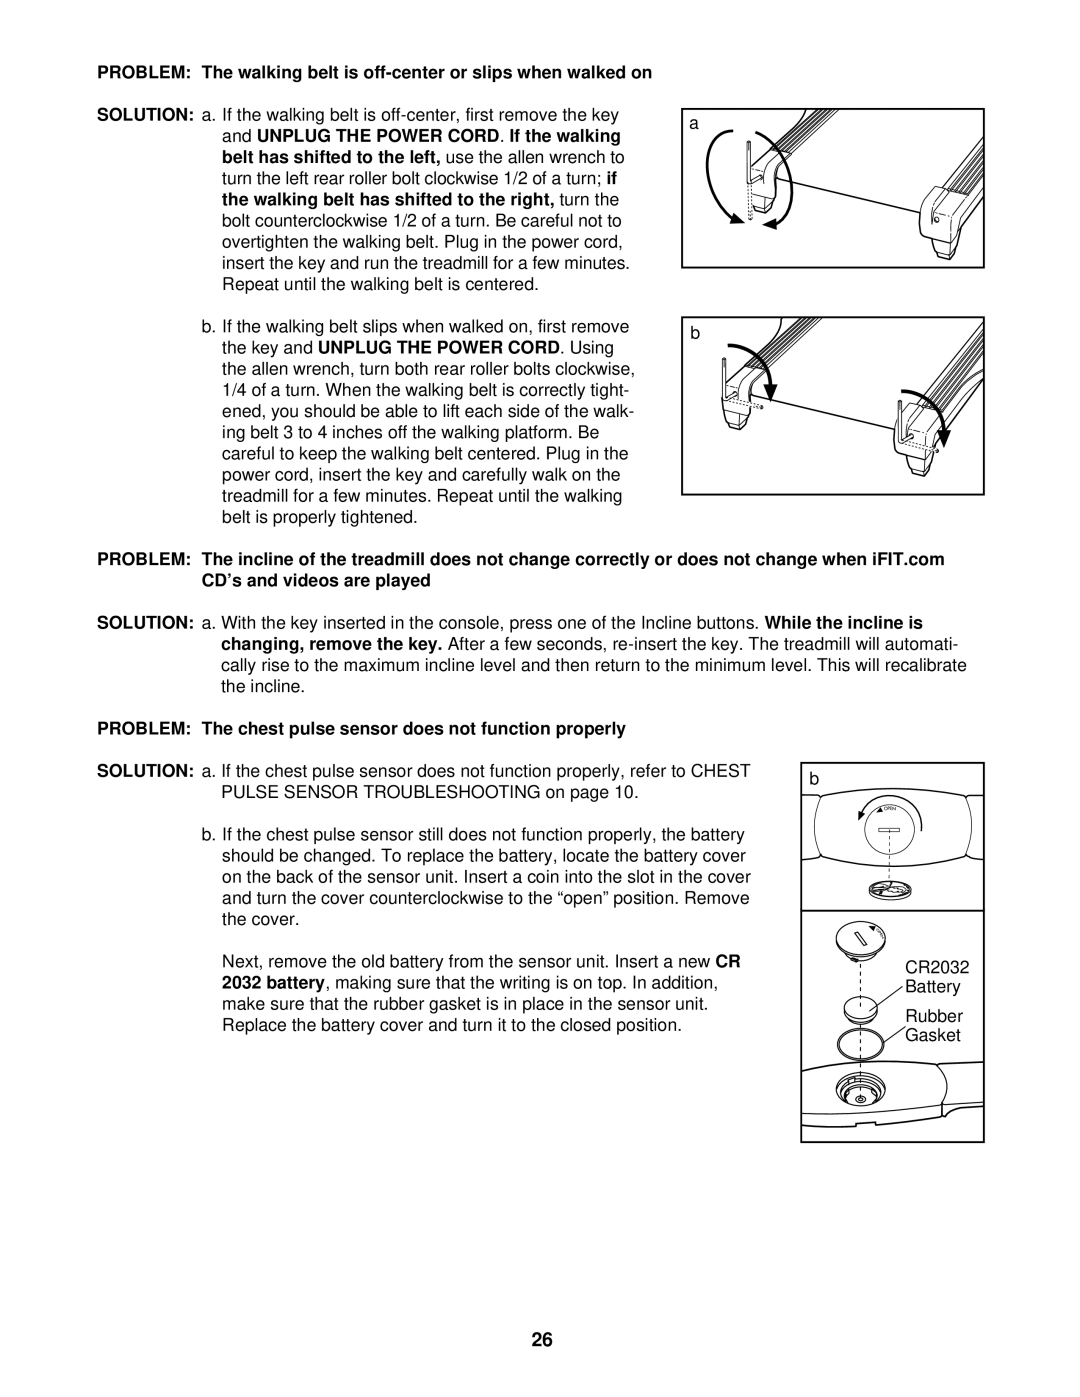
SOLUTION: | a. If the walking belt is |
| |
| and UNPLUG THE POWER CORD | . If the walking |
|
| belt has shifted to the left, | use the allen wrench to |
|
| turn the left rear roller bolt clockwise 1/2 of a turn; | if | |
| the walking belt has shifted to the right, | turn the |
|
| bolt counterclockwise 1/2 of a turn. Be careful not to |
| |
| overtighten the walking belt. Plug in the power cord, |
| |
| insert the key and run the treadmill for a few minutes. |
| |
| Repeat until the walking belt is centered. |
|
|
b. If the walking belt slips when walked on, first remove
the key and UNPLUG THE POWER CORD . Using the allen wrench, turn both rear roller bolts clockwise,
1/4 of a turn. When the walking belt is correctly tight- ened, you should be able to lift each side of the walk- ing belt 3 to 4 inches off the walking platform. Be careful to keep the walking belt centered. Plug in the power cord, insert the key and carefully walk on the treadmill for a few minutes. Repeat until the walking
belt is properly tightened.
a |
b |
PROBLEM: The incline of the treadmill does not change correctly or does not change when iFIT.com
CD’s and videos are played
SOLUTION: | a. With the key inserted in the console, press one of the Incline buttons. | While the incline is | |
| changing, remove the key. | After a few seconds, | |
| cally rise to the maximum incline level and then return to the minimum level. This will recalibrate |
| |
| the incline. |
|
|
PROBLEM: The chest pulse sensor does not function properly
SOLUTION: | a. If the chest pulse sensor does not function properly, refer to CHEST |
| |
| PULSE SENSOR TROUBLESHOOTING on page 10. |
| |
| b. If the chest pulse sensor still does not function properly, the battery |
| |
| should be changed. To replace the battery, locate the battery cover |
| |
| on the back of the sensor unit. Insert a coin into the slot in the cover |
| |
| and turn the cover counterclockwise to the “open” position. Remove |
| |
| the cover. |
|
|
| Next, remove the old battery from the sensor unit. Insert a new | CR | |
| 2032 battery | , making sure that the writing is on top. In addition, |
|
make sure that the rubber gasket is in place in the sensor unit. Replace the battery cover and turn it to the closed position.
b
CR2032
Battery
Rubber
Gasket
26
