ATTACHING RUBBER PAD
1.Slip top of rubber pad over plug at rear of tool body (see Figure 5, page 19).
2.Press rubber pad into place.
3.Tighten screw on back of rubber pad with 5mm Allen wrench.
ASSEMBLING BARREL ASSEMBLY
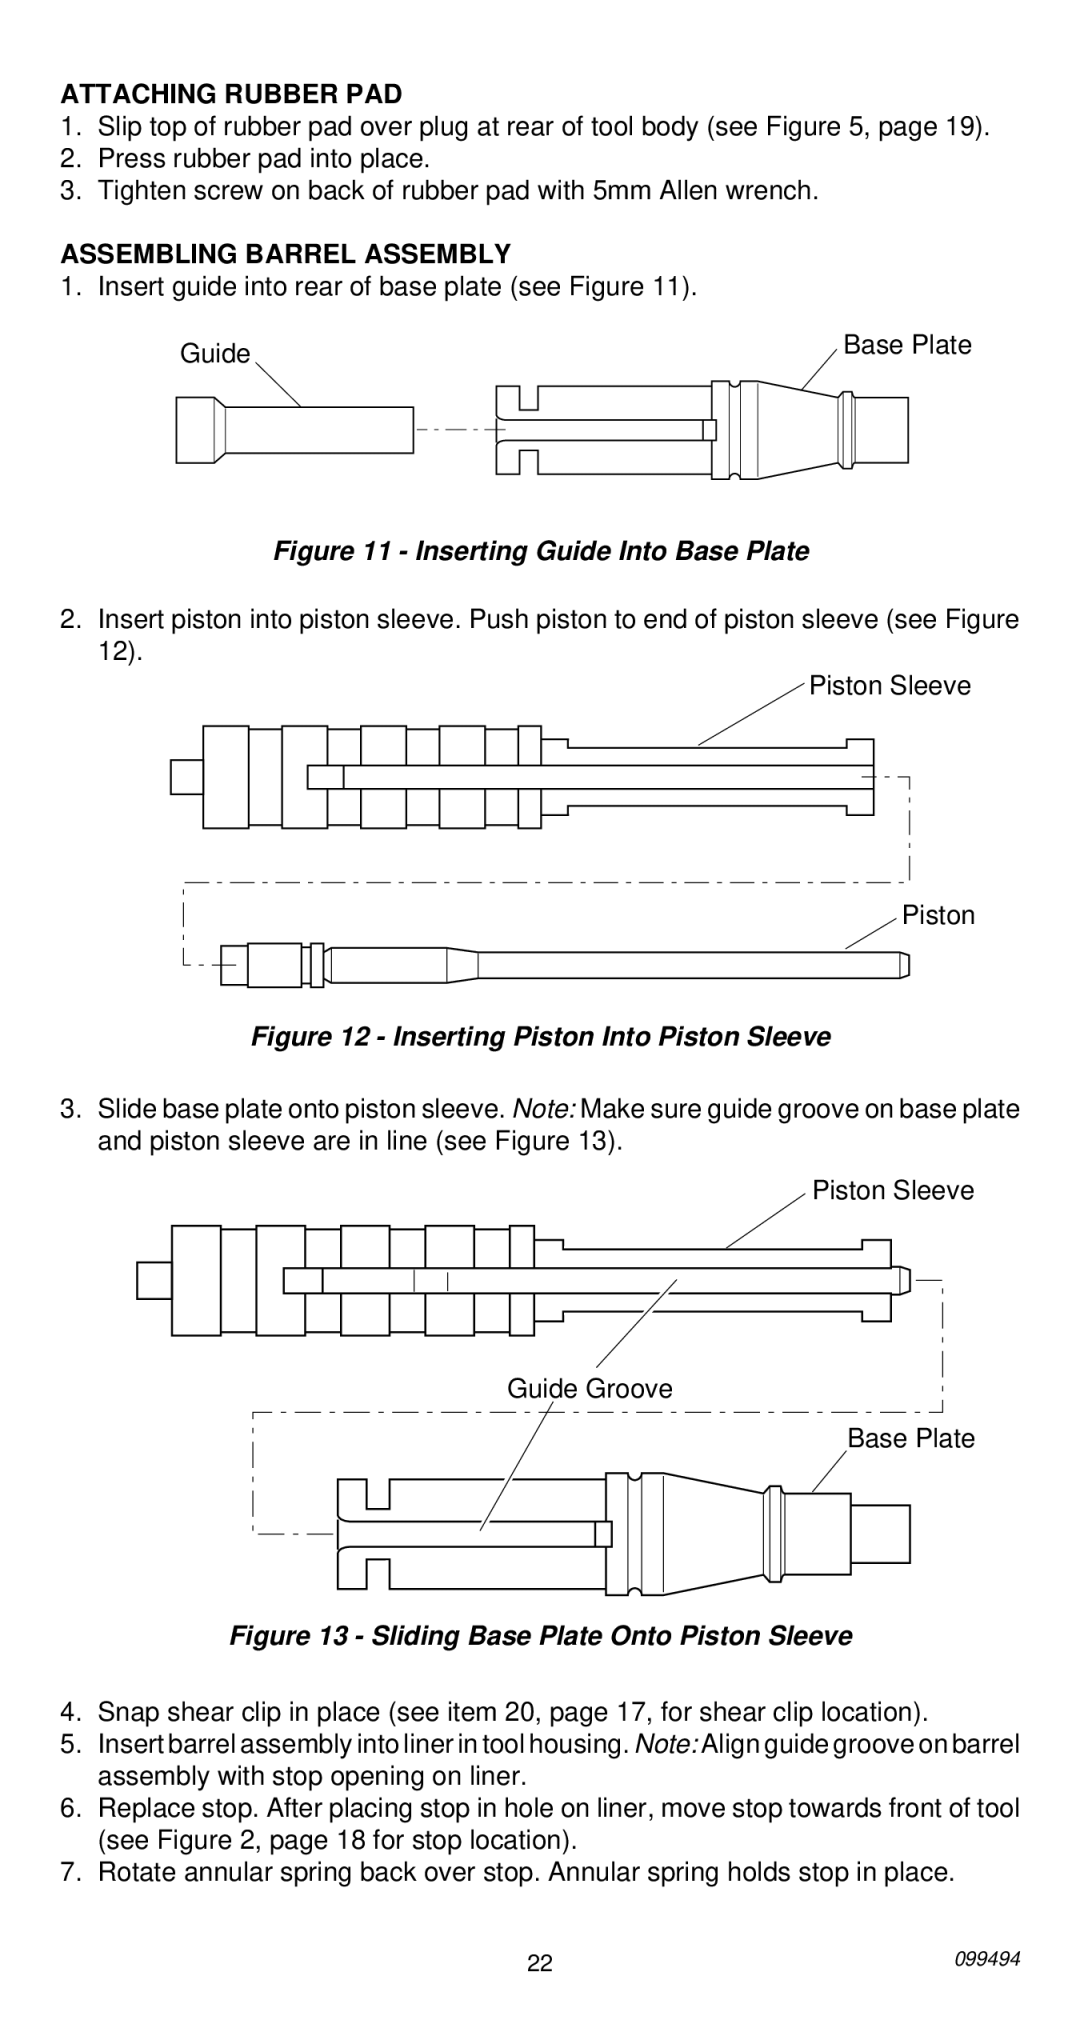
1. Insert guide into rear of base plate (see Figure 11).
Guide | Base Plate |
|
Figure 11 - Inserting Guide Into Base Plate
2.Insert piston into piston sleeve. Push piston to end of piston sleeve (see Figure 12).
![]() Piston Sleeve
Piston Sleeve
Piston
Figure 12 - Inserting Piston Into Piston Sleeve
3.Slide base plate onto piston sleeve. Note: Make sure guide groove on base plate and piston sleeve are in line (see Figure 13).
Piston Sleeve
Guide Groove
Base Plate
Figure 13 - Sliding Base Plate Onto Piston Sleeve
4.Snap shear clip in place (see item 20, page 17, for shear clip location).
5.Insert barrel assembly into liner in tool housing. Note: Align guide groove on barrel assembly with stop opening on liner.
6.Replace stop. After placing stop in hole on liner, move stop towards front of tool (see Figure 2, page 18 for stop location).
7.Rotate annular spring back over stop. Annular spring holds stop in place.
22 | 099494 |