OWNER’S MANUAL
ASSEMBLY
Continued
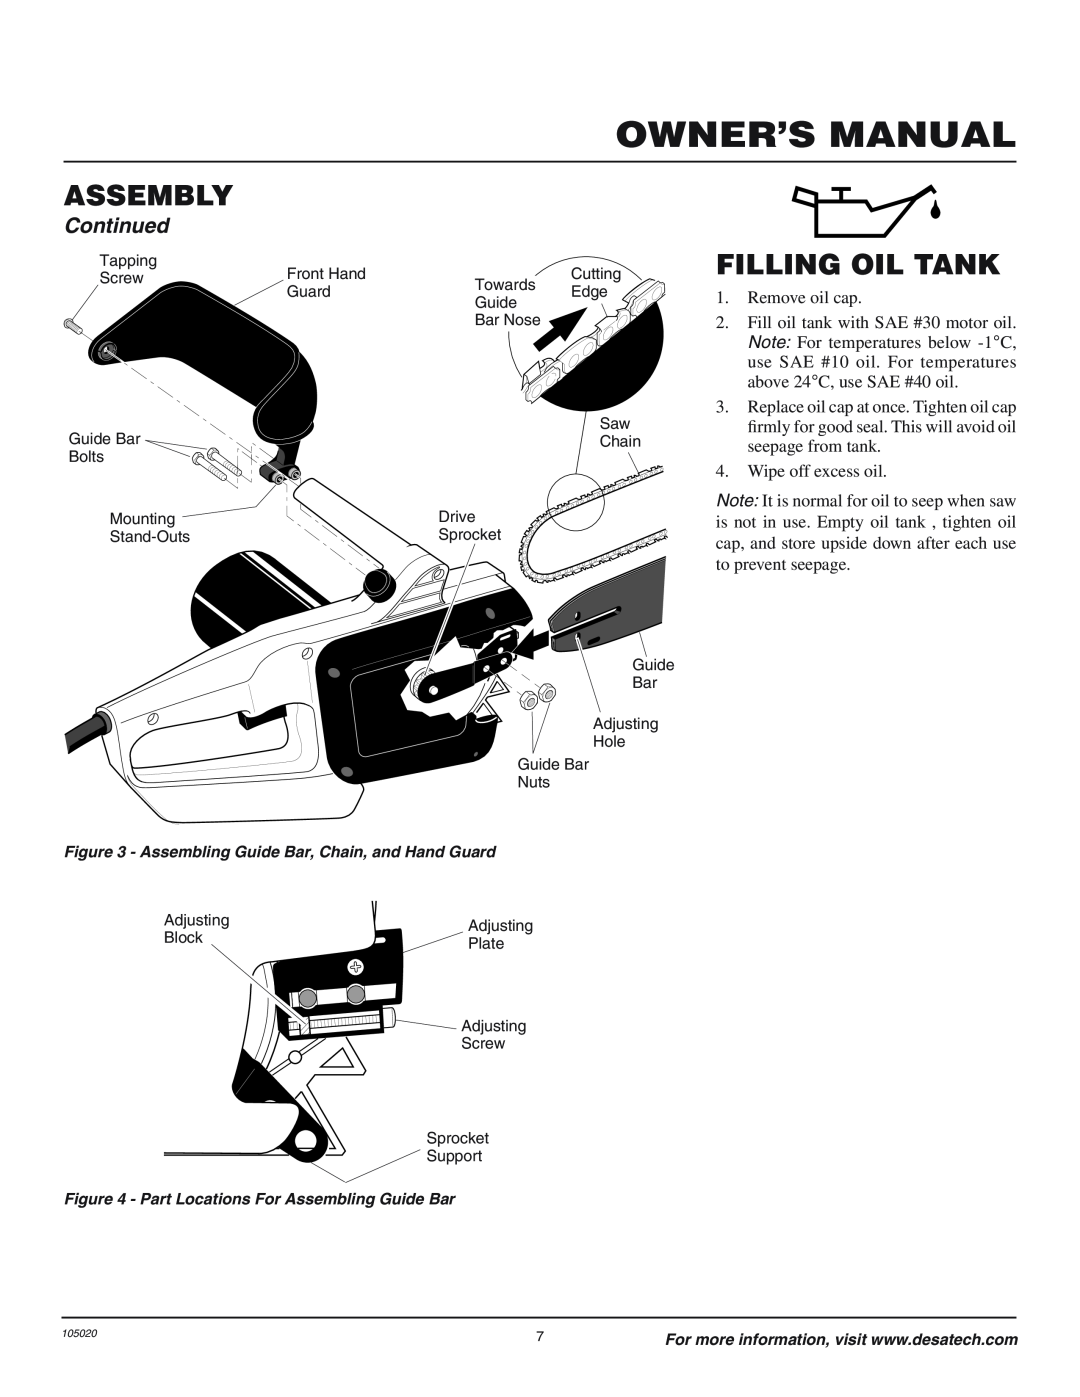
Tapping | Front Hand |
| Cutting |
Screw | Towards | ||
| Guard | Edge | |
| Guide | ||
|
|
| |
|
| Bar Nose |
|
| Cutting |
|
Guide Bar | Edge | Saw |
| Chain | |
Bolts |
|
|
Mounting | Drive |
|
Sprocket |
|
Guide
Bar
Adjusting
Hole
Guide Bar
Nuts
Figure 3 - Assembling Guide Bar, Chain, and Hand Guard
Adjusting | Adjusting | |
Block | ||
Plate | ||
|
Adjusting
Screw
Sprocket
Support
Figure 4 - Part Locations For Assembling Guide Bar
FILLING OIL TANK
1.Remove oil cap.
2.Fill oil tank with SAE #30 motor oil. Note: For temperatures below
3.Replace oil cap at once. Tighten oil cap firmly for good seal. This will avoid oil seepage from tank.
4.Wipe off excess oil.
Note: It is normal for oil to seep when saw is not in use. Empty oil tank , tighten oil cap, and store upside down after each use to prevent seepage.
105020 | 7 | For more information, visit www.desatech.com |
|