¨
ELECTRIC CHAIN SAW
SAW CHAIN
TENSION
ADJUSTMENT
![]() WARNING: Unplug chain saw from power source before adjust- ing saw chain tension.
WARNING: Unplug chain saw from power source before adjust- ing saw chain tension.
![]() WARNING: Cutting edges on chain are sharp. Use protective gloves when handling chain.
WARNING: Cutting edges on chain are sharp. Use protective gloves when handling chain.
![]() WARNING: Maintain proper chain tension always. A loose chain will increase the risk of kickback. A loose chain may jump out of guide bar groove. This may injure operator and damage chain. A loose chain will cause chain, guide bar, and sprocket to wear rapidly.
WARNING: Maintain proper chain tension always. A loose chain will increase the risk of kickback. A loose chain may jump out of guide bar groove. This may injure operator and damage chain. A loose chain will cause chain, guide bar, and sprocket to wear rapidly.
Note: For pre assembled models, the saw chain tension is properly set at factory. A new chain will stretch. Check new chain after first few minutes of operation. Allow chain to cool down. Follow steps below to readjust saw chain tension.
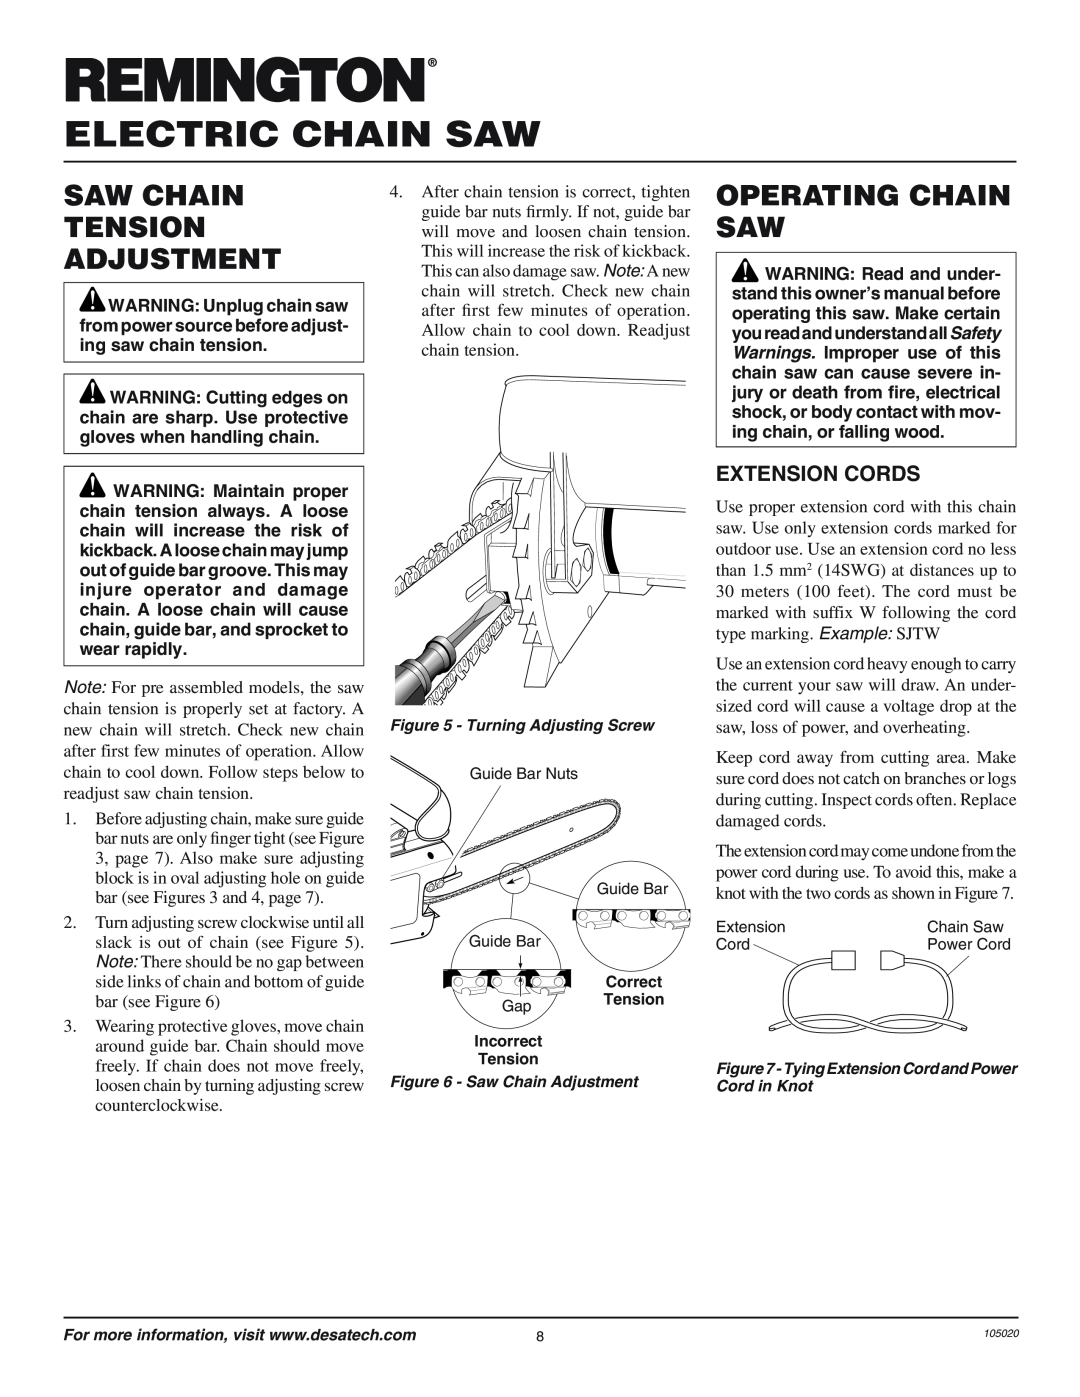
1.Before adjusting chain, make sure guide bar nuts are only finger tight (see Figure 3, page 7). Also make sure adjusting block is in oval adjusting hole on guide bar (see Figures 3 and 4, page 7).
2.Turn adjusting screw clockwise until all slack is out of chain (see Figure 5). Note: There should be no gap between side links of chain and bottom of guide bar (see Figure 6)
3.Wearing protective gloves, move chain around guide bar. Chain should move freely. If chain does not move freely, loosen chain by turning adjusting screw counterclockwise.
4.After chain tension is correct, tighten guide bar nuts firmly. If not, guide bar will move and loosen chain tension. This will increase the risk of kickback. This can also damage saw. Note: A new chain will stretch. Check new chain after first few minutes of operation. Allow chain to cool down. Readjust chain tension.
Figure 5 - Turning Adjusting Screw
Guide Bar Nuts
Guide Bar
Guide Bar
Correct
Gap Tension
Incorrect
Tension
Figure 6 - Saw Chain Adjustment
OPERATING CHAIN SAW
![]() WARNING: Read and under- stand this ownerÕs manual before operating this saw. Make certain youreadandunderstandallSafety Warnings. Improper use of this chain saw can cause severe in- jury or death from Þre, electrical shock, or body contact with mov- ing chain, or falling wood.
WARNING: Read and under- stand this ownerÕs manual before operating this saw. Make certain youreadandunderstandallSafety Warnings. Improper use of this chain saw can cause severe in- jury or death from Þre, electrical shock, or body contact with mov- ing chain, or falling wood.
EXTENSION CORDS
Use proper extension cord with this chain saw. Use only extension cords marked for outdoor use. Use an extension cord no less than 1.5 mm2 (14SWG) at distances up to 30 meters (100 feet). The cord must be marked with suffix W following the cord type marking. Example: SJTW
Use an extension cord heavy enough to carry the current your saw will draw. An under- sized cord will cause a voltage drop at the saw, loss of power, and overheating.
Keep cord away from cutting area. Make sure cord does not catch on branches or logs during cutting. Inspect cords often. Replace damaged cords.
The extension cord may come undone from the power cord during use. To avoid this, make a knot with the two cords as shown in Figure 7.
Extension | Chain Saw |
Cord | Power Cord |
Figure 7 - Tying Extension Cord and Power Cord in Knot
For more information, visit www.desatech.com | 8 | 105020 |