OPERATION
TO ADJUST 0° BEVEL STOP
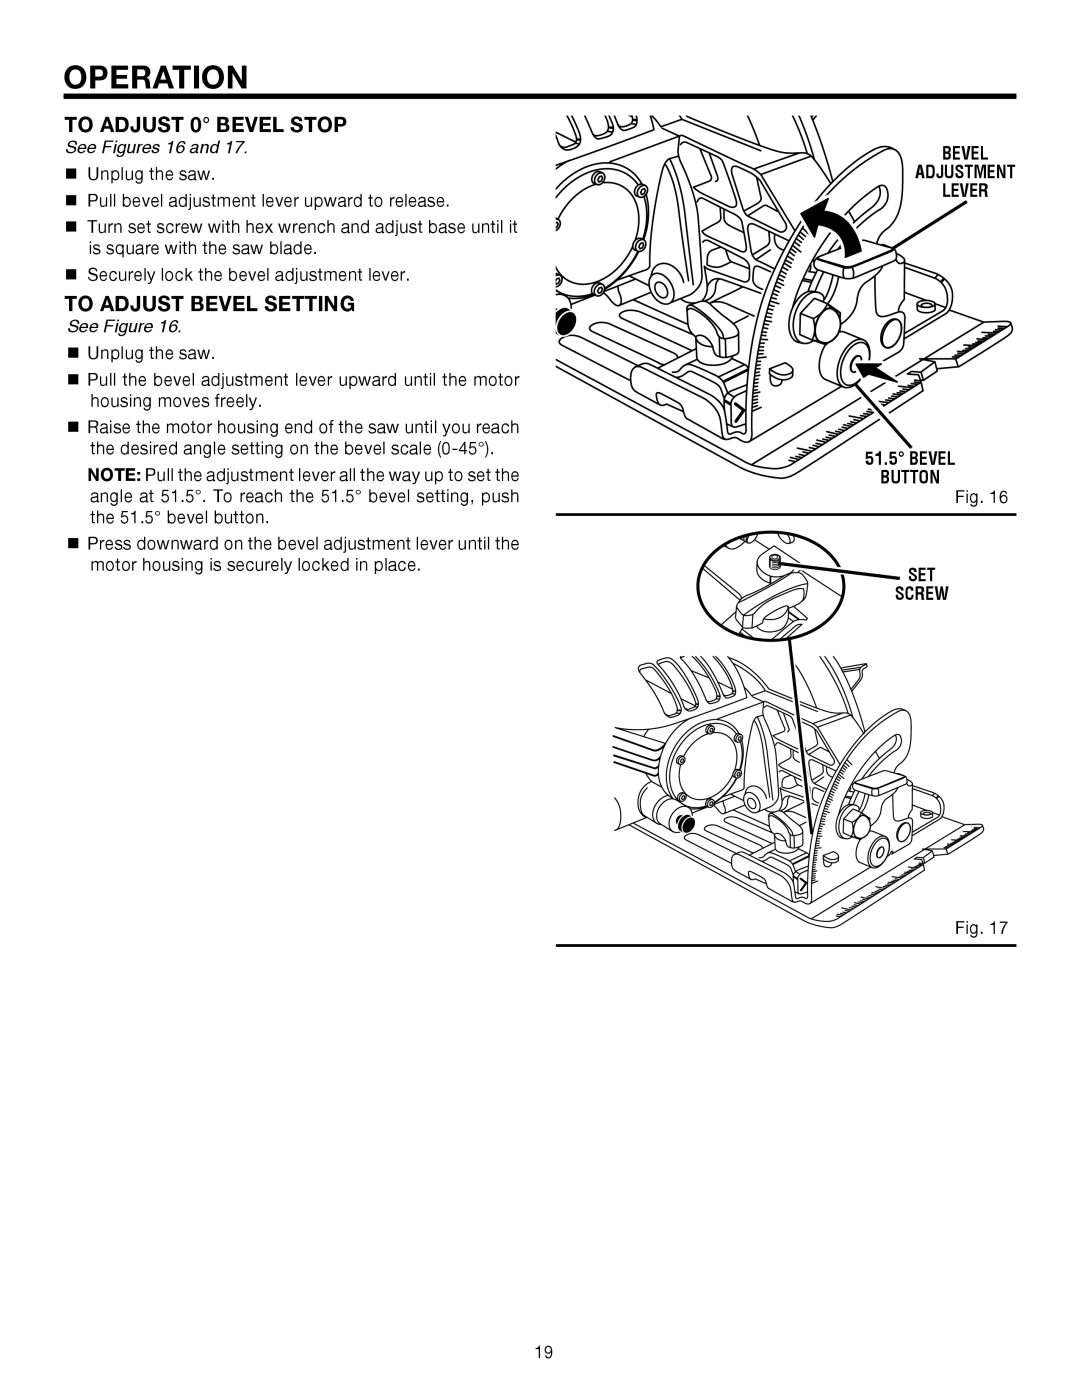
See Figures 16 and 17.
Unplug the saw.
Pull bevel adjustment lever upward to release.
Turn set screw with hex wrench and adjust base until it is square with the saw blade.
Securely lock the bevel adjustment lever.
TO ADJUST BEVEL SETTING
See Figure 16.
Unplug the saw.
Pull the bevel adjustment lever upward until the motor housing moves freely.
Raise the motor housing end of the saw until you reach the desired angle setting on the bevel scale
NOTE: Pull the adjustment lever all the way up to set the angle at 51.5°. To reach the 51.5° bevel setting, push the 51.5° bevel button.
Press downward on the bevel adjustment lever until the motor housing is securely locked in place.
BEVEL
ADJUSTMENT
LEVER
51.5° BEVEL
BUTTON
Fig. 16
 SET
SET
SCREW
Fig. 17
19