OPERATION
INSTALLING THE JOIST FOLLOWER
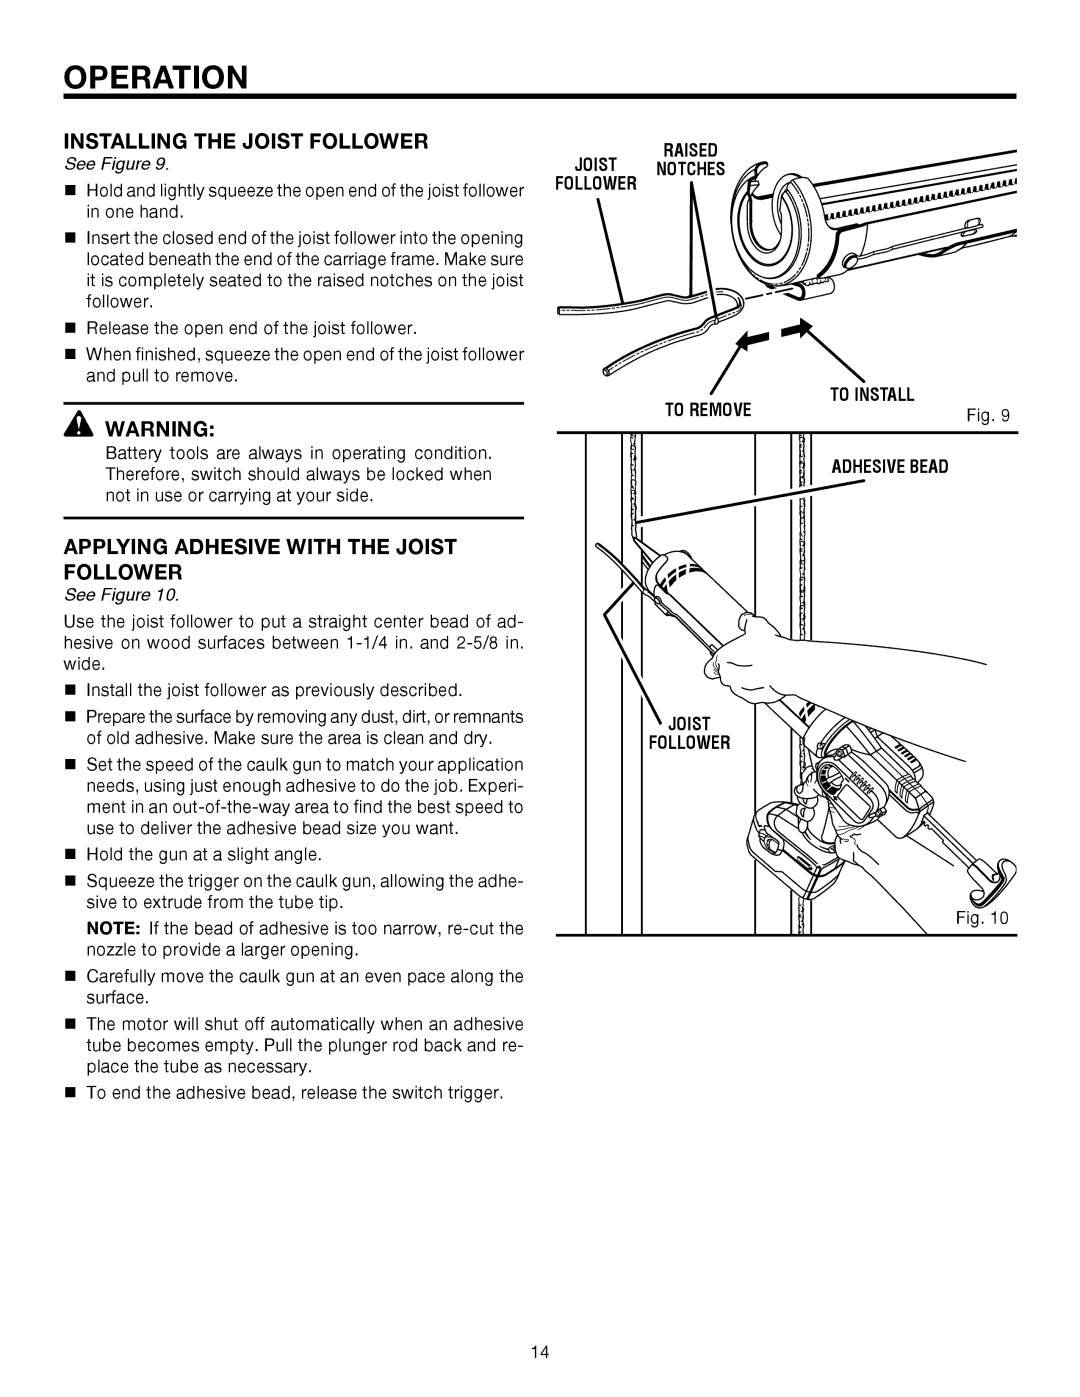
See Figure 9.
�n Hold and lightly squeeze the open end of the joist follower in one hand.
�n Insert the closed end of the joist follower into the opening located beneath the end of the carriage frame. Make sure it is completely seated to the raised notches on the joist follower.
�n Release the open end of the joist follower.
nWhen finished, squeeze the open end of the joist follower and pull to remove.
WARNING:
Battery tools are always in operating condition. Therefore, switch should always be locked when not in use or carrying at your side.
APPLYING ADHESIVE WITH THE JOIST FOLLOWER
See Figure 10.
Use the joist follower to put a straight center bead of ad- hesive on wood surfaces between
nInstall the joist follower as previously described.
n�Prepare the surface by removing any dust, dirt, or remnants of old adhesive. Make sure the area is clean and dry.
nSet the speed of the caulk gun to match your application needs, using just enough adhesive to do the job. Experi- ment in an
��n Hold the gun at a slight angle.
nSqueeze the trigger on the caulk gun, allowing the adhe- sive to extrude from the tube tip.
NOTE: If the bead of adhesive is too narrow,
�n Carefully move the caulk gun at an even pace along the surface.
nThe motor will shut off automatically when an adhesive tube becomes empty. Pull the plunger rod back and re- place the tube as necessary.
nTo end the adhesive bead, release the switch trigger.
RAISED
JOIST NOTCHES
FOLLOWER
TO REMOVE | TO INSTALL |
Fig. 9 | |
| ADHESIVE BEAD |
JOIST |
|
FOLLOWER |
|
| Fig. 10 |
14