VS110 specifications
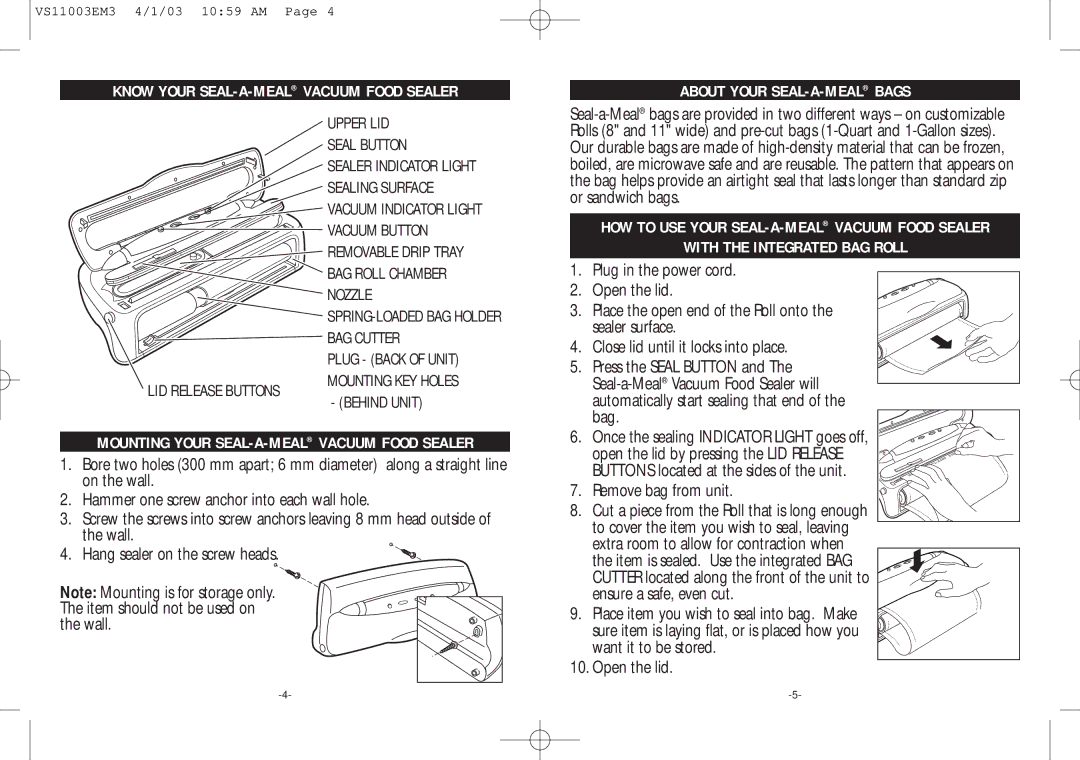
The Rival VS110 is an exceptional vacuum sealer that caters to both home cooks and culinary enthusiasts. Renowned for its efficiency and user-friendly design, this vacuum sealer is essential for anyone looking to preserve food, reduce waste, and maintain freshness.One of the standout features of the Rival VS110 is its compact and lightweight design, making it easy to store when not in use. It is ideal for kitchens where counter space is at a premium. The device is equipped with a powerful motor that enables it to effectively create an airtight seal, extending the shelf life of various food items up to five times longer than traditional storage methods.
The Rival VS110 utilizes a user-friendly control panel that simplifies the sealing process. It features one-touch operation, allowing users to start sealing with just a push of a button. This convenience makes it suitable for both novice cooks and seasoned chefs alike. The vacuum sealer also offers adjustable sealing times, enabling users to customize the sealing process based on the type of food being stored.
This model is equipped with advanced vacuum technology that ensures maximum air removal without crushing delicate items such as berries or chips. The Rival VS110 also boasts a built-in cutter that allows users to easily create custom-sized bags from roll-style vacuum sealer bags, providing versatility and saving users money on pre-made bags.
Another key characteristic is its compatibility with various bag types including embossed vacuum sealer bags, smooth bags, and even some commercial bags. This flexibility empowers users to select the best option for their specific needs.
In addition to food preservation, the Rival VS110 is also useful for sous vide cooking, marinating meats, and preventing freezer burn. It has become a favorite for meal preppers, as it allows for bulk cooking and portioning without the hassle of traditional storage solutions.
Overall, the Rival VS110 vacuum sealer combines functionality, convenience, and versatility. Its thoughtful features continue to attract users who value quality food preservation. Whether it’s for storing leftovers, preparing meals in advance, or just keeping food fresh, the Rival VS110 stands out as a reliable kitchen companion.

